
Set 2 has come and are you thinking about touching Zorga and trying out a new mechanic? You’ve come to the right place!
Hi there and welcome back! This is OuterOrange here ready to discuss some amazing things about Zorga in Set 2 of overDress!
What Set 1 Brought Us
From the prior Zorga Standard Deck Study, we had a good idea of how Zorga functioned best and what makes him stand out.
Zorga’s Key Strengths
- Alchemagic! Being able to use two Normal Orders in one turn
- Access to revival skills
- Key Normal Orders give power to revived/present units
- We have access to RGs that become big beaters
- Can have a full power turn starting on Turn 3
Zorga’s Key Weaknesses
- Consistency with orders and in what order to get them between hand and drop
- Hand being fake with too many orders
- Can get early rushed
- Resources sometimes are too costly
We’ll go from a deck list that was well rounded and go from there:

From Set 1, we’ve felt that there’s room for better Normal Orders to replace/mix with the current ones. We also felt that we needed units that help with resources such as CB, hand advantage, etc.
With Set 2 being introduced we now have better ways to reach numbers, have a little more flexibility for order recycling, and have better units to help with resources. While there is still room for improvement, Zorga as a deck is starting to show some amazing combinations!
Let’s not forget that Set 2 introduced us to new front triggers! This makes decks survive longer if they go second, but also front triggers are now 20k shields once your opponent is grade 3!
So let’s get into the new stuff!
The New Normal Orders
Let’s start with some fun additions to our Order pool:

Regurgitation is a great card when played at the right time. For 1 counterblast and 1 soulblast, we can have access to retire and revival. There’s a catch though, the Grade of the unit that you retired dictates the Grade of which units you can revive. Furthermore, if performed as part of Alchemagic, you can revive up to 2 units!
For example, if you retire a Grade 2 unit, then you can revive 2 Grade 2 units from your Drop Zone when used via Alchemagic. If your opponent doesn’t have any rearguards, you can technically retire one of your own to still revive key units. However, it’s better to retire your opponent’s units as retire can help push your turns better.
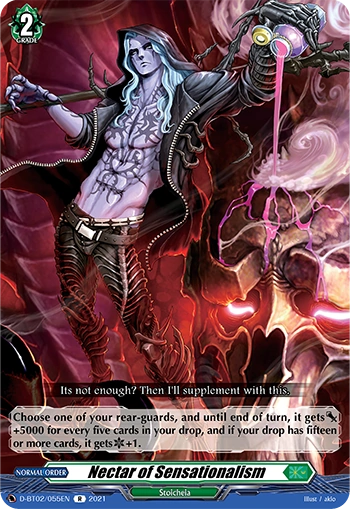
Nectar on the other hand provides buffs to our already strong rear guards and rewards us if we have a large drop zone. For every 5 cards in your drop you can put 5k onto a unit(10 will make it 10k and so on), and if there is 15 then you can also add a critical.
This is the beginning of seeing orders that provide critical pressure.
And the best part about this card is…? IT’S FREE.
There is no cost to playing this order aside from playing it which makes it nice to use early or late game without having to look for resources.
There are 2 more Normal Orders to highlight as well:

Both of these cards serve amazing purposes, let’s start with the Unnatural Death.
Unnatural Death allows you to grab two order cards from your drop zone and put them into your hand with the cost of a counterblast and binding itself to the bind zone.
This is a good recycling order and it can grab Ghost Chase which is great set up for defensive plays. This card overall adds a more defensive playstyle to decks, but also utility.
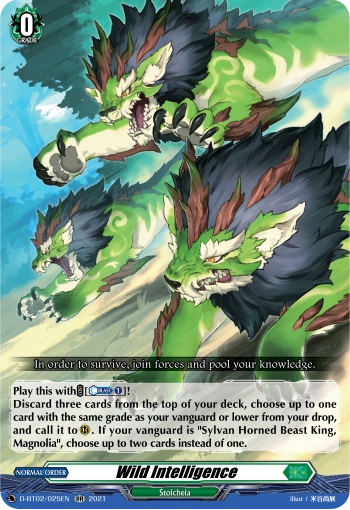
Along with this we also have Wild Intelligence, while this is a Magnolia card, it can be used as well with Zorga! You can counterblast to mill three units and then revive one. It may sound not too great, but as we saw with our previous order, Nectar, we can use Wild Intelligence to push for Nectar faster but also start rushing our opponent on grade 2 if we need to.
Resource Management
When it comes to resource management, in terms of counterblasts and soulblasts we got one new card that does the job and that is Rogue Headhunter!
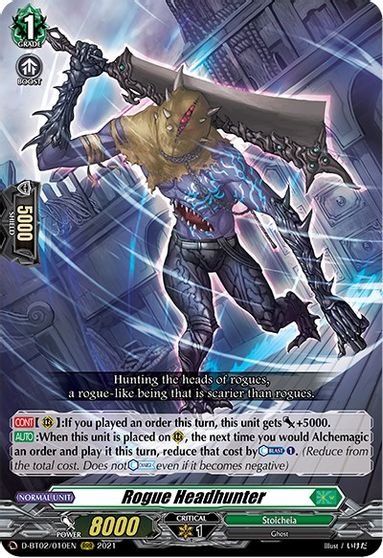
This new handsome fellow gives us extra counterblasts! His skill says when he is placed you reduce counterblast cost by 1. Meaning you can stack these if you wish, but it does not completely reduce all counterblasts like Hendrina does when it comes to soulblasting.
This is a useful tool to have more options in Zorga when using Alchemagic or even when using Zorga’s skill to call a unit from drop with the cost of a counterblast as he refunds himself if you call the Rogue out with Zorga and then use the counterblast reduction to get Alchemagic started.
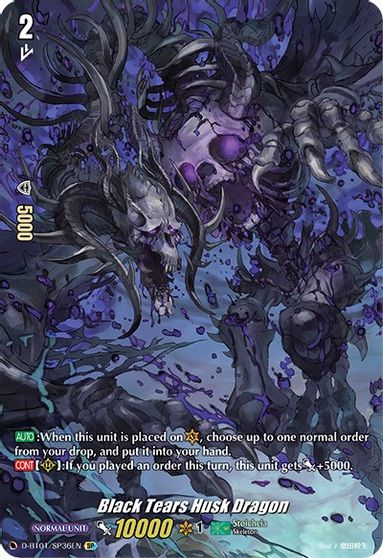
He does have another handy skill, which is the extra 5k if you played an order. This skill works very nicely with Black Tears Husk Dragon who also gets 5k if you played an order, as they make a 28k column by themselves with just playing a single order and not using Alchemagic. This allows us to have aggressive plays early on or set up very nice columns on our first ride. This also helps if we are lacking on orders as we can at least still create some nice numbers and still have a turn that isn’t dead.
How The Deck Works
We have just discussed on some of the new stuff that brought to us Zorga, but what now? How do we build it or what should we go for? Let’s discuss.
Zorga has two approaches of deck building in Set 2 and that is Aggressive and Control.
For Aggression, you can go more towards having a board every single turn and beating your opponent down before they get the chance to do anything. Usually, a deck like this runs more Nectar, Wild Intelligence, Husks, and Hendrina for the aggressive mill. The trigger line up being fronts and criticals. This style is riskier as you have to rely on hand draw to hit your Alchemagic, but can pay off if you end your opponent fast enough.
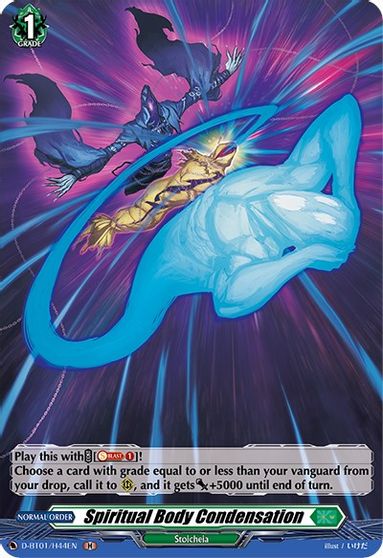
This version will focus on making magic numbers starting from turn 1 and putting down any form of aggression, this includes grade 1’s and mulligan for Hendrina/Wild intelligence/Spiritual Body Condensation/extra Husks to make your turn 2 a beat stick.
On turn 2 if you have SBC in hand you can use it to make high columns, while also calling out Hendrina and any extra Husks you have, also if you mill out grade 2’s from Hendrina you can revive those to add more aggression, this can be continued on in turn 3 and forcing your opponent to stay at 3-4 damage making your Zorga turns become lethal attacks as criticals can finish the game and your opponent may not be able to guard your later turns.
As mentioned earlier, this version is a lot riskier and allows your opponent more counterblasts as there is little denial and little control over the game and what your opponent does once you end your turn.
For Control, some go towards just having less of an early game, but conserving hand, and staying safe. Usually, these builds don’t run as many Hendrina or any Nectar, some focus on Ghost Chase/Cursed Agony and go for more of defensive and control playstyle while also bouncing their defensive pieces and recycling their Alchemagic pieces. This style is about reacting to your opponent and timing a proper finish, not necessarily about retiring. This approach will be even more enhanced when Set 3 comes out.
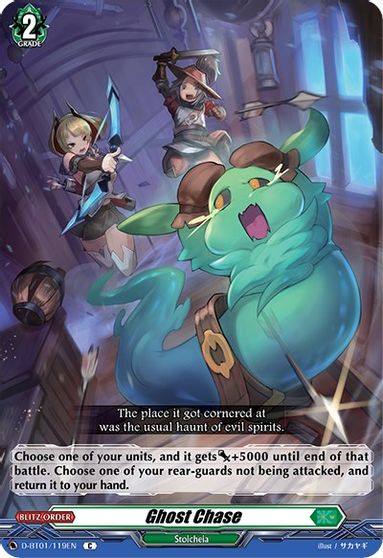
In this version, you’ll be using your hand as little as possible and relying on Hendrina/Rogue to save you resources while also staying in control of what your opponent is doing. This deck allows for Cursed Agony to be useful as you can also Ghost Chase any units that you may not want on the board.
You can also survive anything your opponent throws at you considering your survivability is insanely high. This corresponding with GDR/SBC/Regurgitation should help sustain not only having good columns each turn, but also forcing hand and retire out from your opponent and closing out the games when the time is right. This version also allows you to be able to farm as your hand will usually stay large between reviving units that were killed or ghost chasing units back to then use them again.
This style also allows for more control of the game and damage, you can choose to keep your opponent in certain damage ranges that the aggressive version cannot do since in that version your goal is to push to 6 as quickly as possible.
Aggressive version(Owner: OuterOrange):

Control version(Owner: Ricka(@vgricka)):

Both of these decks have different ways of winning, one that is focused on survival, your opponent running out of steam and defense, while the other focuses on beat down and ending games with certain guard restricts.
You’ll notice these decks may look similar, but have very different ways of play. I would also like to note in Ricka’s list, you’ll almost never use Hendrina for the mill, in the future when set 3 comes around, you’ll see that Hendrina will be completely taken out. The reason for this is that the control variant does not focus on milling your deck at all, it’s focus is purely for survival and reacting to what your opponent is doing. I’m bringing this up a lot as this approach is very different from what people would normally expect from Zorga, but is a very useful and great approach to Zorga.
So let’s discuss some finishers:
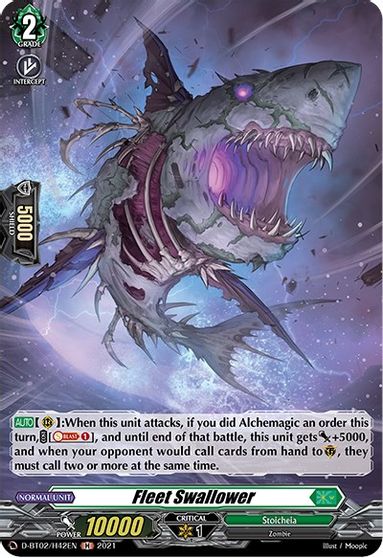
Fleet Swallower is a card that was introduced in Set 2 and forces your opponent to guard with two cards. It may sound kind of weak, but it’s actually quite useful!
In overDress, we have Perfect Guards that lets us be able to guard with just the perfect guard and not discard anything if it is your last or second to last card in hand.
However, Fleet Swallower forces you to have to guard with two anyway this makes it so if your opponent holds on to perfect guards, they’ll have a really hard time guarding on the turn you put out Fleet Swallower, as he’ll gain around 30K power/+ 1 critical from Nectar, his own skill, and maybe a GDR and then he’ll also have the guard restrict active, which can usually close out games if you mill out your deck fast enough.
Another finisher is just constantly combing GDR + Spiritual Body Condensation (or Nectar):

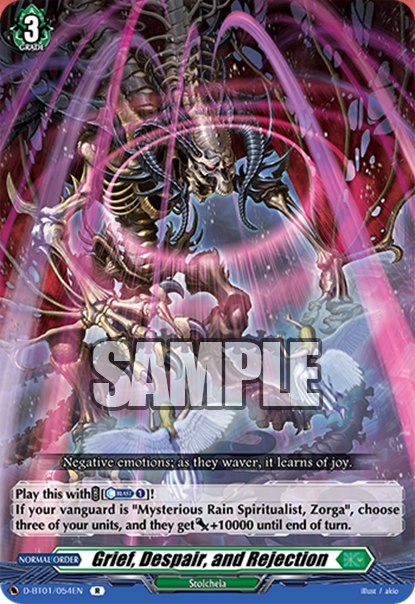
This combination is STILL really good and one of the best ways to Alchemagic! Running these at 2-4 copies is still very necessary and also an amazing way to have a pressure turn every grade 3 turn.
Nectar is also a really great replacement between one of these, rather it’s GDR/Nectar or SBC/Nectar. Both approaches give you insanely high numbers and it is up to your drop zone and board state(if you have rear guards) to decide which to go into if you pick nectar as one of your pieces to Alchemagic with.
Overall achieving this combination will be one of the main approaches to secure heavy columns and force your opponent to guard every attack with their hand depleting fast.
Final Thoughts: OuterOrange
You’ll notice that Zorga isn’t always about having heavy numbers and beating down the opponent nor is always about using Alchemagic. Zorga can be played in different ways and can reach a “win condition” in more than just seeing triggers in your drive checks.
This is a deck that is about knowing what to do and when even though overDress hasn’t given Zorga all the pieces yet to be at that full level of reacting, it is slowly getting there with each set coming out.
I bring up multiple versions of this deck, because it has the tools to be aggressive, but it also has the tools to do whatever it wants the deck owner to do and as we see more orders and cards we’ll see this type of approach come around more. It is something that makes Zorga as a deck stand out a lot from many of the other decks in overDress right now.
With all this in mind it is up to you how you want to approach your Zorga deck when building and what you want your main focus to be as you draw and ride up. I wish you the best in your deck building and figuring out Zorga as Zorga is one of the funniest decks to brainstorm and pilot!
I’m really excited to see where Zorga will take us in the future and I hope you are too!
Thanks for reading for all you Zorga lovers like me until next time! Peace out Amigos!
Final Thoughts: Commander Jaime
Zorga in this set is feeling more of a “complete deck”. The set did help other clans as well, so it’s been a bit challenging for Zorga to compete against some decks. I know the beat down version is one that helps against certain matchups such as Bruce and Bastion.
However, in set 3, we’ll be getting more cool options. So we’re excited for the set to release in English soon!
Thanks again to OuterOrange for taking lead and doing this deck study! See ya amigos, till next time!

&
Commander Jaime

One thought on “Zorga Set 2 Standard Deck Study”