
Hello! It’s Evan here and today we have something for more advance players or for those who want to improve in the Premium Meta with Granblue. Today I am sharing with you my Premium Decklist for Nightrose and this is made with all the cards from the Phantom Dragon Aeon set in mind. If you are coming from Standard I hope this helps you in your journey to find your own build and stance in Premium!
** DISCLAIMER: THIS IS A VERY LONG ARTICLE. FOR THOSE WHO SIMPLY WANT THE TLDR OF EVERYTHING IT WILL BE BOLDED AT THE END OF EACH SECTION**

^^ FOR THOSE WHO SIMPLY WANT THE DECKLIST HERE IT IS IN ADVANCE ^^
Deck Article Breakdown
The way I am going to do this is simply card by card from G-zone all the way to the Forerunner to explain each choice in a concise way while giving other options here and there. A quick description of the card’s value followed by a list of its uses.
This is so that those new and old can really grasp the weight cards choices make in Premium while also learning how values of cards change between formats and how each card impacts the deck as a whole.
Lastly, to wrap up everything I will go into your 2 biggest matchups while also going into more match intricacies to really set you up to succeed with this deck and just in general in being a Granblue Pilot.
** NOTE: For those who also want options there will be a portion at the end of some sections under “Deck Building Options” if you want to make this deck your own**
G-zone
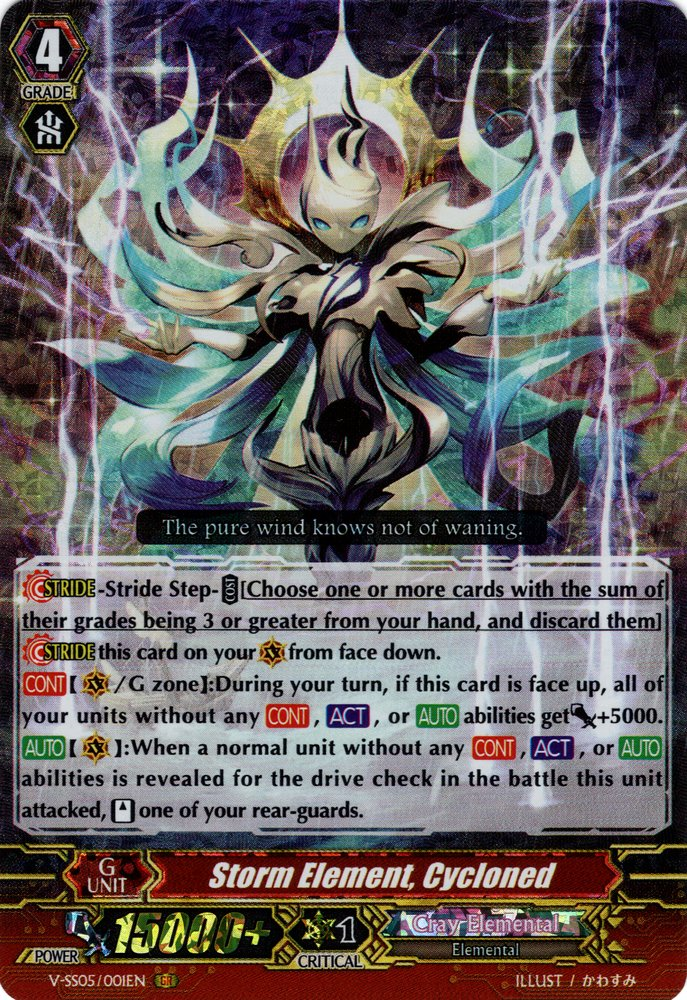
Storm Element, Cycloned: This card is very impactful to the deck. It takes up 4 slots in the G-zone but this card streamlines the G-zone so much that we have so much more freedom in the cards we do run while directly streamlining the main deck to run Vanilla Units to capitalize on a new, faster, and more reliable way to scale power. Thus, in my opinion, putting Granblue in such a solid and stable spot as a high skill ceiling and high reward deck in the Premium Meta.
- Part of the Zarzan Engine which allows early GB (Generation Break) allowing any GB reliant cards to be active if it is ran
- The best flip target for G-zone units such as “Ghostie Great Emperor, Big Obadiah”.
- Improving and making “Rain Element, Tear” a superior CC (Counter-Charge) engine
- Increases any Vanilla Unit Column by increments of 10k per faceup copy
- A way to leverage your advantage against Megacolony and other Control Decks (Expanded upon in the Matchups portion)

Ghostie Great Emperor, Big Obadiah: This card is your go-to as a First Stride. There is very few times where you will stride another card because this card does way too much setup for your actual 2nd stride, which is usually your kill turn. This card takes up 2 slots to fulfill its role of being the Clan’s First Stride but also the niche cases where it can be your Kill Stride as it will call a full board with 5k power buffs.
- This stride applies the F + C = I concept (Filtration + Compression = Information) (More in the Gameplay Section)
- Selectively places UP TO 5 cards from your deck to your drop zone (milling). You can select any number between 0 and 5 as you look through your deck for cards to put into the drop zone
- Usually will always lead to 4 units being called at a minimum each first stride turn through the use of the Zarzan Engine
- Allows for players to draw, setup drop zone for the next turn, board control, hand fix, and/or power spike at the player’s discretion given they have the proper units in the deck to execute said outcomes
- Instantly will make the quality and/or quantity of your drop zone better while resetting your deck’s stack (Stack will also be referred to as RNG (Random Number Generator))

Wight Legion Sailing Ship, Bad Bounty: This card is Granblue’s first stride that allows for a 2nd vanguard attack! Bad Bounty is the most consistent game ender in the clan due to the deck’s power scaling become faster and the fact that it is not reliant on the Quantity of what is in drop but also the Quality. Saving the clan from the worst matchups, Gredora and Link Joker, due to heavy board control while amplifying the engines the deck contains; this card is truly our ship.
- The go-to 2nd stride that is often the Kill Stride as well
- Allows the pilot to gain 1 soul during the battle phase as you re-ride
- Allows a change in the Vanguard if necessary (Nightmist -> Nightrose for Break Ride or Nightrose -> Undead for a massive 2nd Vanguard Attack)
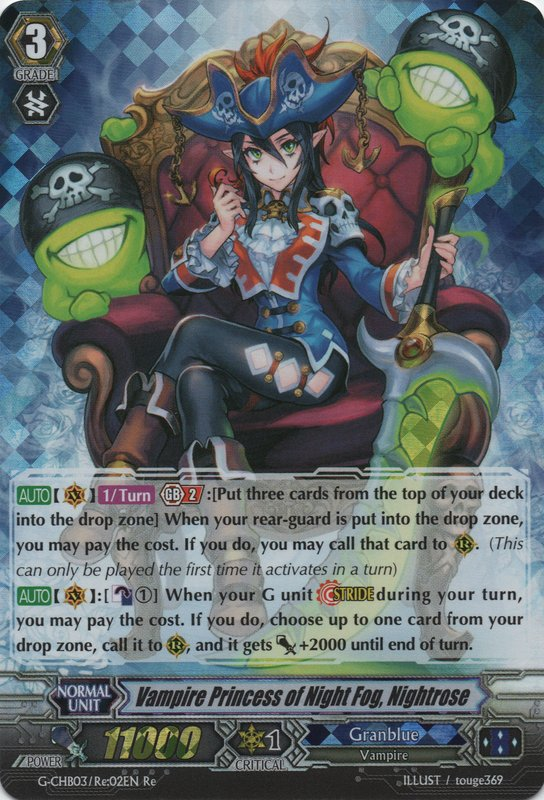
- Enables “Vampire Princess of Night Fog, Nightrose” V-Series to be live in Premium
- Copies can be ran at 2-3, this depends on preference as the 3rd spot in my lost is a “flex spot” where it can be any stride essentially as long as it fits your purposes
- Allows for hand manipulation as you get the choice of what to discard (cycle) to the drop as well as generate another Protect Marker during the battle phase. This allows for a better control of your hand even during battle phase.
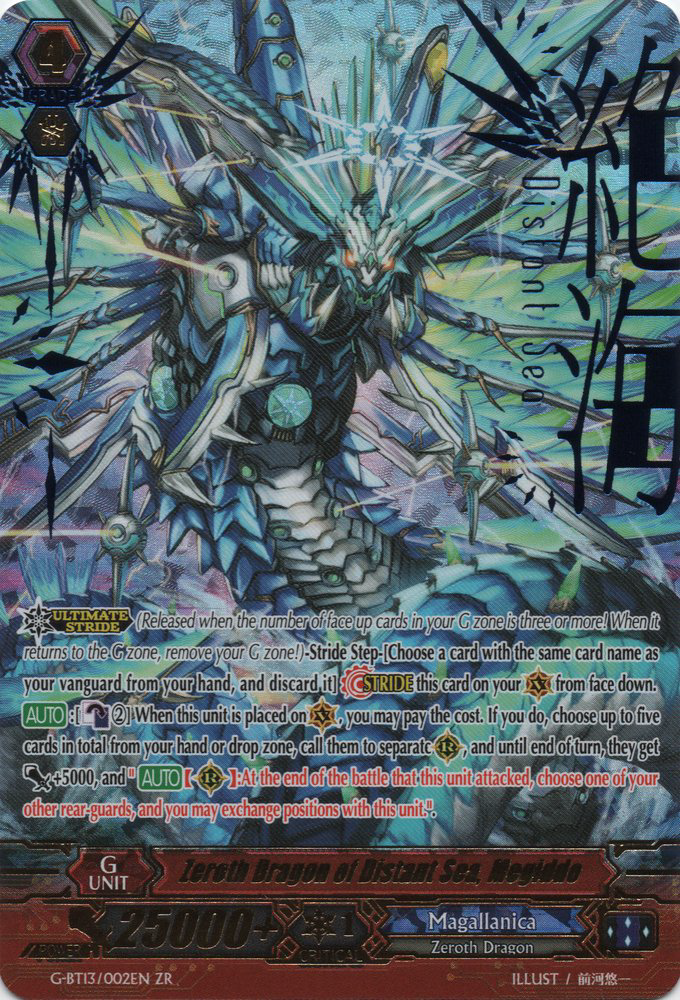
Zeroth Dragon of Distant Sea, Megiddo: This card was once the main finisher of Granblue. Utilizing a 5-6 attack loop of Undead Dragons leading to a brutish way to finish ways. However, now it is but an alternative game ender as its costs and conditions to be better than Bad Bounty are often too slow in being met that it just becomes outclassed by Bad Bounty or the meta itself (Explained more in Gameplay).
- Still a solid card to run as a failsafe but can be cut if you don’t have the budget, room, or access to it
- True end-game status is achieved once 18 cards is met in the drop zone (excluding the Undead Dragons and any attack extenders)
- Efficient in its simplicity and requirements (simply have 2 CB, 4 Undead Dragons, and 1 Attack Extender)
- Usually the 3rd stride if the 2nd stride fails

Unfading Ship, Immortal Galleon: This card is one of the oldest G-units to still remain in the deck. It is the freest card in the clan where it is just full board revive with 10k power buffs to all units. Add to this the fact that we flip up so many G-units, this card does become active much quicker. Although it only has niche moments now, when it is used it will be the most cost effective stride.
- Often is an the last resort stride when the deck is low (below 5 cards) and no way to replenish the deck
- Usually is a 3rd stride. If survive to get to your third stride more often than not a majority of your resources were consumed on your attempt to win on second stride.
- An optional card to have in the deck
- The most budget and generic card to have in any Granblue G-zone


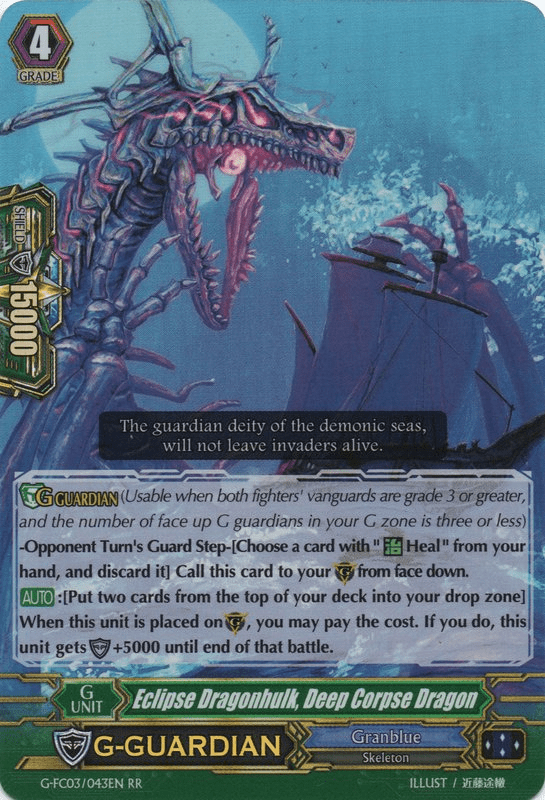
G-Guardians: These 4 G-Guardians are your main priorities as they provide the most shield value for their respective while adding depth to the quality of your heal trigger usage.
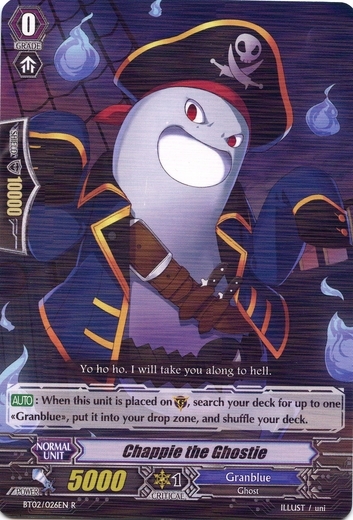
Diabolist of Solicitation, Negronora: This card is the only mandatory card that you need to run at 2 copies. Nora is not only the biggest G-Guardian in the game, it is also one of they few cards that can “superior perfect guard” by placing a unit from the dropzone onto the guardian circle. If you run Chappie the Ghostie (BT02), it adds a selective filter during your opponents turn!
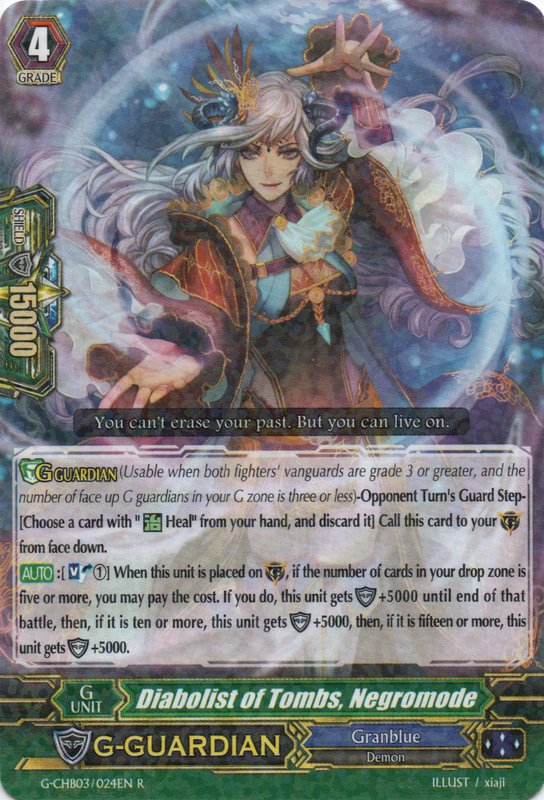
Great Witch Doctor of Banquets, Negrolily & Diabolist of Tombs, Negromode: These 2 cards have the same purpose but different costs. Both are used as your 2nd tier of guarding, Nora being your 1st tier. Due to the nature of this deck not solely relying on dropzone numbers to generate numbers, you want to maximize the value of your 2nd tier G-Guardians depending on the situation. These 2 cards are usually used after your first stride, at this stage of the game your dropzone is really at most 10-15 cards prior at the start of your opponent’s battle phase. For the sake of shield values these cards are equal in the amount they generate but the only difference is the cost. Lily costs a CB (counter-blast) and a rear guard retire and Mode costs a SB (soul-blast). Having this choice of which resource to use for an additional 10k shield on your G-guarding is so valuable because you use your soul during your kill turn but also CB. Which resource can you use in order to maximize your following turn? Which resource should you use to effectively guard this turn if you need to really just survive as opposed to setup into your kill turn? These questions are important to ask yourself during the fight because, although Nora is the BEST out of them all, she is still a valuable card that you only have 2 uses of in any given game.
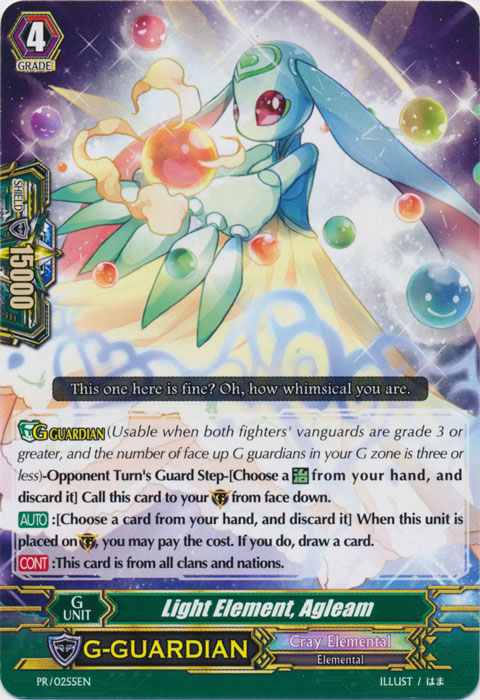
Light Element, Agleam: This card is interchangeable with Ractome but its main purpose is being your first G-guardian if you are striding second AND as a means to fix your hand while stopping an attack with a 15k shield. In premium you may think its a waste to discard a 20k V-Heal Trigger for a 15k G-guardian that has a discard 1 and draw 1 skill but, for the most part, in premium due to there still being a saturation of old G-Era units still being used in the main deck; there are still plenty of cases where a 15k shield can stop most attacks in your opponent’s first stride OR at the start of their battle phase. Usually just the first couple attacks at most. This card provides the opportunity to basically accelarate your GB count while fixing your hand potentially. This is important leading up to your first stride as a each face-up card in your G-zone is 2 calls from drop while also being a target for Rain Element Tear as a means to CC (counter-charge) early if need be whether this be from your opponent damage denying or you using up your CB early on.
Notable Mention – Eclipse Dragonhulk, Deep Corpse Dragon: This card can still be run but the main reason why I don’t run it is because it is between Agleam and Lily/Mode in terms of shield value. That 20k shield requirement in premium is very few in between in terms of actual scenarios and you want to minimize random milling. My deck either selectively mills or draws the cards from the deck. Essentially “complete control” of the rate of how my deck compresses. If you choose to run this card do note that it is a slot that will replace a stride, basically a 6th G-guardian option, or will replace Lily/Mode. It is to your own discretion to do this but it can still be viable!
TLDR OF G-ZONE
- Cycloned: The cornerstone to the Zarzan Engine during bad bounty and provides a great early game while scaling your Vanilla units as boosters and attackers. Helps with the Megacolony matches and provides an early to Granblue.
- Big Obadiah: Your go-to first stride unless you open the Exodia hand and can perform the Zarzan combo with Bad Bounty on first stride. Forces F + C = I and overall increases the quality of your dropzone and deck through selective filtering while providing options to the player to setup to defend or to kill on their next turn.
- Bad Bounty: Your usual 2nd stride and a kill turn. Helps with board control matchups and abuses multiple engines to consistently pump our aggression over the course of the turn thanks to the engines themselves and to the V-Series Nightrose for enabling them.
- Megiddo: It is now an failsafe 3rd stride and is a less consistent 2nd stride in terms of guaranteeing a kill turn due to its requirements that are now too costly to achieve in comparison to Bad Bounty it is still a great card to have in the G-zone but it is no longer Mandatory.
- Immortal Galleon: The most staple and budget friendly stride that is ran in most Granblue decks due to its free skill to board revive with power buffs for the cost of GB8, which got exponentially easier with the Zarzan Engine and other flipping cards.
- Negronora: Best G-guardian in the game in shield and utility for the cost
- Negromode/Negrolily: Both are the same just a choice between CB and SB as cost essentially (The rear-guard cost for Lily is not really factor as you actually always have remaining units on your board unless you want an empty board OR you are against a board control deck)
- Agleam/Ractome: Generic first G-guarding that allows hand manipulation while adding a Cray Elemental Unit face-up in the Gzone after
- Deep Corpse Dragon: No longer necessary due to its milling condition and usually weird shield value. Still can be ran at player discretion but do keep in mind your available strides and G-guardians!
Deck Building Options


These 3 stride are, in my opinion, the only others cards that you can play around with and have the end result still be effective. Do note though that these 3 stride all need 2 copies of themselves at a minimum to trigger their skills. All these cards are mainly as a 2nd stride/alternate game ender. All 3 have their valuable points but none of them are really outstanding or over shadow Bad Bounty and Big Obadiah. That’s just how well designed those cards are in terms of the skills they do and the synergy they cause between cards.
- Pirate King of the Roseate Twilight, Nightrose: This card offers a nice vanguard pressure as your vanguard will constantly be at 2 critical but she doesn’t search the deck or give consistent power boosts. She does have some place if you really need your board empty but since your 2nd stride is Bad Bounty and you normally reride into a Nightrose as your G3 your board will generally be gone either way but if you want the option of having a 2 critical vanguard then this is a great choice
- Diabolist of Corpse, Negrosonger: This card is a nice alternative option to an end game but its downside is that you can only call 1 unit off its skill and you have to discard a card. This means the unit you call cannot be an attack extending unit unless you allocated a CB for it in advance and has to draw you card or be a reliable enough attack to force a valuable guard. This card’s targets are really limited to Undead Dragon, draw cards like Ghost Ship, or honestly vanilla units since they scale super well with Cycloned. This card can close out games though since its “board problem” is solved thanks to Negrobone and if Bad Bounty is our main end game, a card that generates no board and nothing except an additional vanguard attack, the Negrosonger stands to really benefit off the same cards as well. Think of this card as Bad Bounty Lite.
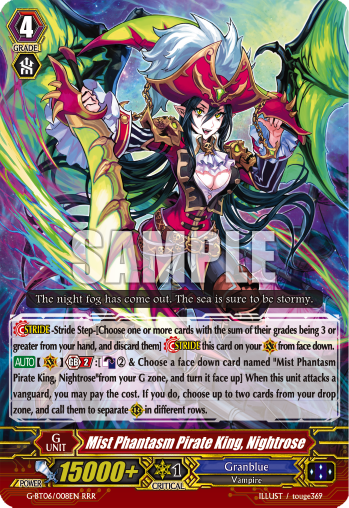
- Mist Phantasm Pirate King, Nightrose: This card is honestly just an alternative battle phase attacker. The same board building engine can be used for this stride as well but this card offers 2 calls as opposed to 1 without discarding a card from your hand. CB is one of the easiest resources to really manipulate so the CB2 isn’t really an issue. This card is another Bad Bounty Lite while being safer yet weaker than Negrosonger as the units it calls doesn’t gain any additional power. Think of it as having the Nightrose G3 as a stride but you don’t get the power boost and your call cost is 1 CB higher.
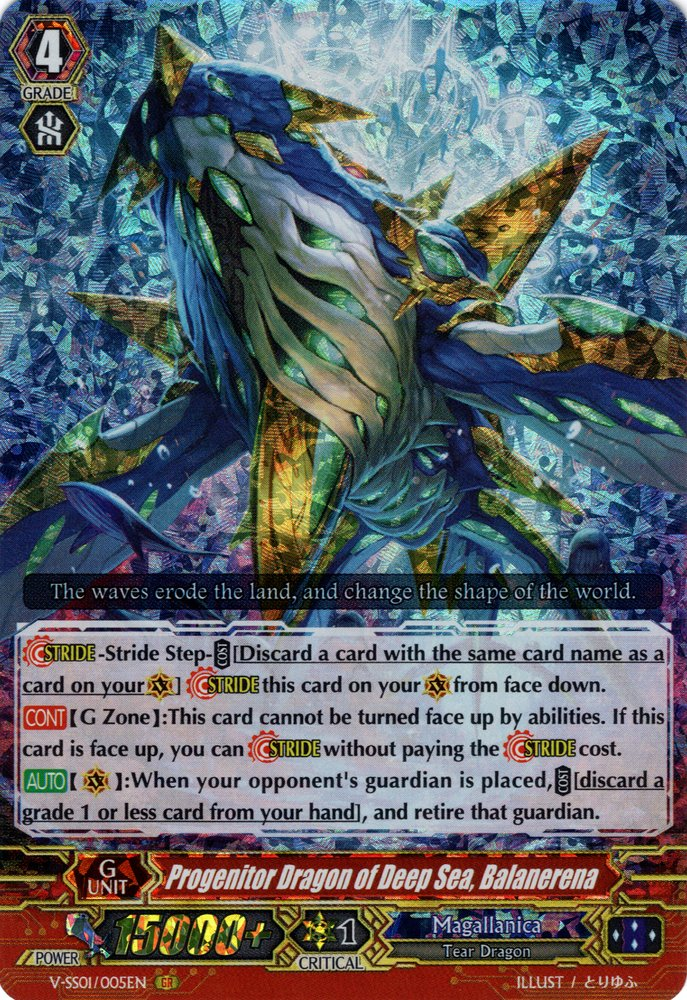
Notable Mention – Progenitor Dragon of Deep Sea, Balanerena: This card did get better with Negrobone and other board building cards introduced in the latest set but the main issue with card is that it has persona cost which is relatively hard to pay sometimes since this deck is more about compression rather than constant milling and hand manipulation and, even though having Grade 1 or lower units in hand is relatively easy, this won’t be a reliable kill stride. Your opponent is normally at around 3-4 damage at the start of your 2nd stride turn. Without getting critical triggers during drive checks you more than likely will not win the game and since you are board building by using cards in your hand you will always net negative in terms of card economics on this card to even make a decent board. You can run this stride as a convenience card since if you sack critical triggers and your opponent is at 5 damage by your second stride with low PG counts then this stride will kill.
GRADE 3 UNITS
This section highlights the G3 units of the deck. In total we have 9 G3 units and this is to really maximize the amount of G3s we have while still running the necessary units to perform all the functions the deck can do. The playstyle is more adapt with the flow rather than try to fit a set combo to the flow. With the amount of cards you draw and the amount of cards you filter from your turn 1 to the end of your first stride phase, 9 G3 units is the most optimal number. Your 2nd stride is generally your last so hard filtering G3 units won’t really affect your end game assuming the game state says otherwise.

Vampire Princess of Night Fog, Nightrose (V Series): This card is one of the most well redesigned cards in the game. It is not “overpowered” at face value but its skills synergize so well with strategies and units while giving an additional power boost and board manipulation. Rose is hands down the BEST G3 vanguard in the clan.
- Rose offers the best early game possible for Granblue. With previous G3 units like Cocytus or Basskirk you needed to have a certain dropzone quality for your G3 turn to be above mediocre. What Rose does is by simply calling 2 units, even just triggers, it will be at minimum a 15k shield when your opponent is at G2 and this will happen twice if you revive those same units with Rose’s 2nd skill. This is massive in premium where shield quality and hand pieces are sometimes too tied together than the opponent actually can’t guard for their next turn to be more optimal.
- Enables abuse of any draw cards like Ghost Ship or an engine like the Zarzan engine as anything with an AUTO can trigger a 2nd time in the battle phase for CB1
- Indirectly solves the issue of “early game” along with the Zarzan engine since we are no longer tied to a “good dropzone” to generate a certain amount of aggression and if we are forced to give up first stride we can shift to a more aggressive playstyle
- Fully utilizes and further cements Bad Bounty as an endgame having 2 Vanguard attacks over 22k, in Premium where 11-12k G3 boss units saturate the meta, is already fantastic as it forced fair amount of guard for such a low “magic number” but on top of that it is able to extend the battle phase by a minimum of 2 more attacks
- Allows players to even utilize older G-era cards to deck build because any units with a requirement of “a Nightrose Vanguard” is now fully live
- This card is often underestimated in terms of its power because the unit itself isn’t broken, but the synergy it gives to even the literal simplest of attack columns is something that no other deck can do
- Allows for more depth in gameplay as it force retires any units afflicted with its power increase. This is good and bad since in some matchups you want to have a board while in most it doesn’t really matter. It is a good additional layer that is added to players learning certain matchups like Megacolony.
- Resolves the fear of losing Nightstorm. There are games where you damage check Nightstorm but now if Rose herself is has a skill to account for that so you really won’t ever have access to that last attack extension in your combo but its quality is affected by a myriad of factors.

Dragon Undead, Skull Dragon: This card is the most linear in its usage. Its the best beat stick in the game that scales the longer the game draws out.
- Has a call restrict but this is really a small disadvantage compared to its versatility in usage
- Is a G3 unit that has a protect gift (fairly obvious)
- The best target for any battle phase calling abilities
- Due to its ability to self-retire in terms of maximizing the usage of this card on a kill you will only ever need 2 in drop since the most you will be having as attacking units are your 2 front row rear guards. This deck isn’t built to constantly go for a Meggido end game.
- The best auxiliary ride for board control decks and not a bad ride off of Bad Bounty if you simply need a bigger vanguard attack and can setup following attacks by different means

Mighty Rogue, Nightstorm: This card’s main purpose is really just as an attack extender and aside from that there is no value to really ride this unit.
- Great attack extender and unit to discard for stride
- Helpful and convenient if you have the CB on your first G3 turn and you can use this card
- This unit now hits magic numbers thanks to Rose since with any booster this unit will demand a 15k shield at the minimum

Lord of the Seven Seas, Nightmist: This card is my secret tech and has SO many uses while having so little drawbacks to actually running. This is both a convenience card as well as a game ending card that forces your opponent to do their next turn wisely. Even if you heal out of Limit Break (LB) this card has a hidden purpose beyond that.
- The main purpose is to extend your attacks by 2. Whether it be 2 more Skull Dragon attacks (for a total of 6 Skull Dragon attacks on a Bad Bounty turn) or calling Zarzan and Nightstorm for further use of that engine, this card’s purpose is to further enhance your kill turn by allowing the pilot to weave in 2 more cards during the battle phase.
- Its one of your main Greed Shade targets on your first stride and is often done to send a message to your opponent that they either kill you on the next turn or keep you at 4 damage while ensuring you have heal priority in a chance for you to heal out of LB. In many games you really wont be past 3-4 damage on your first stride because of the early game damage denial the opponent will do to prevent you from using Colombard, adding Nightmist basically ensures that your opponent has to to either perform a kill turn or a very big defensive setup turn.
- Nightmist’s second purpose is to be false information for your opponent while also being another option for you as the player. The Zarzan engine is “piece reliant” in the sense of you needing a certain number of cards in your at the start of your kill turn and with 3 of them being Vanillas to really maximize the engine. But Nightmist essentially makes it so you can do the Undead Dragon engine on with a Pseudo Megiddo turn. Therefore, revealing this card to be in your hand provides 2 situations for your opponent. Either your hand is very optimal in guarding while still being able to provide your optimal kill turn or you are adding this card to bluff your hand’s state. For the most part, even without the BR skill reviving 2 units you can still generate a very deadly Bad Bounty turn since many cards are self sufficient already. But there are some games where the BR skill is necessary due to your hand state, where the quality of your shields is rather low so you are committing your hand to pure defense and the BR is the skill you are banking on because you will be at 5 damage and low hand size so you cannot generate a board with Negrobone. These are 2 very real situations for a Granblue pilot and if your opponent knows this then they may make suboptimal plays if they read the situation wrong. If they assume your hand is in disarray and commit to a kill turn and fail then you will capitalize on that. If your opponent doesn’t pay heed to your hand then that’s fine too, it just means you have more options next stride turn. This added layer of information control is another tool to use to win the game.
- Nightmist is essentially a third copy of Nighstorm. While Nightrose is already a battle phase attack extender, having a different kind of attack extension is amazing while riding this unit first in the worst case scenario is not as bad as riding Nightstorm. If Nightmist is your first G3 vanguard, you can fully commit to building your hand during your first stride turn because it is already your vanguard so its purpose of sending your opponent an ultimatum is already accelerated and in plain view. The downsides of first riding this card is not as noticeable because of Colombard and the pressure that G2 card has in forcing your opponent to damage deny you at one point in the early game.
TLDR OF GRADE 3 UNITS
- Nightrose: Amazingly designed card that synergizes with Bad Bounty so much while offering the most efficient early game the clan could ever get since every line rear-guard line will require a 15k shield. Rose also enables old G-era cards to be used if desired while just enabling any cards with an “AUTO” ability, that can be triggered and resolved, to be done twice. Finally, Rose solves the issue of attack extending so even if you lose Nightstorm you can still extend your attacks by using other resources.
- Undead Dragon: Best beat stick in the clan that scales super well in the game and is generally the call target of any attack extenders while now having a second use of a massive vanguard re-ride thanks to Bad Bounty. This helps so much against control decks.
- Nightstorm: The best attack extender in the game as it is not tied to being on the Vanguard Circle and can really be triggered on rear once GB is live. A horrible ride but its versatility and aggression is too good to pass up.
- Nightmist: The secret tech card that is a quality of life card while also being a win-condition card. Nightmist extends any Bad Bounty turn by 2 attacks. If you lose this card either by healing out of LB or it being stuck in damage, it wont really affect your combos as your combos/plays were already made without Nightmist in mind, it just enhances it further with Nightmist. Lastly, this card provides a level of mind-games you can do with your opponents and adds layers to your plays by, again, weaving in 2 unit revivals during the battle phase.
Deck Building Options
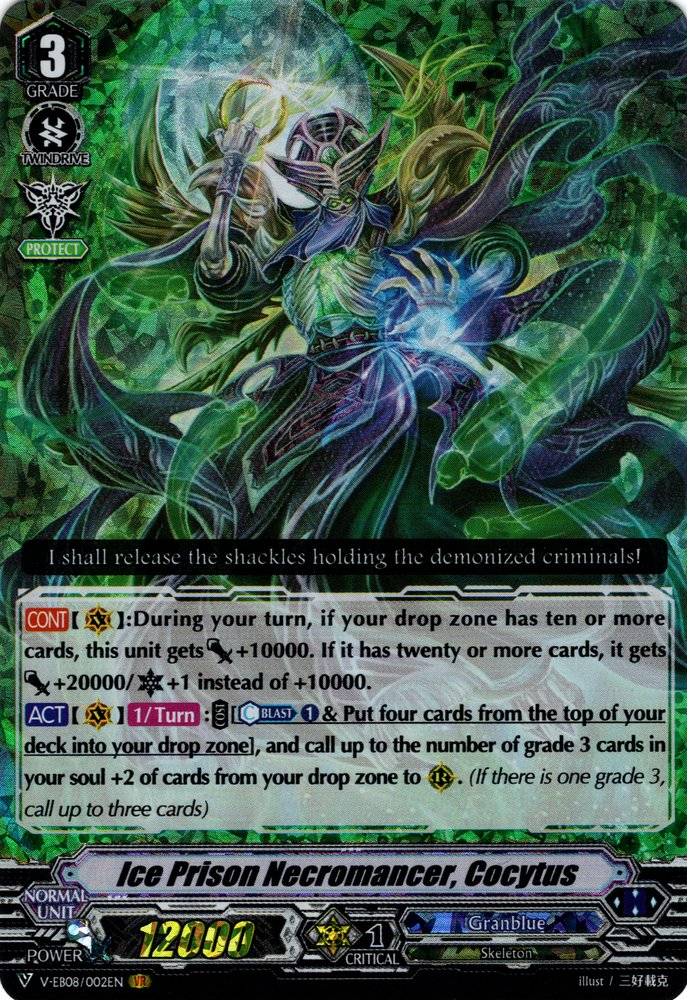


- Ice Prison Necromancer, Cocytus/King of Demonic Seas, Basskirk: These 2 cards essentially are a backup vanguard and is more of a budget option now rather than a main ride. Out of the 2 Basskirk is better for this deck build since dropzone count is really a 2nd hand objective for this deck and being able to use a card in soul is helpful in some cases. Cocytus is beneficial as well since you can technically mill 2 good units and use it off that but its up to you if you want to run these 2 units as neither will break 22k power on first G3 ride and the only difference is control. Do you want to incorporate some RNG milling so that you can attempt to call a good board or do you want to be safer and use a card from your soul with a guaranteed power increase. Bad Bounty synergizes better with Cocytus as it is a 32k base with 2 criticals as opposed to Basskirk’s 17k with 2 criticals but this is only assuming you have zero accesses to Nightrose V. If you can only get 1 Nightrose V series and are more of a budget player then you can honestly just grab Basskirks as a intermediary card until you get more copies of Nightrose.
- Vampire Princess of Starlight, Nightrose/Seabed Demon Beast, Scaredick: These 2 cards are more options for a G3 rearguard that can enhance your offensive capabilities. Scaredick synergizes well with Nightmist since it is a 2 critical beater and you can dump your hand to increase dropzone count, getting 30 cards in drop is not that difficult with enough conscious effort but you dont naturally get there with game progression. Starlight is a great extender for your G1 vanillas and Zarzan. Having Starlight in the backrow rearguard means you can call Zarzan at any point of your battle phase when you revive a unit. This availability is nice but keep in mind that the Zarzan “loop” is somewhat fragile and riding into Starlight as your first G3 is objectively worse than Scaredick and Undead Dragon since at least with them you get a Protect Gift. If you want to run either, ensure to take into account the negative possibilities and know how to adapt.
- Vampire Princess of Night Fog, Nightrose/Seven Seas Sage, Plegeton: These 2 cards are alternative Bad Bounty ride targets while also providing their own unique support to the deck. Both cards have the downside of riding them doesn’t give a protect gift and, even though Plegeton can revive a unit on ride, if you have ride up a G3 turn these cards are essentially dead rides since you don’t generate a quality drop in the early game and if you don’t have a Colombard to use it is a dead ride. As an alternative ride target though they shine. Plegeton is great when you have limit CB and you can’t CC (counter-charge) during Bad Bounty and is a nice ride before you stride on your 2nd stride turn since it can give you 1 revive before you start your stride turn, thus, setting up your board and allowing you to use Negrobone for other technical aspects like fill up soul, draw, or to call other targets. This is very beneficial if you only have 2 Negrobones in drop and you need to make your calls count. Nightrose is a great defensive ride since you can revive an Undead Dragon during the battle phase via her GB2 and, since you run Negrolily, you still have access to her defensive engine. This engine was a staple in G-era since you can retire your rearguard via Negrolily then trigger Nightrose’s GB2 skill to revive the retired unit. This can be a card like Skeleton Cannoneer for example to retire a unit during your opponent’s battle phase or a card like Mick the Ghostie and Family to give your Vangaurd a 10k power buff for the rest of turn. If you want to run either of these cards you can, just remember its risks and weigh it for yourself if you want that reliable go-to card or you want a more streamlined build.
GRADE 2 UNITS
This section discusses the grade 2 units of the deck. If you haven’t already noticed we only run 9 grade 2 units. This is because we want to guarantee seeing Colombard while not compromising on the lean Zarzan Engine and utility that the grade 2s bring to the deck. You can shift a grade 1 unit to the grade 2s increasing it to 10 if you would like for consistency. However, after extensive testing and really pushing the boundaries of card ratios 9 grade 2s is your limit on how low you can go to still see a grade 2 in your opening hand with relatively high consistency and 11 is your maximum before you compromise too much on the other unit ratios in the grade 1s and 3s thus making the deck less consistent.
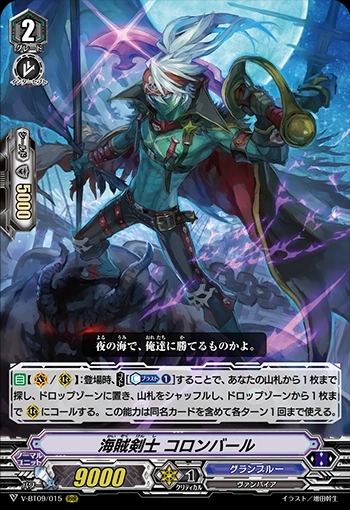
[Counter Blast (1)], search your deck for up to one card, put it into your drop zone, shuffle your deck, and call up to one card from your drop zone to (RC). This ability may only be used by a card with the same card name once a turn.
Pirate Swordsman, Colombard: This card is the definition of OVERLOADED. For a cost of CB 1 you can essentially call any card from the deck or drop-zone. Colombard is a one-card-engine and is basically responsible for our early game being very effective. With some help from the card restriction lists as well as cards being abusable in Granblue this card has permanently made its place in every deck.
- Colombard is the sole reason why opponents will deny you a CB going into your G2 turn. The main reason for this is to avoid you triggering the Zarzan Engine and getting early GB and buffed units by your G2 turn. No deck can really handle multiple lines being over 20k when they are on G1 on G2. Even if you don’t run Zarzan, just the fact that you can fetch this engine OR the fact you can fetch a beater like Ghost Ship is enough for most players to pass their turn without attacking.
- While offering a great early game Colombard is also an attack extender for Nightrose. Due to Nightrose’s skill only being to call units in a column, you generally can only call 1 attack unless you use an attack extender. Colombard fulfills this by being called in the backrow rearguard and calling another unit to the opposite front row rear. Usually done to achieve 2 more Undead Dragon attacks after Nightrose’s on attack skill is triggered.
- Deck compression is something Colombard provides but is not really that relevant. You only use Colombard in the early game and as an attack extender for your 2nd stride kill turn. Overusing Colombard can lead to CB usage being less efficient and is often a trap pilots fall for because they assume “filtering = better deck”. Your first stride Obadiah already does the minimum you need to do in any given game and the way you stack your deck at certain points of the game is enough reason to not use Colombard’s skill unless as a final attack extender because it ruins that stack. Remember, Colombard is a mandatory shuffle. This is great early game to fix a weirdly stacked deck but is awful late game when your deck is already really filtered.
- Colombard solved Granblue’s issue of being “1 turn to slow” because it makes the whole game 1 turn slower. If your opponent gives you early CB you can freely capitalize on that with the Zarzan Engine and since people fighting for first stride still happens often, if you have CB going into your Nightrose G3 turn you will again have a chance to multi-attacks with Zarzan and potentially even use other beatsticks like Ghost Ship on top of Zarzan. If your opponent denies you that CB for your G2 turn they are already not dealing you damage in the early game and, if you are going first, allows you play a really dirty strategy. Either ride up and proceed to hit G3, this best when you have another Colombard for your G3 turn, or to stay on G1 and attack their vanguard. If you stay on grade 1 and just attack when you went first in the game, your opponent is forced to ride up to G2 and either give you damage or pass another turn. The fact that you can indirectly affect your opponent’s hand and card economy so early on is amazing.
- 50% of games where you dont see Colombard, it is actually more beneficial to G-assist rather than ride a G2. It depends on the matchup but remember, Zarzan is always a plus 2 since it creates you board for free. If you G-assist but guarantee the Zarzan engine going off you will only net zero in terms of card economy but plus 1 in GB. This is a risk but is a valid strategy that can win you games because you can generate that early Gb and aggression.

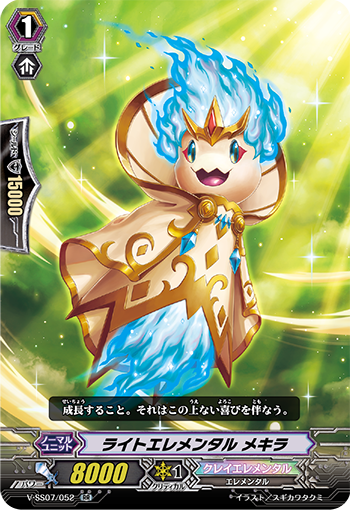
Nightwatch Pirate, Nilde/Light Elemental, Mekira: I will be addressing these 2 vanillas right now as they essentially provide the same uses in the main combos while having the same impact as attackers and/or boosters respectively.
- Both are the prime Zarzan targets as they are highest base in terms of power and thus hit the magic numbers of 22k-23k far easier just by themselves with 3 Cycloneds face up in the G-zone
- Nilde is great for those games where you want to damage deny, like a mirror match, since you can under swing and most Granblue decks are running a good amount of 8k base G1 units in their decks.
- Both improve the quality of our shield in hand with them being 15k shields. In premium a 15k shield can block most early game attacks and the 2 attacks in most first stride turns.
- Both scale really well with Cycloned. At 4 face up they are 27k and 28k base respectively and that is a really respectable attacker and/or booster when you take into account that we are a combo attacking deck. This also helps against our worst control matchups like Gredora since we can just call these vanillas from hand and still hit magic numbers even without boosting.
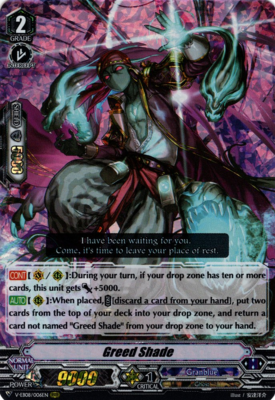
Greed Shade: This card is still super well designed and is objectively still very overloarded even though its use in this deck has diminished due to the fact that we need a high tempo or high control and hand manipulation is a not as wanted because of how fast you draw/compress your deck in the stages of the game where Greed Shade is ideal. It is still a well designed card and should not be cut out because you are still going to have those moments where you need a certain card from drop.
- Greed is a the best hand fix in the clan. For the cost of milling 2 when placed you can select any card from dropzone and add it to your hand. You can even just do Greed’s skill to “check” the top 2 cards of your deck and predict your drive checks from the mills (more in Gameplay)
- Greed is a really bad ride on G2 since its only beneficial on the R circle and milling early game has no real merit to it when you don’t gain power and the option to fix your hand only comes up in 5% of games and a lot of the games in that 5% is more of a “quality of life” improvement rather than a desperate hand fix. You need to see Colombard early game and if you hyper-focus too much on Greed Shade’s “in a vacuum” value then you will run more copies of Greed which will lead to a higher G2 count which means less copies of units on other grades and less chances to see Colombard as your G2 ride.
- The only times where Greed Shade is used is really on your first stride when you fetch and call it with Big Obadiah or when you conveniently draw into it in the early game. Greed is not a mandatory card to see and is a complementary card that can further your early game but has zero impact on it if you lose it.
- The main reason you call Greed Shade is to get Nightmist into your hand on your Obadiah turn to do that BR combo or to bluff or to add a heal to your hand so you can get to your 2nd stride with more certainty. Much like how you don’t need to see Nightmist every game to win you don’t need to see Greed every game to make your hand. The other engines in this deck support these 1-of card choices because the engines are so lean they are self-sufficient while still being easily prone to being improved on by 1-of-techs like Greed.

Stormride Ghost Ship: This card’s purpose is super linear but still super important since it generates great aggression and draws you a card. Same caveats as Undead Dragon but easily abusable to leverage your early game if you have access to it and your first stride to build your hand.
- Often is your go-to-call on Obadiah to draw and can be revived via Nightstorm to have another attack
- Great early game card to be able to use and fetch with Colombard if you don’t need to or can’t get Zarzan
- Is a staple in every deck since its one of the fastest power scaling card in Granblue
- Should not be ran at more than a 2-of due to its inability to be called
TLDR OF GRADE 2 UNITS
- Colombard: The card you need to see for your G2/G3 turn. Its really crucial that you should even G-assist for it in some games. It is generally the best deterrent from early damage since most players don’t want to use Zarzan and is the best as generating aggression and tempo when you get Zarzan off while providing other options when you lose Zarzan while also being an attack extender.
- Nilde (Vanilla): Great Zarzan target and is a good base to under-swing especially in mirror matches since a lot of G1 units are 8k bases in most decks. Your hand quality in terms of early game guarding will increase since 15k shields in the early game for decks that can’t abuse Zarzan is generally enough to hard block most attacks.
- Greed Shade: A great hand fixing card that is generally used on your Obadiah turn to fetch Nightmist into your hand for your Bad Bounty turn. Its use have decrease in the early game since Zarzan can compress your deck by drawing and you have to call this to rear to really see its benefits. In a deck where milling is not a priority you need to run more copies of Greed to make it early game relevant and that will affect your other grades. It is good enough being a convenience card and losing it doesn’t impact your end game to much degree since its the same case as losing Nightmist.
- Ghost Ship: The best attacker and draw card in Granblue that also has the fasters power scaling. Great in the early game if you are able to use it and a staple in the first stride to draw cards while applying pressure.
Deck Building Options
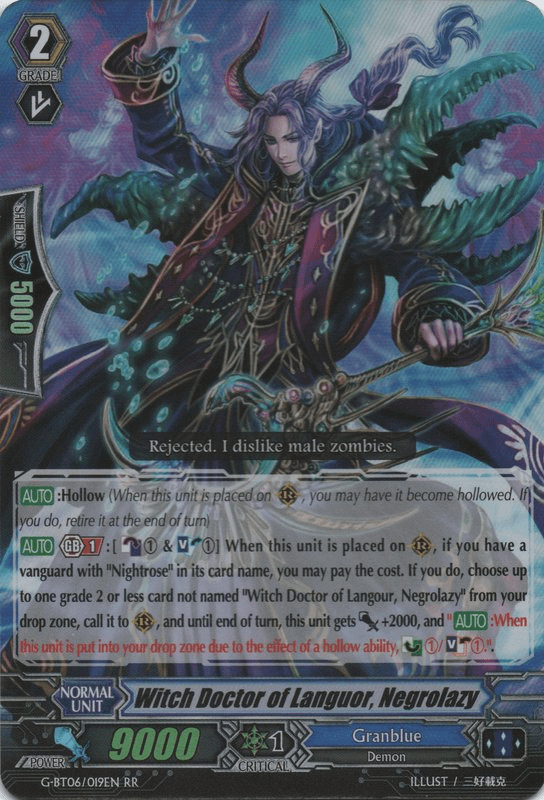


- Witch Doctor of Languor, Negrolazy (G-series): Since we do have a Nightrose vanguard for a majority of the time and have early GB you can run Negrolazy as a tech option. It becomes an 11k base which helps in the early game and refunds itself so seeing it on your G3 turn is pretty nice since you get a “free call”. However, do keep in mind that outside of that this card has no real value outside of being a last card extender on your Bad Bounty turn because your calls are fairly streamlined already and its revived is limited to G2 or less units, therefore you cannot call Undead Dragon with Negrolazy. It is basically an inferior Nightmist (G2) in the last game but a better Nightmist in the early game since you get to cycle soul. Captain Nightmist and this card have the same values just reversed points in the games where they are best used at.
- Skeleton Cannoneer: This card you would think should still be ran in the deck but its not that necessary barring specific matchups. You have enough of a draw engine so this card’s value in that is diluted and the ability to retire has been redefined due to the way cards are now being designed. Where retire a single unit is no longer than impactful since multiple units share the same or have similar functions to one another. This applies more in Premium where we have the standard cards on top of the G-era cards and interactions. If you want to run this card you can if you want that safety to have that spot removal when you need it like against Angel Feather to shoot their Nurse of Broken Hearts. Its easier to abuse Cannoneer with Negrobone since, as long as you have CB, you can keep looping it. It all depends on your meta and what you are likely to see BUT with how fast your numbers scale you can generally brute force your way through most matchups and only specific matchups, like Angel Feather, have such a rearguard reliant defensive engine. A lot of decks right now have units that also disappear so the amount of value your single retires have is minimal.
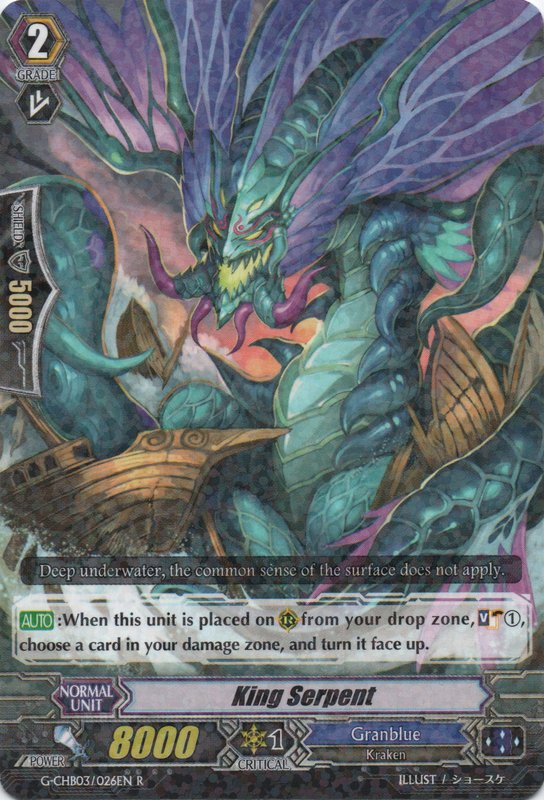
- King Serpent: We have enough CC as it is as well as optimal soul manipulation with the triggers we play but this card has its uses to just build soul. If you want to make your Obadiah turn free and need to build soul you can run this card. It is a wonderful 8k base to under-swing as well but keep in mind you have to adjust for this new CC/SV engine by moving around other units that provide the same purpose to really maximize your decks potential. If you do run this card how to you add to your G2 line up? What do you do if this gets lost in damage? How much impact will this card actually have in the best and worst cases? Keep those questions in mind when you try this card!
- Heat Elemental, Bobo: This card is an interesting tech since its not really to counter damage denying but it can also be used for that. It’s main purpose is to fill soul and basically lock your opponent’s out of heal why setting yourself up with heal priority while also safely upping your damage so you can stay at LB. Its a great 1 of tech but for my deck I chose to remove it for Colombard consistency and adjusted the rest of the deck accordingly. You can run this card to increase your G2 consistency while adding another “quality of life” card to your G2 roster.
- Pirate Swordsman, Colombard (G-series): A great attack extender since it can synergize with Nightstorm but it does make your turns more CB heavy which is not always easy to allocate since at times your opponent is keeping tabs on your damage to prevent getting hit as hard while forcing you to do more convoluted actions to get to a more ideal positions. This card also weakens your Zarzan engine since it shares the same name as its V counter-part you have to sacrifice a V-series copy to accommodate for its 1-of slot. Its nice since it doesn’t influence your G2 count but it lowers the chances for you to get V-Colombard. If you want to run this do keep in mind the sacrifice you are making by lowering V-Colombard.
- Thin-mist Banshee: A counterpart to Ghost Ship in the sense that you can call this from your hand and draw if its retired via effect but it also hits weaker numbers. In terms of first stride this has the exact same value as Ghost Ship as a stand alone unit since a 5k difference in this case is an okay trade off to the ability to call in early game. But it has little influence in your early game unless you run 2 copies since you normally rely on your Zarzan engine and worst comes to worse your Vanilla units since Nightrose makes every column a magic number. However, if you want to run this card for the ability to have that early game draw engine more reliably as opposed to Ghost Ship that has a call restrict that you can 100%
GRADE 1 UNITS
The grade 1 units of this deck arguably are the most impactful and most interaction heavy. Some have very simple roles while others have a great deal amount of impact on the game and the amount of control you have. Much as the other grades, if not more, all the ratios of the units here are chosen for a purpose but this is where also have the most flexibility in how creative you can be with your deck builds.

Rain Elemental, Zarzan: The bread and butter of the early game, a very good multi-attack engine, the card everyone dreads to face and dreads to run since its so “linear”, and the card that has brought so much quality to the depth and gameplay of Granblue. This card is an honorary member/ghostie and it being on the restriction list is to solve the toxicity this card caused the card game as a whole but is also the biggest buff to Granblue.
- The best target for Colombard in the early game. The deck is designed to maximize the amount of Vanilla units being run while being the least amount possible for the sole reason that we can always resolve Zarzan in the early game. Being able to generate 2 units on board that all gain a 5k power buff, scaling with faceup Cycloneds, for essentially a SB cost is insane.
- This card allows the deck to compress even in the early game. Even if you are just drawing you are replacing the vanillas in your hand with hopefully cards, therefore, cycling your cards. Even if you do draw more vanilla units, it is just more targets for Zarzan and is information you can use to define your deck as the game progresses
- As mentioned before with Colombard’s section this card is something all players who is facing a deck running this to ever resolve in the early game. However, thanks to the restriction list we are the only clan that can reliably get Zarzan and with 99% consistency. Before there wasn’t much impact to this card since every clan can run it BUT now that it is restricted to 1, every other clan has to rely on luck to get Zarzan in the early game while we have a method to always get it. Sure it can be played around by damage denying but as stated above with Colombard you can even turn that against your opponent.
- Zarzan indirectly helps Nightmist with regards to LB. With your heals also being vanilla targets, there are times on your turn 2 where you have to sacrifice a heal since you drew into it. On your kill turn if your incorporate Zarzan at any point in time during the turn, which you should to get Cycloneds faceup, you will notice that you will draw your heals more often since you are compressing your deck that fast and the last 3-4 cards of your deck are always the same card so you can easily predict if you are going to hit a heal and use any draw cards and Zarzan appropriately.
[Discard a card from your hand & put this card on the bottom of your deck], and call a grade 1 card from your drop zone to (RC). If your drop zone has ten or more cards, you may call regardless of the grade.
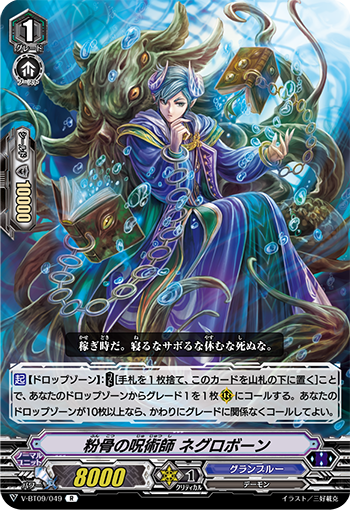
Witch Doctor of Powdered Bone, Negrobone: A welcome addition to the clan and an overloaded card not in design but with the stupid amount of synergy it has on top of its board building potential while maximizing drop-zone count for your kill turn. Bone saved Bad Bounty and further refined our early game and this card should not be slept on.
- The main use for this card is most apparent on Bad Bounty. Being able to build whatever board you desire before your battle phase is a privilege no other deck has because out drop-zone is our second hand. Although it requires a discard cost to activate this discard cost isn’t really a discard. On your Bad Bounty kill turn you want excess cards in the drop-zone to increase your numbers. Bone just helps with that process while building your board.
- As mentioned before with Zarzan you always know the last 3-4 cards of your deck and that is Bone. You always use Bone on your kill turns to build your board to ensure your kill turn is not scaling but is constantly a high pressure similar to Megiddo. As a result, your last 3-4 cards in deck are always Bone so you can plan/draw accordingly with that information.
- Bone is the ideal first ride in this deck because we use abuse the Zarzan engine. Why you may ask? This is because its the an ideal card to SB and your early game pieces are conveniently G1 units! If you ride Bone first and are able to get the Zarzan engine off you guarantee a second use of it if you get it into drop and have vanillas in hand. Most pilots overlook this card until you hit 10 cards in drop but don’t forgot a lot of your key units are G1s!
- Bone provides a way to still function on low CB if you are damage denied. Assuming you didn’t draw Tear, which is also an amazing G1 target for Bone to CC, you can stride into Cycloned, use Bone to revive and use Zarzan again, build your board with a chance to re-stand those vanillas with your drive checks, all while getting Cycloneds faceup and further setting yourself up. This is one situation where Bone shines in value.

Rain Elemental, Tear: The main card to CC with and to SB with. This card has a fairly linear usage but still very impactful.
- CC scales with face up cray elementals so you can essentially CC3 on any given 2nd stride at a minimum
- CC can be used in the early game thanks to Zarzan flipping Cycloneds face-up but keep in mind your soul will be empty and you have to refill it at the next possible moment
- Due to the Zarzan Engine flipping our G-zone s early and more effectively, Tear out classes Grenache. This is a topic I will address here for obvious reasons. Grenache’s main problem is that its CC is tied to the Hollow Mechanic (ie. the Hollowed unit must be retire with the hollow ability at the end of the turn) meaning you have to basically reserve a spot for Grenache for the whole turn and you don’t get that CC until the end of the turn. Whereas Tear can be called from anywhere and CC a certain amount for SB2 and can immediately be retired for a better booster. This is why I took out Grenache and why I don’t think he is needed anymore.
- On top of the above mentioned superiority to Grenache, Tear shifts our CC engine into our G1s thus fixing the issue with the G0s being over saturated
- A really good card to under-swing with since not many G1s are actually below 6k even in G-era, relevant G1s at least
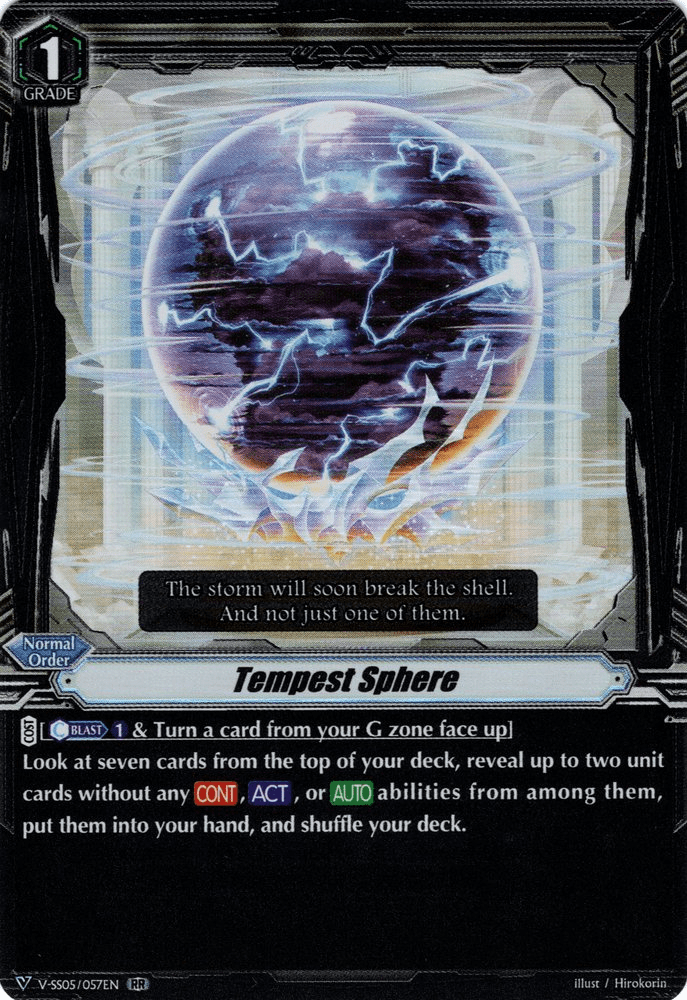
Tempest Sphere: This card is a much needed complementary card that has a second function of filtration and compression on top being second copy for other cards.
- It is ran as a 1-of to avoid any riding mishaps and after testing this card is, again, a convenience card that is also a failsafe to if you lose Zarzan to damage as you have a 2nd card that can flip Cycloneds which you can search via Greed Shade on your first stride.
- Helps accelerate GB and faceup Cycloneds if you draw into it while helping to find targets for the Zarzan engine or just heals for defensive purposes
- Being able to filter out heals means it indirectly helps Nightmist’s LB concern of healing down.

Dolph the Ghostie: A really linear card that is a convenience card with the sole purpose of superior perfect guarding.
- Convenient first ride to draw cards from your deck thus compressing your deck
- One of the main targets for Negronora to call from drop-zone to “Superior Perfect Guard”
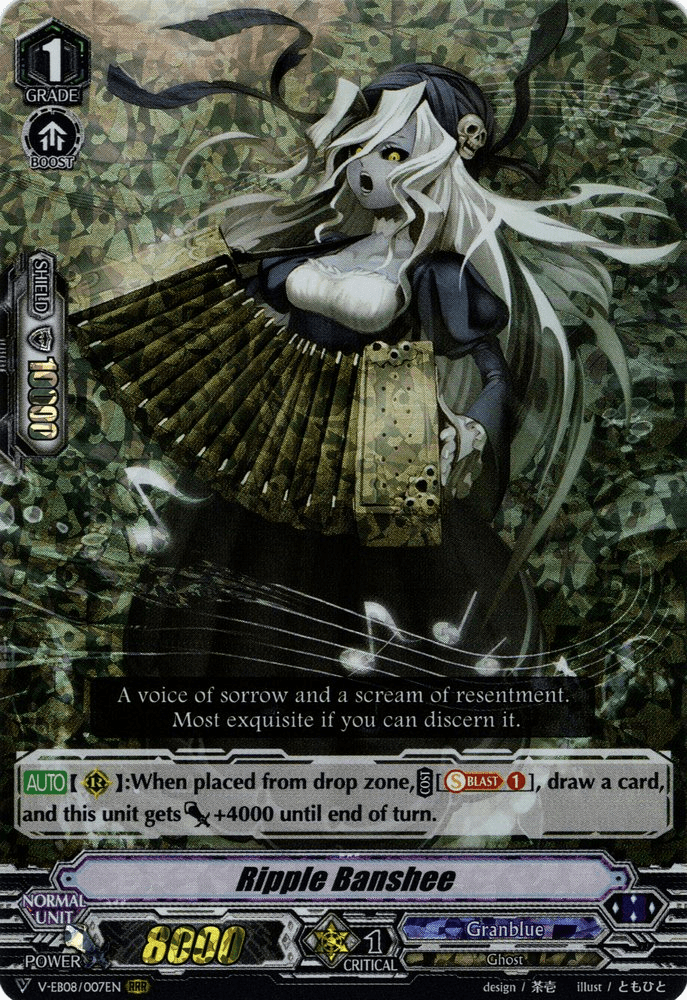
Ripple Banshee: This card is your second draw engine that utilizes the soul.
- A failsafe for when you damage check Ghost Ship so you still have a draw engine without having to filter your critical triggers that draw
- At times does help with soul management since SB1 is not as heavy to the usual SB2 from tear
- A second draw card that doesn’t have a get be used to guard with (ie. better Ghost Ship with a SB cost)
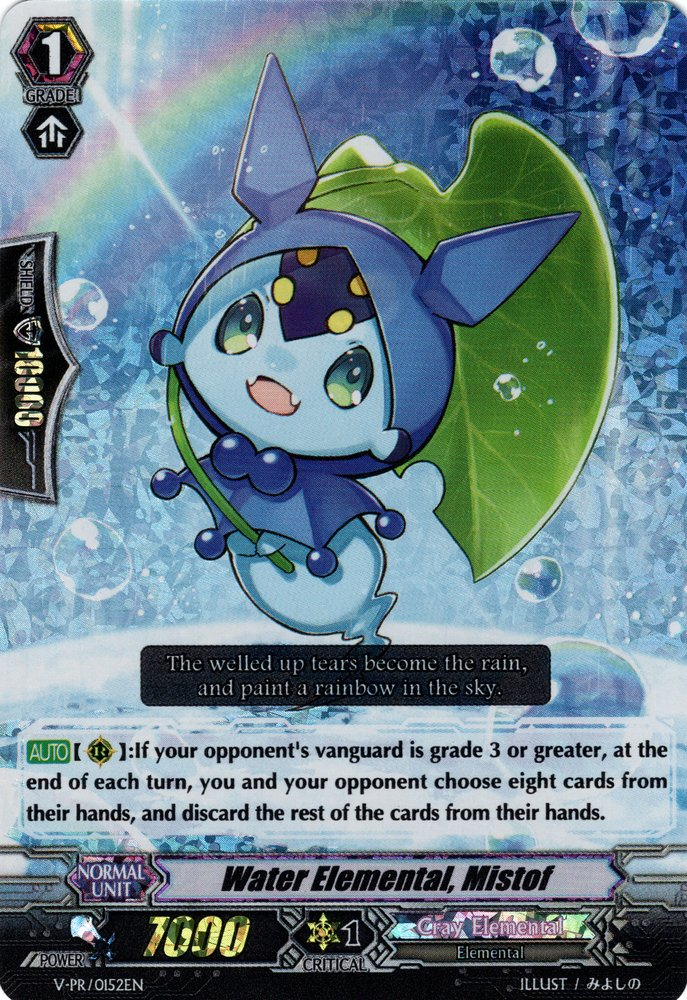
Water Elemental, Mistof: This spot in the G1s is more of a flex-spot and is a spot you can fill to your discretion. I picked Mistof as a counter to decks that generate hand advantage before the stride phase and is a Colombard target.
- Guarantees your opponent is at 8 cards at the start of your first stride and that is really all you need since its easier to scale them in damage when they only have 8 cards in hand as opposed to more
- In some matches against decks like Oracle Think Tank and they just generate massive hand but only have 3-4 massive attacks in a turn you can keep Mistof on the field since if you have heals in hand you can use Nora to block their attacks rather easily. Of course you have to prepare for this in advanced but this is just another layer to the gameplay if this deck.
- Mostly a convenience cards as well since if you draw into it you call it to ensure your opponent never passes 8 cards at the end of their G3 turn since you are more than likely winning or attempting to win the fight for first stride
TLDR OF GRADE 1 UNITS
- Zarzan: The most abusable engine that became buffed in Granblue thanks to the restriction list and made Granblue the only clan that is able to consistently get and use this card. Allows for control of the early game with mind-strategies when it comes to your opponent damage denying as well as provides the ability for the pilot to set a high tempo for the game if need be since this unit and its engine can be abused at all stages of the game for Granblue. While helping with (F + C = I) and other outliers.
- Bone: An overloaded card when it comes to synergy. The main ride target for G1 as if you ride this unit and get Zarzan off you can use Zarzan twice by your first stride by simply having the vanillas in hand to resolve the skill. Helps build board for your kill turns and helps stack the deck since you always know Bones are the bottom and the rest of the deck you can figure out by trigger-checking and smart guessing.
- Tear: Granblue’s best CC card that replaces Grenache due to the ability to flip G-units face up faster while being an amazing base to damage deny at times and being able to CC in the early game by being called from hand or a target for Bone
- Tempest Sphere: A second Zarzan copy if it goes into damage and is often just a convenience card since you usually use it when you draw into it and reap the benefits rather than search for it to use usually
- Dolph: Convenient first ride being able to draw more cards from the deck, but it’s main purpose is to be a PG target for Negronora
- Ripple Banshee: A failsafe to Ghost Ship being a second draw card that uses soul. Has other uses in the soul cycling department.
- Mistof: A card you can replace with any tech card you want but I run it as a way to counter decks that generate hand and to guarantee my opponent is at 8 cards at the start of my first stride in some matches
Deck Building Options


NOTE: ALL OF THESE ARE JUST SUGGUESTIONS AND FINDING THE RATIOS AND NUMBERS FOR EACH CARD IS UP FOR YOU TO FIND!
- Skeleton Sea Navigator: An alternate early game engine. This card already has a build that can center around it and since it is a reliable Colombard target you can run this card to fill your drop-zone for Undead. You can play that engine in this deck if you want!
- Dancing Cutlass (G/V Series): An alternate CC/Board Building engine. This does take quite a bit of room so if you want to run this engine you are more than likely sacrificing Zarzan and running more Tempest Spheres and Navigators to fill Zarzan’s role.
- Light Elemental, Honoly: A great counter to multi attack decks. This card’s value is very debatable since a lot of multi attacking decks actually have spot-removal or can change their attack patterns to maximize the first 5 attacks or even just have a really good battle-phase CC engine to make this card’s defense a small hurdle. It honestly depends on your area and the meta there.
- Heat Element, Howam: The best way to counter damage-denying. This card’s value is questionable at best but it is still there if you are going to be seeing a lot of slower decks like Gyze. However, if you fetch it with Colombard it is kind of a waste since that call could’ve been for Zarzan or Ghost Ship. If you want the security of always having CB then this card is a nice tech but you can thrive off low CB.
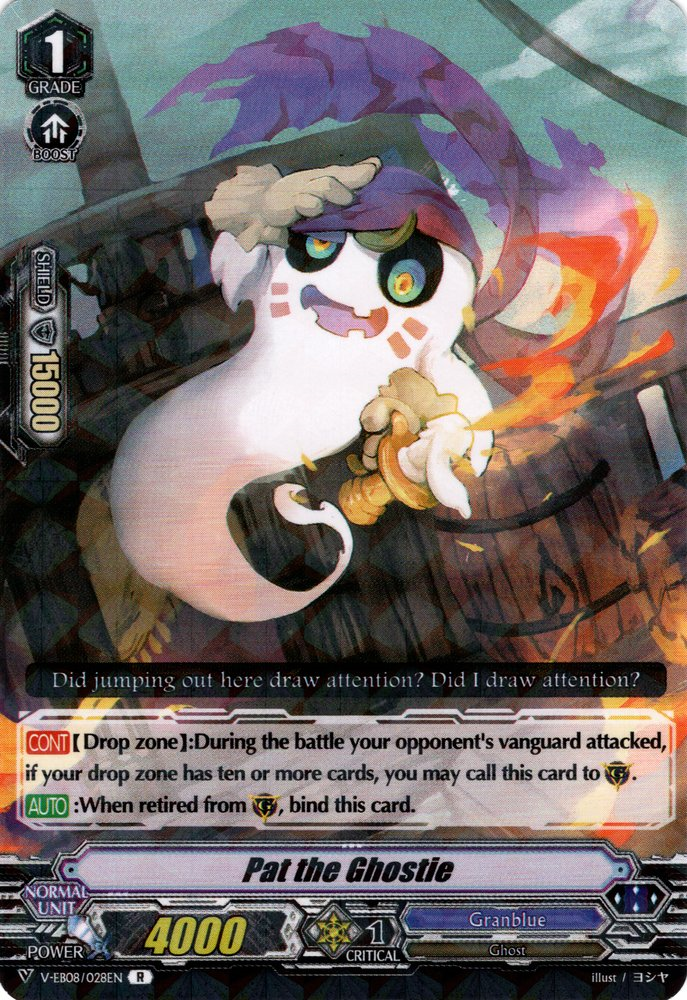
- Pat the Ghostie: A random additional shield. This card can also be another vanilla but having that extra 15k shield for your opponent’s vanguard can come in handy in some games and just make your Nora that much bigger for no real cost.
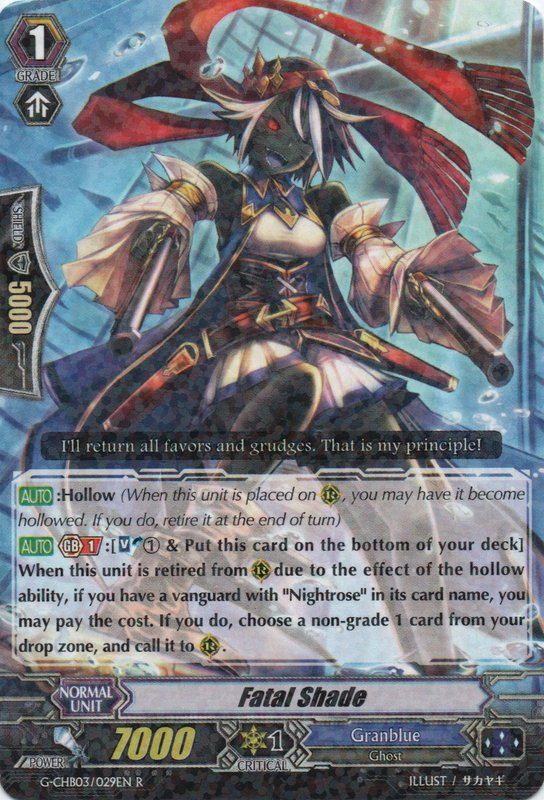
- Fatal Shade: This card is a flexible piece of Nightrose support from G-era and essentially provides you with an end game revive while refilling your deck. You can call an interceptor or call a Colombard to then call another unit. If you use G-era Nightrose you can setup for a defensive play as stated earlier.
- Evil Shade (V Series): The function of this card is an extra copy of Negrobone that you can call as a setup on your first stride or, if you run more copies, can call from hand to be able to build your board of vanilla boosters. Losing a few cards in drop-zone to the bind zone will not really affect your numbers as much since Undead Dragons will be boosted by vanillas that are 20k+ in power on average.
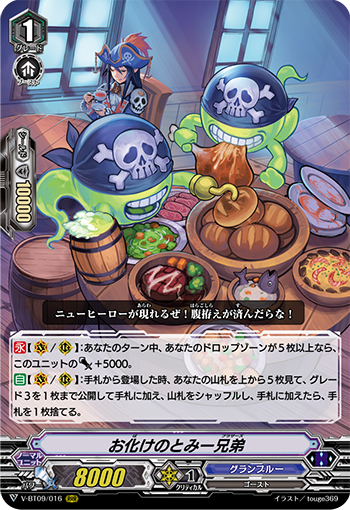
- Tommy the Ghostie Brothers (V Series): You can run this card for consistency but that’s already comes with most decks. Unlike in Standard where your deck compression and filtration is slow, in Premium it is very fast and you have a lot more opportunities to abuse cards. This card is great in the early game if you run a build like Navigator where you fill your drop-zone quickly, thus enabling it to be a 13k unit, but you are also fighting with RNG and you want to secure your Nightrose ride.
GRADE 0 UNITS
The trigger line-up is fairly linear and straight forward but the reason why there is 2 copies of all effect triggers is so you see them in equal chances. The amount of vanilla units in your trigger zone, for Zarzan to be consistently online, needs to be at a minimum 7 cards and that is really pushing it. If you can get it to 8 cards like my list you are in a way better spot!

Chad the Ghostie: A grade zero stride fodder (counts as a grade 3 for the cost of stride). We run this so we can have better consistency in striding. There are games where you want to keep G3s in hand to ride to fill up your soul for the next turn(s).

Wild Seas Banshee: A draw engine that goes into soul during battle phase. This is beneficial since it is a relevant booster in the early game and if you have GB active on your turn 2 this makes your Vanguard a higher attacker while optimizing your rear guard lines.

Rampage Shade: The sentinel critical trigger. Overall just a useful shield value since in premium this stops most attacks by itself and this card buffs our Nora’s shield values to averagin around 60k shield when paired with a vanilla unit.
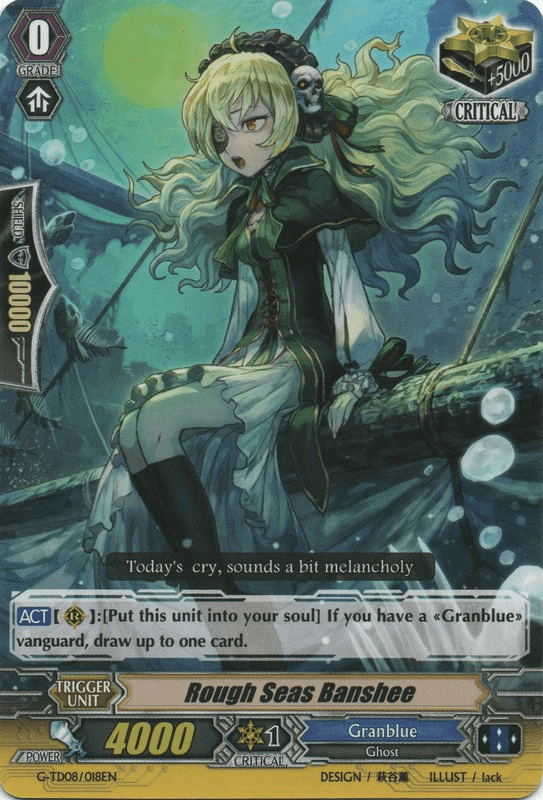
Rough Seas Banshee (G-series): This card is a 5k trigger but the reason we run this card is because this is an on demand SC. The draw is often done BUT is OPTIONAL due to its wording. There are games where you need the SB during main phase for Tear or Zarzan and you don’t want to sacrifice your board to accommodate a Wild Seas Banshee so this card fills that role since its easily searchable and callable with cards like Negrobone.

Vanilla Critical Triggers: This can be whatever art you prefer but you do need to run these triggers as Zarzan targets and the fact that they are 10k critical triggers.

Vanilla Heal Triggers: Can be any art you desire we just need to run vanilla heals for Zarzan and the 20k shield value.

Gust Djinn: This is more of a convenience draw trigger and its main purpose is to fill the role of a 2nd sentinel perfect guard in the deck. If you have the ability to run 2 Dolphs then you can do it but you want to ensure you have 2 PGs in your deck for your Nora and the random draw does help. Anything beyond 2 draws is questionable and more often than not will borderline deck you out. It’s so much easier with Negrobone but will cause the pilot to micromanage more to ensure they don’t deck out thanks to a draw trigger.

Undying Departed, Grenache: This can be any V-series starting vanguard you want!
Deck Building Options


- Undying Departed, Grenache (G-series): The general staple of CC in Granblue since Nightrose was first revealed. If you want to run this card for the safety of always having a CC 2 at the end of your first stride turn you can but Tear already answers that CC need as discussed before!
- Chappie the Ghostie: A free filter during your opponent’s turn. This card is still really good and synergizes well with Nora and just being called on the guardian circle in general. You can run this card card to increase the quality of your Noras and filtration!
- Guile Shade: A weird tech card that is basically an ultimatum for your Nightrose vanguard attack. Essentially saying if you let this hit Zarzan will go off. Beyond being a massive on-hit it has little other uses.
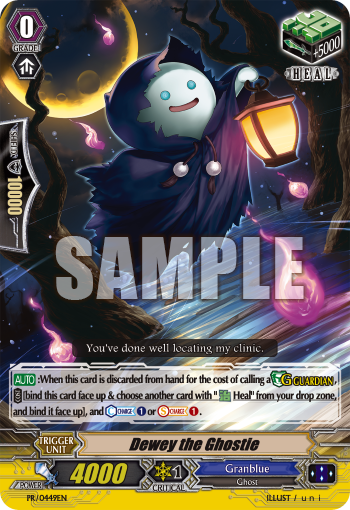
- Dewey the Ghostie: You can run this CC/SC heal if you want more control over your resources but you will be sacrificing 10k heal triggers for that resource control.
- Cody the Ghostie: This card is a weird attack extender during your battle phase. YOu can revive this unit after an Undead Dragon retires to that circle. If you prepared in advanced and have a Vanilla booster that like can hit a respectable number especially if Nightrose is your Vanguard!
- Mick the Ghostie and Family: A once restricted card that still has uses if you can incorporate it into your deck. Mick is useful because it can be revived, give a 10k buff to a unit, then sent back to deck. With cards like Negrobone, Colombard, and Zarzan it is very easy to call and retire Mick. However, Mick is still a 5k shield and stand triggers are questionable in their effectiveness since you attacks are generally streamlined to account for Criticals being hit on your drive checks not stands. If you want to run Mick for the power and deck replenishing option can but keep in mind how it will affect your trigger consistency and overall what benefits it really brings to deck!
Protect Gift
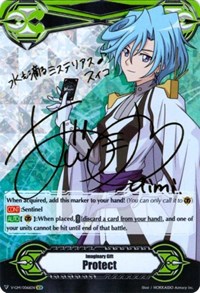
This clan in general is a Protect 1 Deck. The only matchups where you choose Protect 2 are matches where you are very hand restricted or your opponent has a lot of attacks that are of low value but wreak havoc on your hand because of the amount of attacks. This is usually games against Ezel, Oracle Think Tank, Nubatama, Aqua Force (in sone cases), Luard etc. You can also go Protect 2 if you really want to leverage your aggression but this is very greedy and usually does not pay off.
Gameplay
In this section I will just go over general game flow as it is important to have the foundation of the processes I used to make this deck. That way you can adapt and adjust depending on the matchup since you can do something for every matchup with this deck and I am proud to say that. But before we do, we have to discuss a certain concept.
The F + C = I concept (Filtration + Compression = Information) stems from the fact the fact that when you filter or draw cards from your deck you compress your deck thus the information of what is in your deck can by defined by the cards in play. This is most obvious when you use Negrobone on your 2nd stride Bad Bounty turn to build your board. Your last X cards are Bones and after drawing and filter what are the cards that you may drive check.
This “equation” is applied throughout each game with this deck since you have control over how fast cards come out of your deck and you draw those cards so they are not “wasted” in the early game. When the stride phase starts you filter your deck by 5 cards then compress it further by drawing. This is the embodiment of F + C = I. Keep this in mind as you go through this section!
Opening Hand: In terms of how you start the game you ideally want to end up with a Nightrose, a Colombard, a grade 1 ride, and 2 vanilla units. This hand is the most optimal and generic since you have access to the Zarzan engine and pretty hefty shield if you need to guard. However, as long as you see a Colombard and can ride up to G2 while having 1-2 vanilla units that is still a solid hand to start with.

Grade 1 Ride: There really isn’t much variance here. The only important things to mention are if you are going second and you need to damage deny your opponent, mulligan for a lower base G1 like Tear, If you don’t need to just attack and if you can’t just pass turn if you need to since it’ll equalize during your G2/G3 turn, and If you are going first and your opponent doesn’t attack on their G1 turn you have the option to not ride and just attack their vanguard to force them into a weird situation as stated before in Colombard’s section.
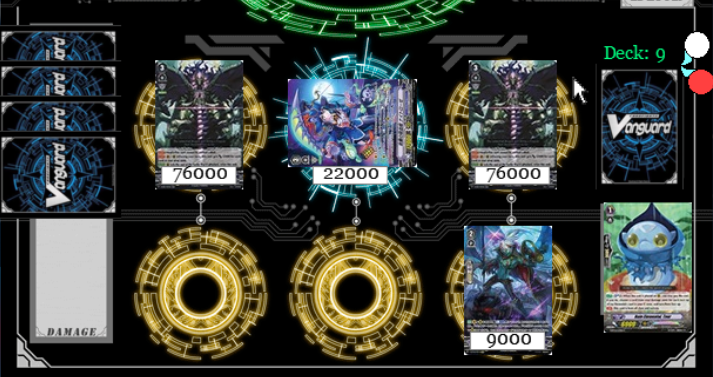
Grade 2 Ride: This turn is arguably one of the most important turns on the game since your G3 turn is just an extension of this turn.
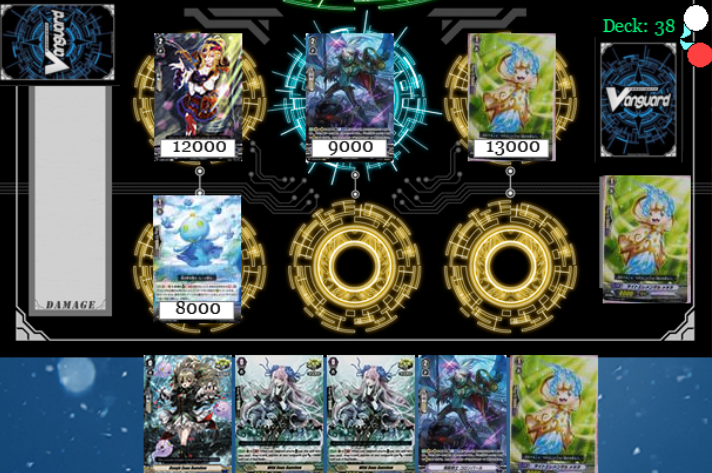
This is just an example of the how your board can look like if you are able to trigger Colombard on your G2 turn. If you have Wild Seas Banshee you can even call her to make your Vanguard bigger and refuel your soul.
In terms of placements of the vanilla unit, if you are looking to be very aggressive you can do the above example as it is an effective formation especially if your opponent doesn’t hit triggers defensively.
If you want to have 2 value attacks, place a vanilla behind your vanguard to really force a 15k shield for both attacks.
If you need to damage deny your opponent you can call the vanillas to the back row as well as Zarzan to setup for next turn or just forgo Zarzan and fetch Ripple Banshee for the draw. If you are doing this setup with Zarzan ensure Zarzan isn’t behind your vanguard so on your G3 turn its easier to retire and reuse Zarzan.
Grade 3 Ride: There are times where you have a very luxurious hand so to say where you can give up the first stride but have an amazing G3 turn on Nightrose. This is usually when you can ride another G2 for your G2 turn and save a Colombard for your G3 turn since all units are 5k bigger and you are able to abuse Zarzan offensively.

If you ride any other G3 other than Nightrose its not that bad its just more linear since you have to rely on Zarzan and if you can’t get Zarzan off either you are zero damage which is also good or you didn’t see Colombard which means you are having a very mediocre turn.
If you have to give up your first stride you can have the above field entering battle phase. From there its all based on what’s in your hand or drop to decide what you are calling during the battle phase. Normally a booster behind vanguard to ensure all your lines require 15k shield or more to guard and you are going to attacking at least 4 times on your G3 turn. Whichever units you call, whether it be Zarzan for aggression or draw cards like Ghost Ship and Ripple Banshee, understand that you G3 turn will be very aggressive and will leverage your advantage. Be mindful that you will be at lower damage for the most part so make sure your hand is still stable enough to survive.
First Stride: Your first stride is Big Obadiah 95% of the time and is your setup for your 2nd stride kill turn. The odd 5% is when you have a really good early game, crit sack, and have the Zarzan loop engine ready.
Your 5 targets for Big Obadiah varies depending on the situation but the general drop-zone you want to have at the end of your first stride and/or going into your 2nd stride are the following:
- Tear
- Nightstorm
- Negrobone (Important to at least be able to get 2 into drop before your 2nd stride)
- Undead Dragon(s) (2 is preferred)
- Rough Seas Banshee (G-series) (not a high-priority target unless you need soul)
- Raging Seas Banshee (a decent staple mill to fill your soul during your battle phase this turn)
- Greed Shade (to be able to hand fix or fetch Nightmist for a Bad Bounty Breark Ride)
- Nightmist (G3) (for the Bad Bounty Break Ride)
- Ghost Ship/Ripple Banshee (this is for the first stride, as long as you have a way to draw at least 2 additional cards during your first stride this role can be fulfilled by these cares or your critical triggers)
Generally you will have a minimum of 4 calls, if not 5 calls, during your first stride if you were able to use Zarzan. If you were not able to use Zarzan in the early game and can only call 2 your safest 2 call targets are Nightstorm and Ghost ship as they provide aggression and draw OR you can do a call a Zarzan and Nightstorm to be able to build a board and generate aggression in exchange for drawing 1 less cards.

If you are able to call 4 or more units generally it is Nightstorm with a draw card then a booster, which can be a draw card, plus greed shade to setup your hand.

Second Stride: Your second stride being your kill turn is generally either a Bad Bounty Break Ride turn (BBRT), a Zarzan loop turn, a combination of both (with or without breakride), or a Standard Plus turn where you basically do your your combo in standard by with an extra vanguard attack and better boosters.
BBRT: (Using the below image to describe the turn)

- Setup board by using Negrobones to revive Undead Dragons. If you need to CC use tear to account for that since you need 3 CB this turn.
- Enter Battle Phase
- Attack 1-2 are the 2 Undeads unboosted (52k and 54k)
- Attack 3 is Vanguard (apply all triggers to backrow booster behind vanguard)
- Activate Bad Bounty to CB1 and ride a Nightrose over Nighmist to activate Break Ride
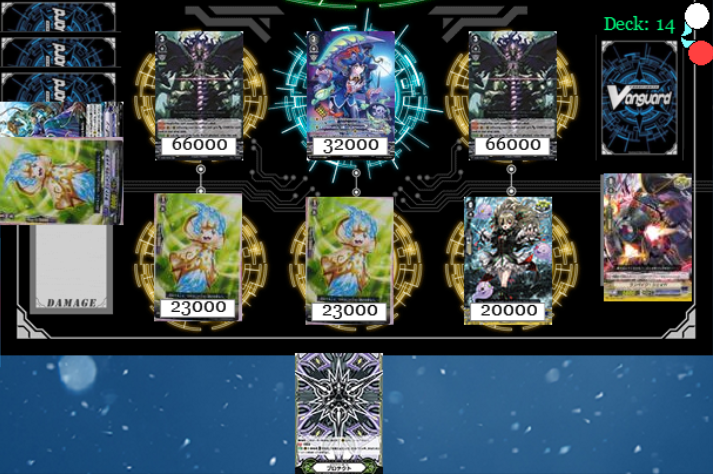
- Attack 4 is Undead unboosted (66k)
- Attack 5 is Undead boosted (88k)
- Attack 6 is Vanguard boosted (55k plus the triggers you got from Bad Bounty)
- Use Nightrose’s skill to revive a Undead + Colombard column then use Colombard to call an Undead to the other open rear-guard. Apply all triggers to the remaining booster (total of 2 CB used during this)
- Attack 7 is Undead without boost (65k plus any triggers you placed)
- Attack 8 is Undead with boost (90k with any triggers you place)
Zarzan Loop: For this combo we actually have a video I made awhile back to showcase the power of the Zarzan engine!
This video does have power counters to help gauge the power levels. You can of course extend this more with Nightmist but for the general idea of the loop this video covers it!
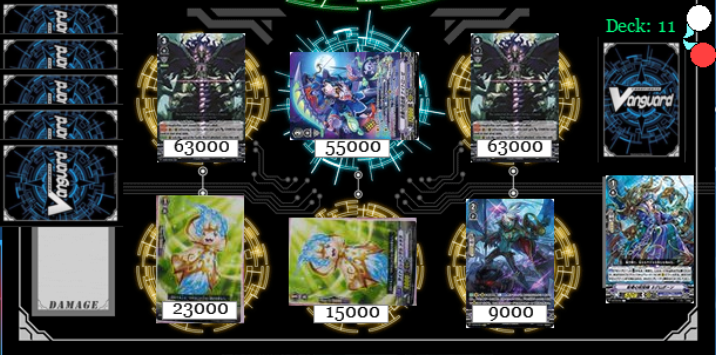
Standard Plus: This is generally just 4 Undead Dragon attacks. Essentially think of the BBRT without the Break Ride if you want an example here is a gameplay in which this is showcased.
This is of course a standard deck profile as well 😉 The end game is shown at 27:58 and at 36:59! In premium this is better since you have bigger vanilla boosters and 2 vanguard attacks as opposed to 1.
Hybrid Turn: This turn when you incorporate the Zarzan Loop and the Undead Dragons can be dont with or without Nightmist you just have to exchange at Undead with a Nightstorm at during your main phase setup on your 2nd turn Bad Bounty! From there you use Nightstorm to call Zarzan and rebuild your board with Vanillas then use Nightmist’s skill to revive 2 Undeads upon Breakriding. Its the first half of the Zarzan loop mixed with the last half of BBRT and vice versa you can do it the other way around. It really is all just dependent on the about of resources you have.
Third stride?: If they survive your 2nd stride turn and you somehow survive theirs your 2rd stride is generally either Immortal Galleon (GB8), Megiddo if CB permits, or you don’t stride and just play standard since your deck is low. Generally speaking, your third stride often doesn’t come because you either win or lose before then unless you are against hard control. The amount of aggression you can output is insane now.
Bad Bounty VS. Megiddo: As you can see with how much power Bad Bounty and how fast and consistently it can do an end game it makes you wonder if Megiddo is still viable. As a second stride no because its too drop-zone reliant in terms of quantity and in this build you can only ever have 4 Undead attacks on Megiddo at best. Compare that to bad bounty where 4 Undead attacks is its typical outcome while 6 is the best outcome. Bad Bounty is more “piece reliant” but it also gives you the freedom to mill whatever cards you want on your first stride as opposed to Megiddo forcing you to prioritize Undead Dragons. For the meta near and far if you can end by 2nd stride you should.
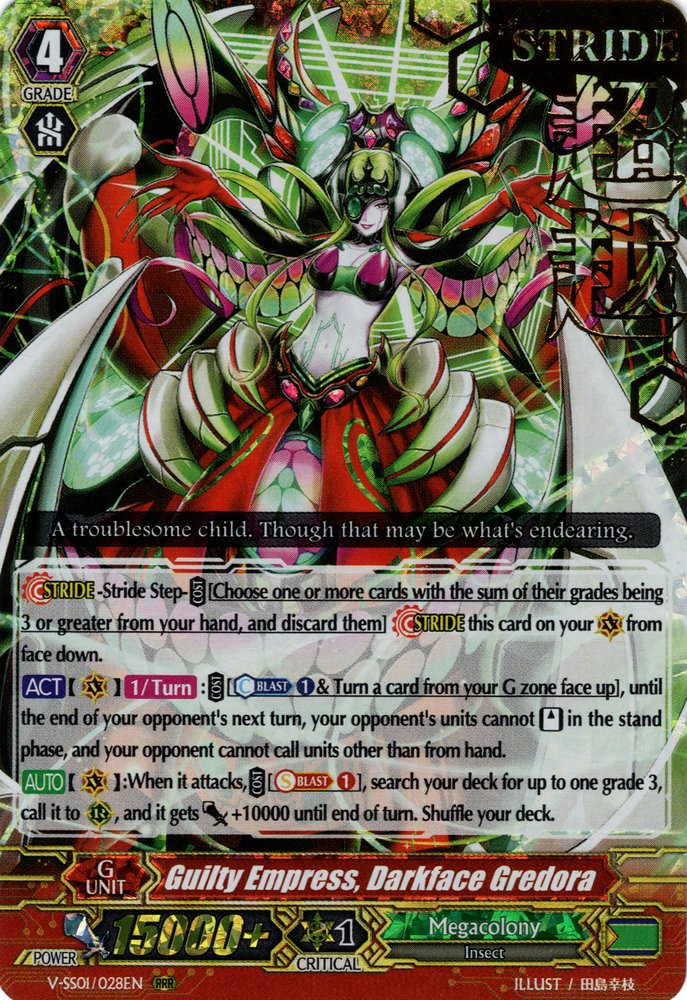
Matchups: Gredora


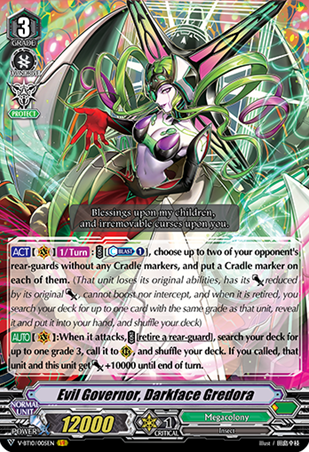
This matchup is arguably one of the hardest because Gredora locks us out out of our revive mechanic but with some new tools we can make this matchup so much easier. It will still be skill based but you have far more input that before.
Early game: The early game for Gredora is still fairly linear but you want to get your Zarzan engine going for two important reasons. It lets you build board and apply aggression and flip up Cycloneds because Cycloned is the “counter” to the Cradle mechanic.
The Cradle mechanic removes the original ability of the unit it is attached to thus making it a Vanilla and thus able to be buffed by Cycloneds!
It is best for you to call triggers to your front row with Zarzan so that if units to get Cradled it will be G0 units. This may seem counter-intuitive because in Premium there are very valuable G0 units but most G0 units are impactful during stride phase. In this matchup you want to fight for the first stride which you 100% can since you have a better G2 game with Zarzan. Therefore, if they Cradle your G0 units they are less likely to retire it early because they want piece units out of their deck not necessarily triggers and they are less likely to damage deny by hitting them because they want those G0 searches later in the game!
IMPORTANT NOTE: Once a unit has been Cradle try your best to not call over it because it’ll become an valuable vanilla attack later!
[discard a card from your hand], draw a card, and if you discarded a grade 3 for this cost, choose one of your opponent’s rear-guards without any Cradle marker, and put a Cradle marker on it.
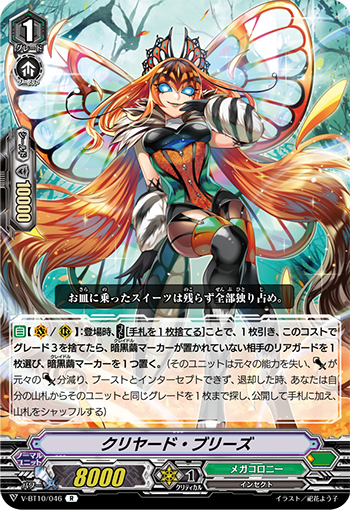
Damage denying Gredora doesn’t have much value to it. Their “draw” comes during their stride phase and the faster you can end the game the better. All their Cradle making units are in the G3s with the exception of Clear Breeze which is not really CB reliant and no other Cradle making units are really ran that are that impactful.
Depending on the Gredora deck you are fighting they may have cards that rest, they generally don’t but if they be a cautious and time when you call over units so they don’t get defense cards during your offensive turns. However, since most Gredora decks don’t focus on resting, the main reason why having having G0s cradle is a good thing is that once striding starts you can move them to the backrow and keep them there until your Bad Bounty turns. Knowing when to boost and rest your rears is crucial in this matchup since they wont be standing again once they are rested during the striding phase.
Now the next topic we have to discuss what to do for either Gredora. Generally its easier if you see the V-series Gredora since you still have access to both your columns but if you see the G-series Gredora that is a harder since you have to make your plays more convoluted. The use of Zarzan is what can help answer this. As long as fill up both your side columns with units you should be able to stabilize. Usually, they can’t retire outside of V-series Darkface and that only appears in the battle phase since that is when it is best utilizes along side V-series Cyclomatooth.
Stride Phase: As much as possible fight for first stride. You have the aggression and engine to punish and force the Gredora player to ride up. If you brick and cannot fight for first stride try to NOT RIDE NIGHTROSE. You don’t want your units to retire since it can trigger Cradle and empty your board which is the last thing you really want to do without enough information. If you can figure out if they run don’t run G-Gredora then you can ride Nightrose. This is just a precaution just in case and there really is not a difference in terms of outcome since you want to keep your units on your board anyways since the drop-zone is essentially locked out for 90% of game.
The 3 main cards you filter with Obadiah
If you have the first stride Obadiah your main goal is to filter out any cards that either are only active via drop-zone revive or cards that is too attached to the drop-zone in terms of functionality that it has no other purpose. This is to compress the deck to cards you want to see. You want to see Vanillas since they are glorious attackers and is a saving grace against this matchup, you want to see G3 units since you have to ride every turn so you can attack with your vanguard, and you want to see good shield value targets like Negrobone since its a 10k shield. If you have to though you can mill Negrobone if you already have the three listed cards out. This is one of the few matchups where you want to filter Greed so you can get a card to your hand.
On this first stride try and build a board revolving around vanillas. If you don’t have a column locked do the regular first stride Obadiah that pushes aggression and draws! Just ensure have backrow boosters in each column AND they are not rested. This is important so during your Bad Bounty turns you have attackers you can just push up from the backrow that can still hit even if they are Cradled. By the end of your first stride ensure you have 3 faceup Cycloneds. Do this by using Zarzan 1 more time or using Greed to fetch Tempest Sphere! This will save your Bad Bounty Turns.
This stride is why we have to play so weirdly, being able to deny all forms of calling outside of the hand is insane. This is also why you can even call heals down since for 90% of the game they wont be active as long as they keep striding this card. Its overall pressure is average but the fact that we are crippled is why this matchup is very skill based. Either you can manipulate your board to and your hand so you the best chances to draw vanillas and shields while not having to constant replace your board and giving cards or you lose because they just are too far in the lead in all places from resources to hand economy. This is a tightrope walk to say the least.

After your first stride you will always be using Bad Bounty. The only time you ride Nightrose off Bad Bounty is when you run out of Undeads or can push for game and you require the 5k power boosts to your rearguards. Otherwise, you have to maximize your 2 Vanguard attacks each turn while having maybe 1-2 rearguard attacks that are base 15k power. This depends on the opponent’s damage and hand size but generally you don’t attack with more than 1 rear guard unless you know for certain they have at least 2-3 of their PGs out so that way you force the last couple with the Vanguard attacks if not then a lot of shield then your rearguards are there to depend 5k shields at base power. In Premium it difficult to generate a 5k shield at times since yes older G-era cards exist in decks but so to V-era cards. You basically force your opponent to sub-optimally guard.
This matchup is between the skills of 2 pilots and seeing which one is luckier and better at the grind game. Since when it comes down to it, you can have a lot of input on your calls and field state but if you get those critical triggers you just force more guard and pressure.
If your opponent damage denies you for whatever reason and you can’t Obadiah or Bad Bounty on your first stride you can also use Cycloned and be a bit cheeky since if you check a vanilla unit you stand a vanilla rear guard.
Matchups: Dark Irregulars

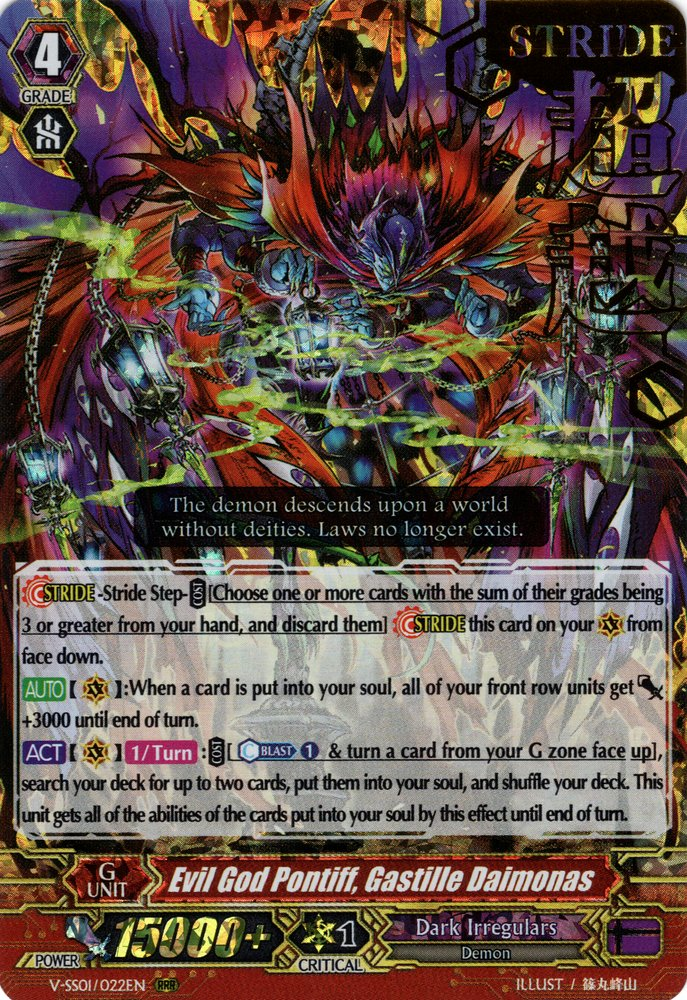

This matchup is also skill based but is either a glorified game of chicken on who can blow the other out of the water faster or a waiting game for you. Thankfully, unlike with Gredora, we have access to our mechanic again.
Early Game: If DI goes first, damage deny. This is to prevent them from getting their early SC engines like V-series Yellow Bolt and V-series emblem master from triggering. If they don’t ride and give you damage immediately get the Zarzan engine. In this matchup you do still have the better G2 game. If you can push them to 3-4 damage and get first stride you can setup defensively and can easily live their next turn.
IMPORTANT NOTE: Always leave your field empty so that if they can’t use Brufas during their stride turn. Brufas is a mandatory retire of a rearguard. Yes this means their own if your board is empty which they cannot do if they want to maximize their NLK turns.
There are cases where you can give up first stride but that is when you can use Zarzan during your G3 battle phase and your opponent is at 3-4 damage going into your G3 turn. From that range you can blow them out and win. Be aware of the situation and accurately judge the power of the Zarzan engine in that moment.
If you cannot early game and your hand not optimal or going first and can comfortably bid your time keep them at 2 damage. This is the alternate way of fighting DI in which you can damage deny until you get to your stride. If you can always have heal priority and get to your second stride. You can fully end the game from 2 damage since DI don’t have a strong hand to begin with unless they prepared in advanced and rode Bladewing for extra shields.
Damage denying also means using the Colombard + Zarzan Engine but not using it for aggression but more so for scaling. Getting more Cycloneds faceup just boosts your power. If you see that being aggressive will have a better outcome and you have the means to apply that aggression then do it.
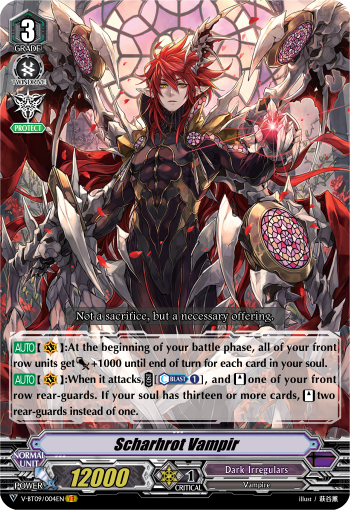
Stride Phase: Your whole goal is to either end them on your G3 turn or First Stride or bid your time and win the game 2nd stride with massive numbers. It is still important to discuss surviving their first stride which usually their kill stride.
Assuming they have 3+ damage they can already to an effective end game since they only need 3 CB to have an optimal Gastille stride turn and they have their really consistent SC and CC engine to refund and CB they used in the early game. Generally in this turn there will be on average 3 Vanguard attacks all at relatively high numbers (around 50-60k) or 2 massive attacks with their last Vanguard attack being a card that restands units. The amount of rear-guard attacks they have varies and depends on if they hit a stand triggers or using standing skills and are able to weave Enigmatic Assassin in all those attacks. Generally around 4-5 with Enigmatic and if they use cards like Scharhrot or Number of Terror to extend 6-8 attacks.
Essentially, be at 1-2 damage at the end of your first stride and hope you have enough shield and defensive trigger luck to survive their turn. If you do you win. Since a 2C vanguard is usually not an issue as long as you deny Brufas you can NG the first 2 Vanguard attacks and solely focus on blocking the rear-guards since those are objectively easier to block until they reride into a Scharhrot Vampir it which case the last 3 attacks are equally massive. Always check their soul at every stage of the game so you can prepare accordingly and guard early in a way where your valuable shields are still available to use against their first stride
The DI player being at 1-2 damage is most ideal since if they run Heat Elemental, Bobo it still costs them a card from hand to be an a better damage but you are making them work for it. If you are doing the slower method keep this in mind. Either method you choose you have to prepare to survive their first stride.
Piloting & Deck Building
To wrap up this article I just want to give a few tips in term so piloting and deck building since they go hand in hand where if you are good at one its because you are good at the other.
When deck building do not be afraid to build outside of the “normal” that the majority accepts. To me this deck build is the best I can offer right now but it can always change. Be open to removing cards that are now less optimal (ie. me removing Grenache). If you are looking to get into competitive in the Premium format its best to have this mindset. This clan is one of the most volatile clans because to “solve” this clan is only a means to represent your answer to the meta and matchups you fought and tested against. There is no wrong build as long as you can justify it and grow from those choices.

In this clan card ratios actually impact the deck significantly. Running cards at different quantities can make or break some engines and your overall performance with the deck. We are the clan that specializes in drop-zone manipulation and deck filtration. That is a factor that I believe most people tend to overlook. Yes the deck’s RNG can be “manipulated” by running more copies of X card but that doesn’t take into account how much the RNG changes when you filter your deck. Your 2-of cards can suddenly be way more consistent because you draw so much or you took 5 cards out of the deck on your first stride.
When piloting a Granblue deck in Premium its best to actually go “cookie-cutter” to start with. Understand why some decks are built the way they are even if their are not as optimal or more optimal compared to other builds. You can easily net-deck someone and do well with the deck when you memorize combos but what happens when a new meta deck is discovered or what happens when you can’t do your combos because your opponent outplayed you by denying you damage or by indirectly affecting your turn because they paid attention to your hand and forced you to guard with valuable cards?
These intricacies are learned mostly through trial and error but you really only understand them when you can build a deck for yourself and understand how that deck can fight with the meta. How a 1 card change can suddenly make the deck exponentially better (ie. Zarzan) or how a single card can provide you with a lot of extra aggression (ie. Nightmist).
Once you start to go deeper into things like opening hands or card prediction by counting what units are in play or by recalling the last 5 cards that were taken from deck and in your head calculating a rough percentage on the chances the next card with be X type of card, then you begin the depth of this clan and how painful, fun, and never-ending deck building is. In turn also making piloting any deck ever changing.
If you actually read this far thank you. I hope you enjoyed this and this will be out in a video format as a part of the “2020 Granblue Encyclopedia”.
I hope you took what you can from this article, thank you for reading!
Welcome to Granblue Premium~
CrieTEXe

One thought on “Premium Nightrose – Masterclass Dive”