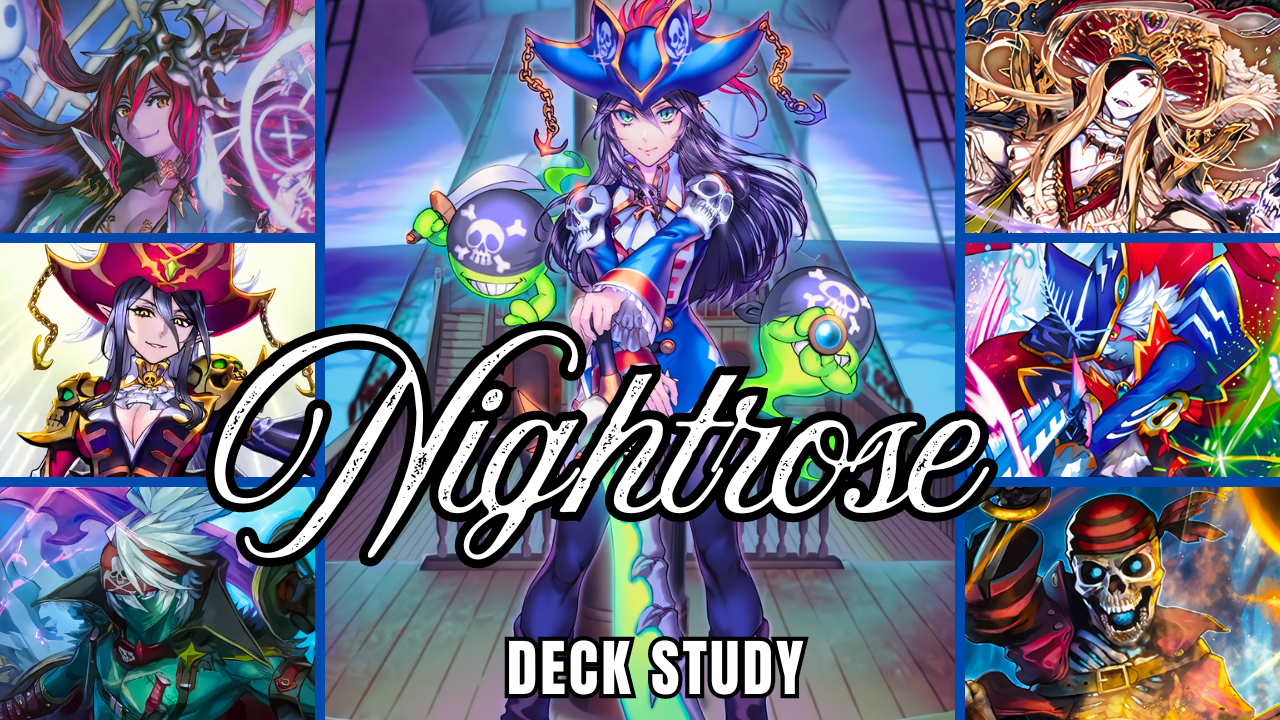
Hi amigos, it’s time for a deck study type of article! Let’s dive into Nightrose Premium for the BCS 2024/25 season! This includes current Nightrose and Crest support suggestions.
As the season progresses, I will update this article with anything extra. So keep it bookmarked! This is a BIG article. Use the table of contents to navigate through. Continue off or refer back to it when needed. Enjoy! (Last Updated 11-28-24)
- Nightrose’s Play Style
- Typical Card Ratios
- Basic Go-To Plays
- Other Key Plays
- Sample Deck Lists
- Metagame Matchup Tips
- Additional Resources
- Credit and Support
Nightrose’s Play Style
Let’s cover the Winning Image/Big Picture for the deck.
Strengths:
- Revival mechanic (reuse cards and build ideal field setups)
- Multi-attack (both Vanguard and Rear-guards)
- Build hand advantage both in quantity and quality
- Can search for ANY card (Obadiah, Colombard, etc. )
- This includes techs like Honoly, Enpix, etc.
- Disruptive plays (Negrolily and GB2 combos)
- Retire with Cannoneer, restrict the number of attacks with Honoly, etc.
Weaknesses:
- Slow start, it needs key pieces in the drop zone as soon as possible
- Deck out can be an issue (can be mitigated with practice over time)
- Counterblast (CB) heavy
- High dependence on Countercharging (CC) with cards like Grenache, Waterspout Djinn, etc.
- Guilty Empress, Darkface Gredora
- Narukami binding (mitigated with Ghoul and Belle)
- Grindy mirror matches 🙂
Overall the deck has a lot of strengths that it can rely on consistently. Making it one of the top decks of the current metagame. Most of the weaknesses aren’t as major since there are ways to mitigate them with either practice or tech choices.
Typical Card Ratios
Grade 3 Lineup
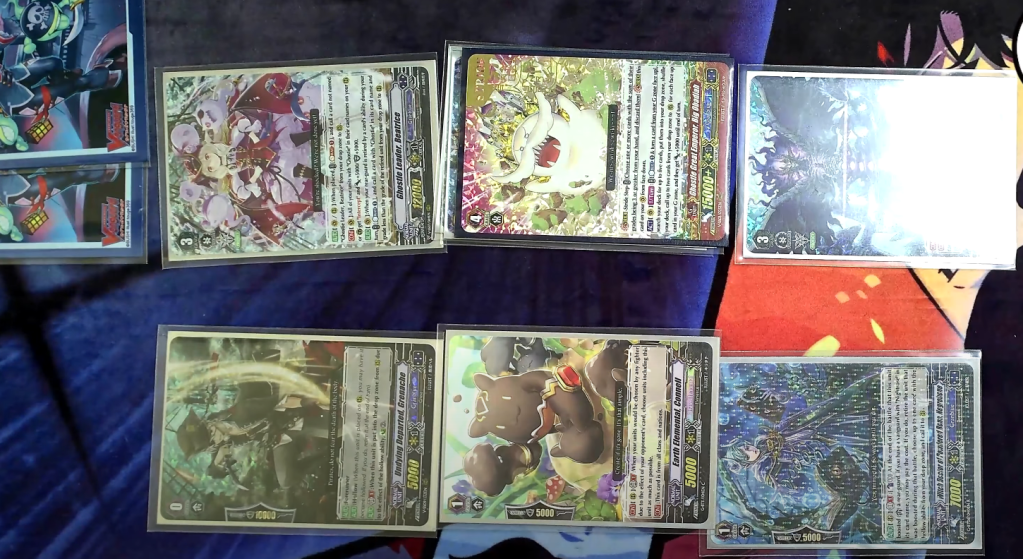
The Grade 3s (G3s) are pretty straightforward. Starting off with our early go-to Vanguards, they are G Era Nightrose and Beatrice!
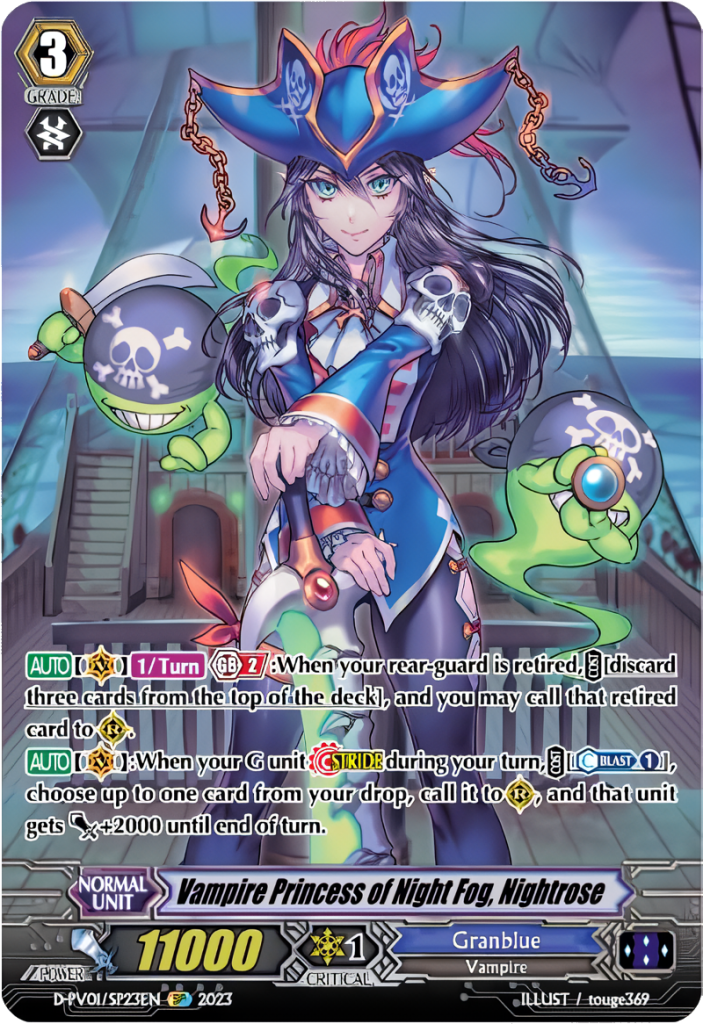
Going first, we want to capitalize on G Era Nightrose because we can Superior Stride into Bandit Rum! Typical ratios of Nightrose G are 3 copies. The breakstride skill can come up from time to time, but it depends on the game state. Usually, we want to preserve the CB for a battle phase revival.
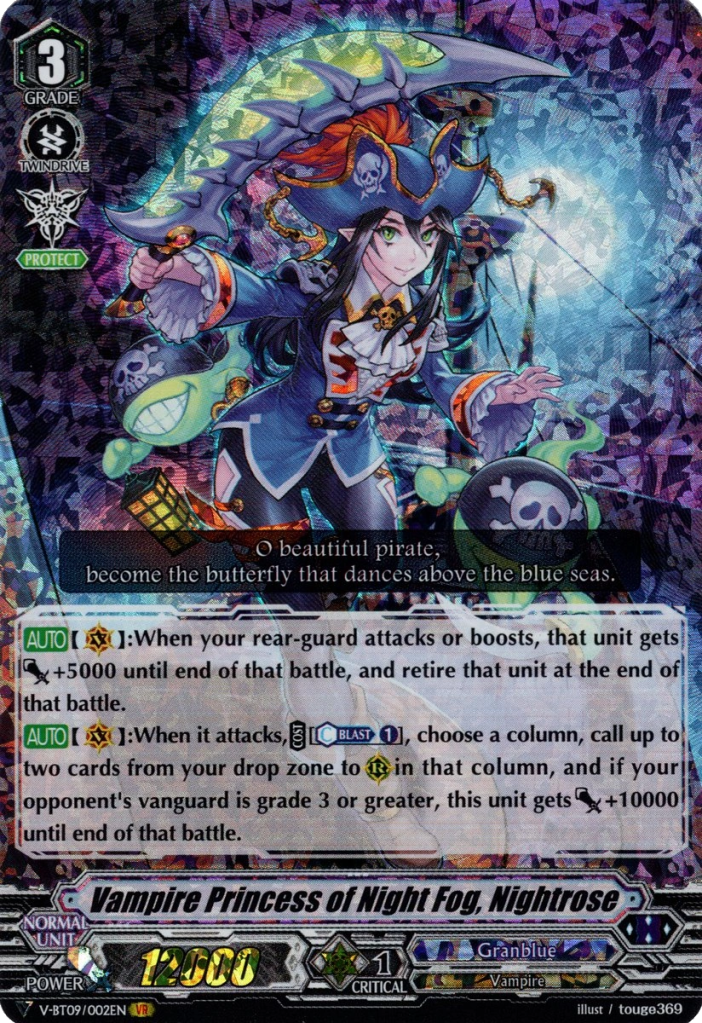
Bandit Rum helps give us 2 Protect Gifts, usually, we go with Protect I. These are 2 cards for extra hand size and are Sentinel. These can also be used against matchups like Shiranui and Chaos where they can fizzle.


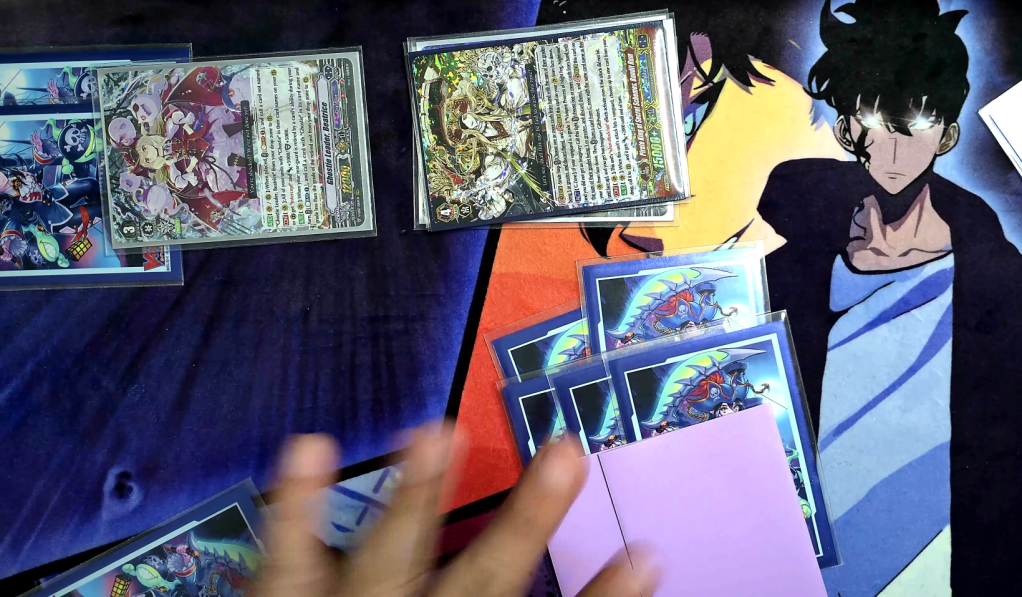
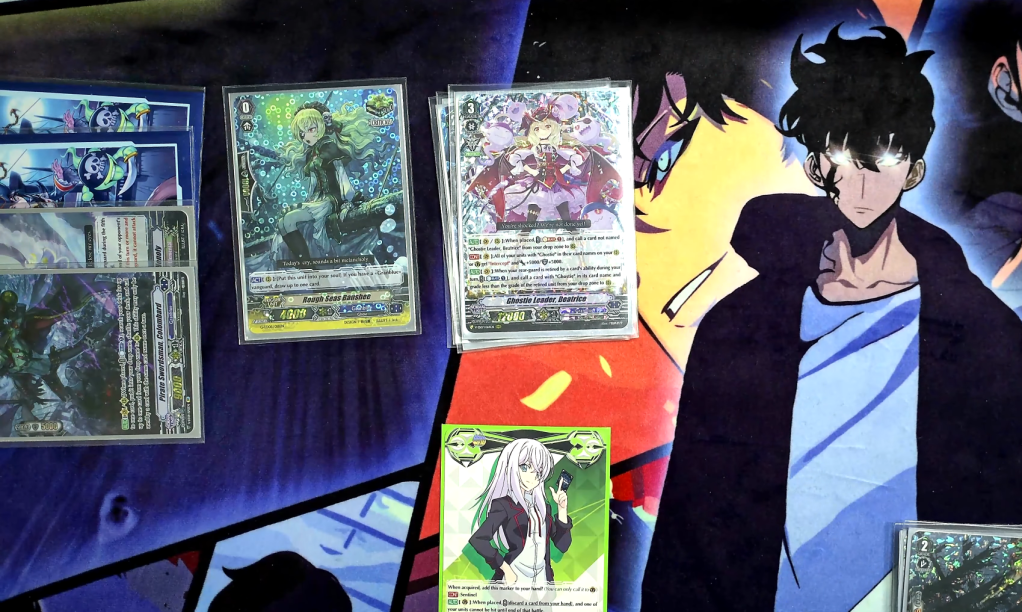
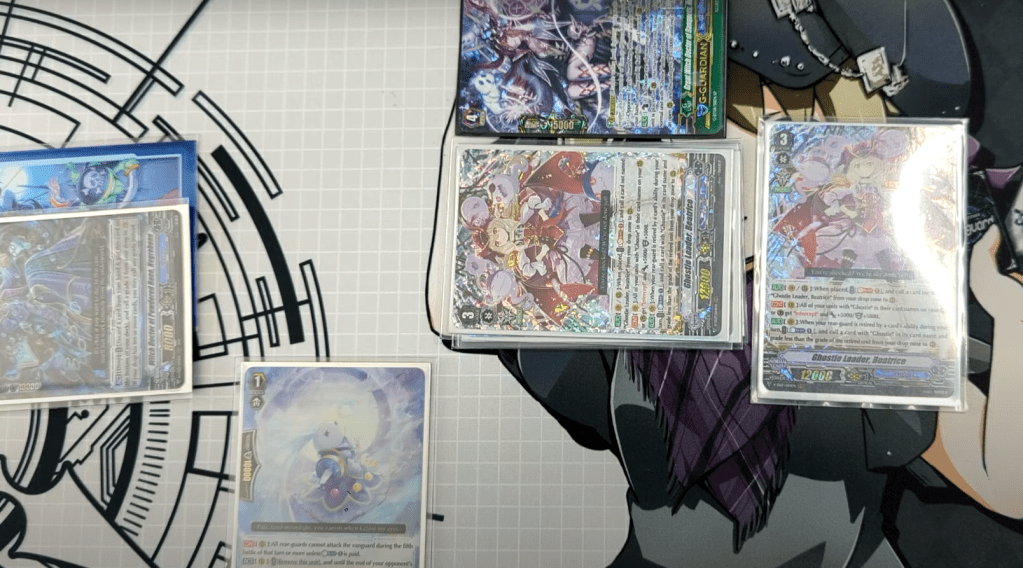
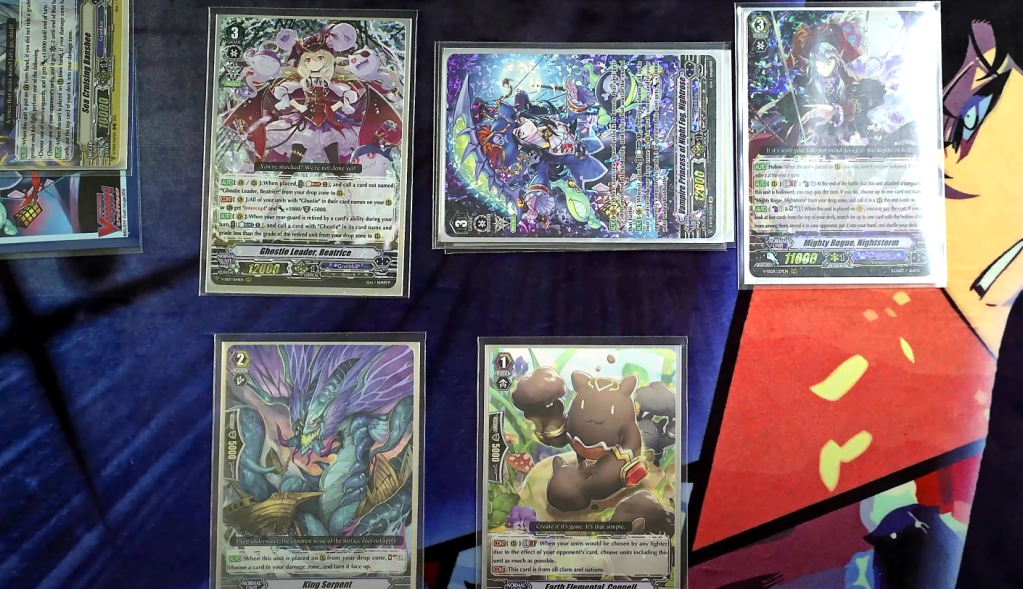
Going second, we can capitalize on both Beatrice and Obadiah. Beatrice is typically played at 2 copies. With Beatrice, we instantly get 1 Protect Gift and a revival!
Cards we typically revive with Beatrice are:
- Utility – Greed Shade/Colombard/Grenache
- Draw Power – Rough Seas/Wild Seas Crits
- Beaters – Ghost Ship/Skull Dragon
- Tech cards – Enpix, Honoly, etc.
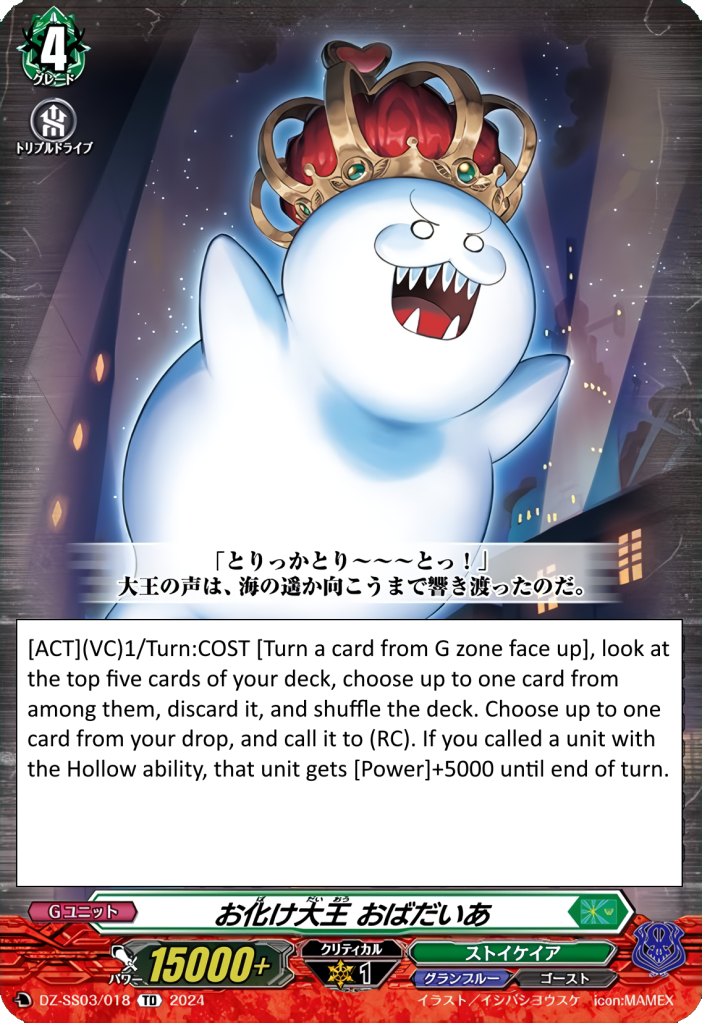
Furthermore, Obadiah will let us fetch 5 key pieces we’d like to use and set up for:
- Utility – Greed Shade/Grenache/Jesse/Enlargulv
- Field Setup – Forbidoll/Negrobone
- Beaters – Ghost Ship/Skull Dragon
- Attack Extenders – Nightstorm/Riveting Franche/Beatrice
- Other – Cannoneer/Honoly/Enpix/Nightrose V/Ghoul/Belle/etc.
Both Bandit Rum and Obadiah turns typically have 4-5 attacks. Both turns can create hand advantage while still applying pressure.
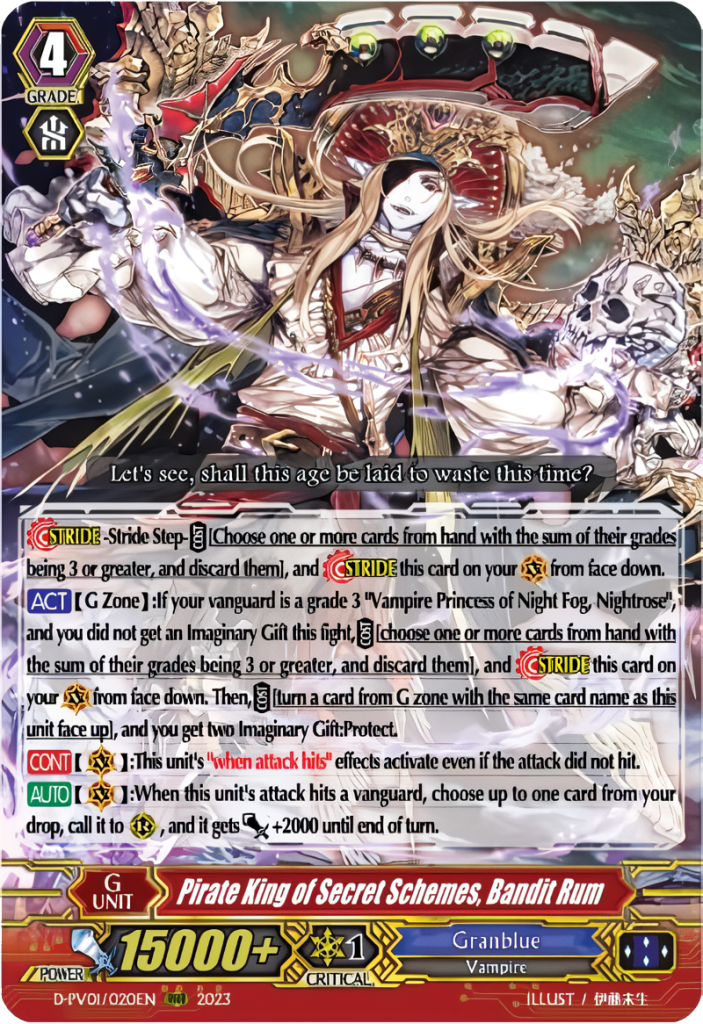
The following turn, we can apply more pressure with the Bad Bounty stride.
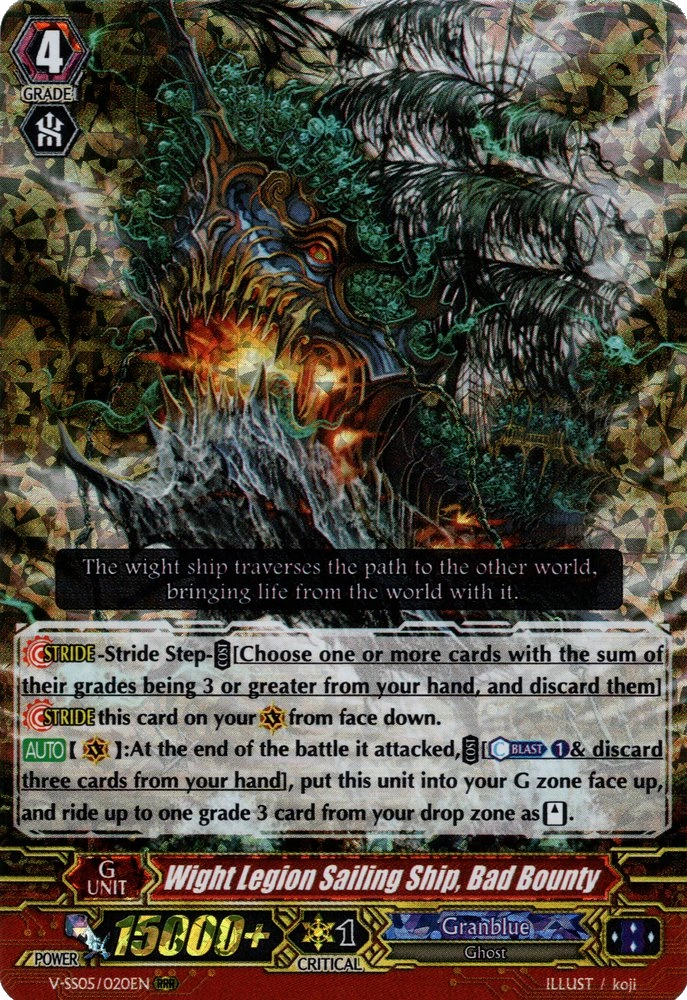
Often we reride Nightrose V to help extend more attacks where we can revive cards like Skull Dragons, Nightstorm, Beatrice/Colombard. Nightrose has a Continuous skill that gives all Rear-guards an extra +5k.
We play 1 copy of Nightrose V since we’re already playing 3 of the G Era version. Remember, you can only have a total of 4 copies of a card with the same name.
You can also reride cards like Beatrice and Nightrose G instead. Typically, those are chosen if you don’t have enough CB or a Nightrose V isn’t available in your Drop zone. You can also reride Skull Dragon. That choice arises in the Megacolony and Chaos matchups due to the inability to call more Rear-guards.


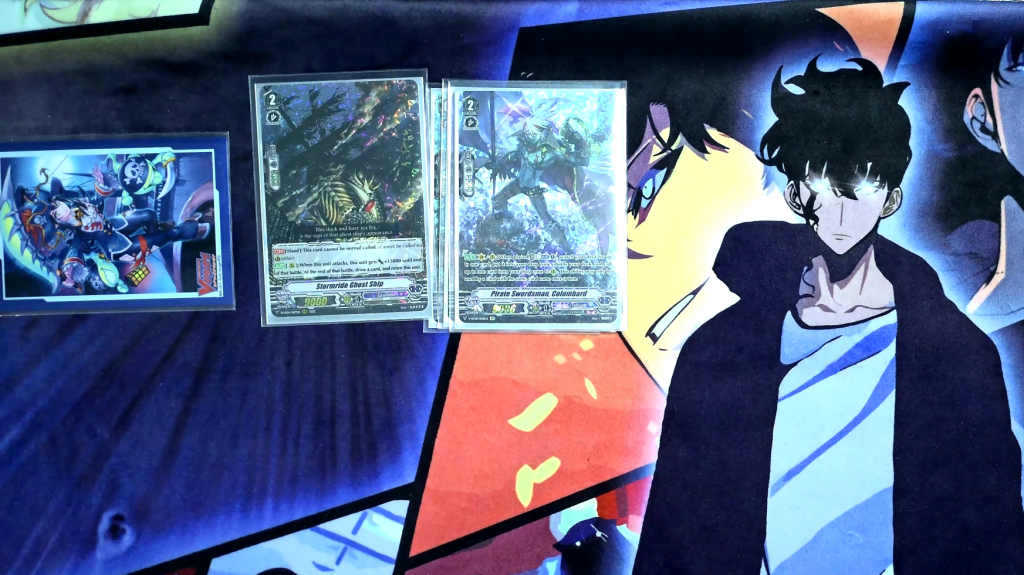
We’ve briefly mentioned both Nightstorm and Skull Dragon! 1 copy of Nightstorm is enough but be increased to 2 if you play a Crest variant build. Nightstorm is typically used to attack extend while then Beatrice/Colombard extend more since they have on-place skills. We also want to be cautious of using too much CB.
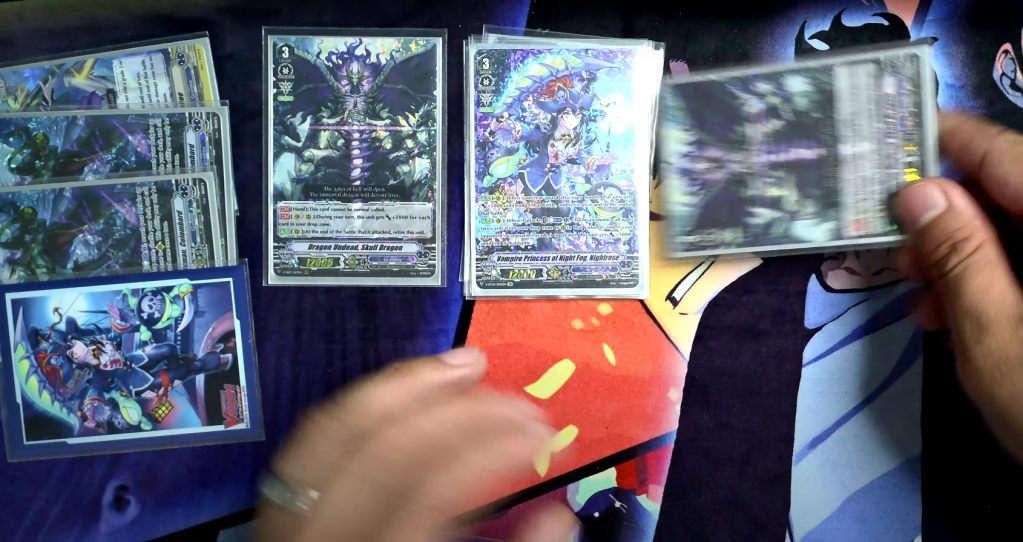
Skull Dragon is literally a beater we spam. 2 copies is enough. It self-retires at the end of the battle it attacked. It can be revived quickly by another Rear-guard or Vanguard skill. In the late game, this card easily scales to 60/70k power levels. It’s really annoying for the opponent to deal with. 🙂


Both Forbidoll and Enlargulv are at 1 copy. These can be fetched by Obadiah. Enlargulv can be called to RC. Then grab Forbidoll from the Drop zone. Then set up your field to have Nightstorm/Beatrice/Skull Dragon depending on the game state. Literally, you deck thin 7 cards on the Obadiah turn.
Forbidoll can also be used later on for easy main phase setup on both Bad Bounty and Bartholomew turns. You can use Enlargulv to grab a Beatrice and call it to RC. Then you can superior call a Skull Dragon or Ghost Ship. Enlargulv can also grab G3 Heals to help with defensive quality. Especially if you need to G Guard against a certain matchup.

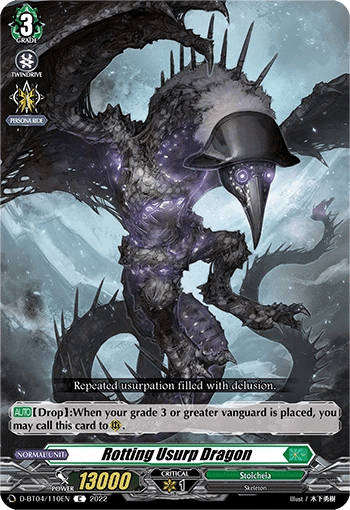
Technically Sea Cruising Banshee is a G3. In typical builds, we see 4 copies of it. Mainly because it helps us survive against aggressive decks in the early game. As well as stride fodder or reride target against Megacolony.
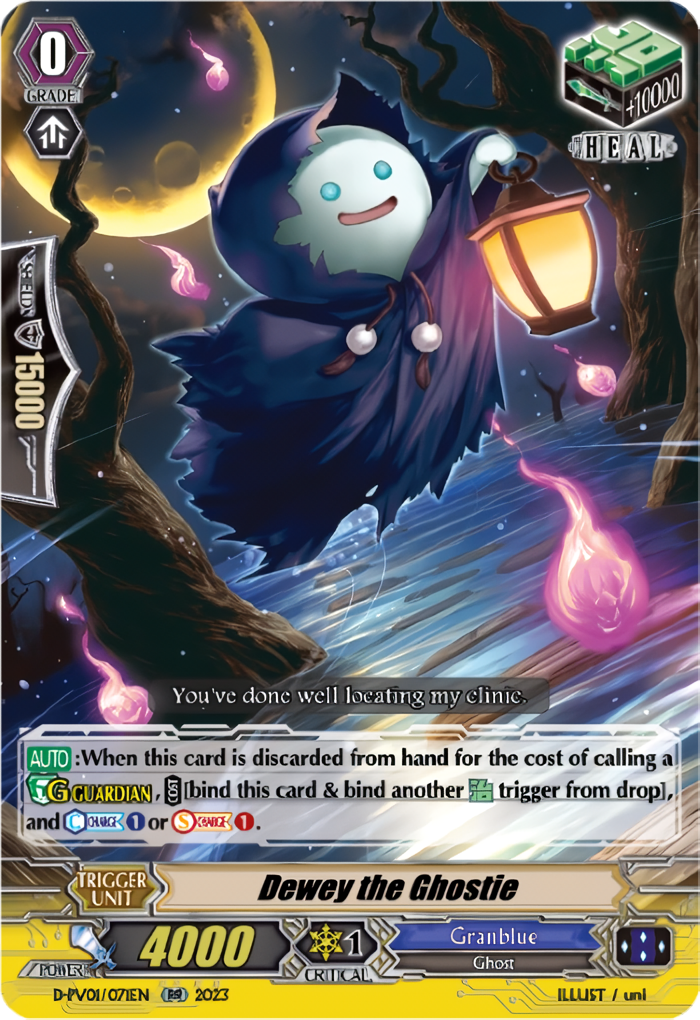
Dewey can help with CC and has been seen 0-1 copies from time to time. It’s more of a Heal where you want to G Guard with it in the late game. Ideally, you get the CC effect in most scenarios.
Other Grade 3 Options
Depending on the use, cards like Starlight Nightrose and Negrobolt can be used in certain builds.
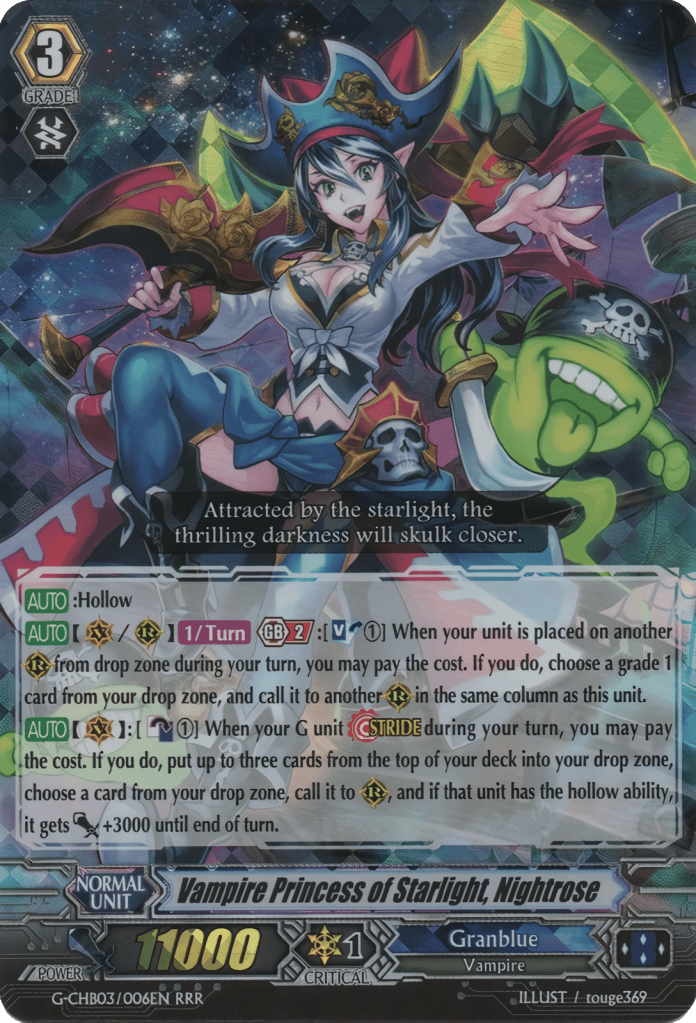

Why mention Starlight? Glad you asked! It’s worth mentioning to play 0-2 copies in a Crest-focused build. Remember the Nightrose Crest forces us to only ride G3s with Nightrose in the name. No Beatrice nor Skull Dragon. So having a 5th/6th ridable target can help with consistency and more Bad Bounty targets. We’ve also seen this in other Crest-focused decks like Shiranui where they play 3-4 Oboro and 2 Zanki.
Furthermore, if you decide to play a Starlight in the Crest-focused build, you can also play a Negrobone G. This combination gives you a Starlight Loop combo. Essentially, you can loop more attacks with Starlight reviving Negrobone G. Remember the Crest will scale in power so these attacks will hit over damage-checked triggers. It’s not as necessary anymore thanks to Beatrice now existing. So you can see Starlight as a backup for attack extending.
Negrobolt can be used as a win-con on a Bad Bounty turn. The power and extra Crit make it very threatening. Which can force a PG out, making it easier for a Skull Dragon to hit afterward. If your opponent survives, you’ll still get +5k shield extra for every 10 cards in Drop. You get this advantage for each card you guard with. Pretty spicy if you do play it, 1-2 copies.
Grade 2 Lineup
Starting off we have both Colombard and Greed Shade!


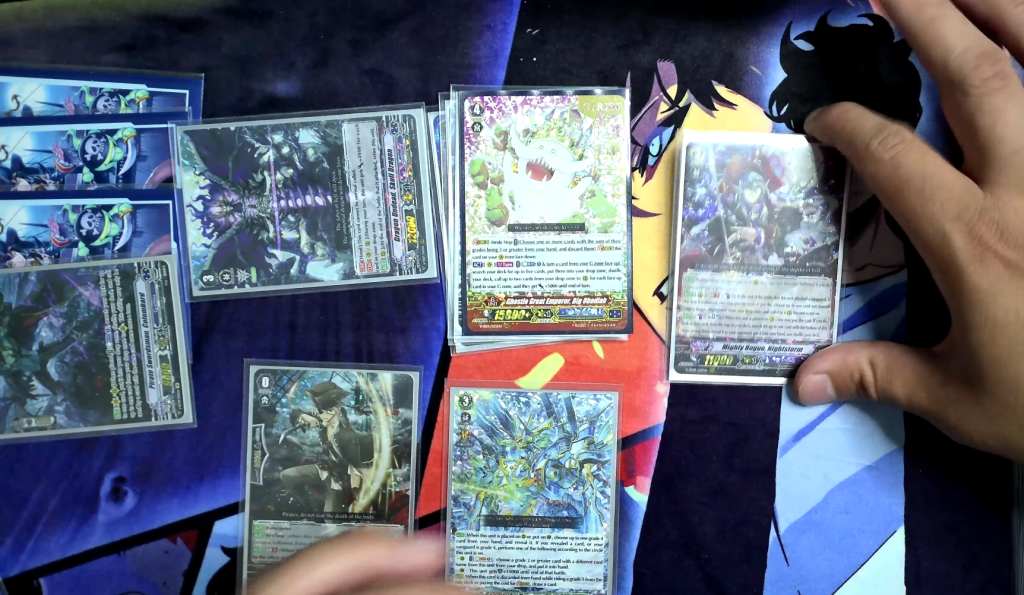
Colombard is played at 4 copies. He’s our ideal ride target and is key in searching for our key pieces:
- Ghost Ship/Skull Dragon
- Grenache/Cannoneer/Nightrose V/etc.
- Tech cards like Honoly
9 times out of 10, you’ll grab Ghost Ship on your Turn 2. Colombard can be used to help build a main phase field or attack extend in the battle phase. Do keep in mind he’s a hard 1/Turn.
You can execute a Negrolily disruptive play and revive Beatrice to revive Colombard. Why? Because you can then use Colombard to search for a Cannoneer/Honoly/Grenache from your deck and revive it. This can be a surprise for some opponents since it’s during their battle phase.
Greed Shade is typically played at 1 copy. He’s there to help fix our hand at any point in the game. It can help discard combo pieces into the Drop zone. It can also grab our higher shield cards or other combo pieces we need in hand instead. It’s a great way to recycle back into our hands with Perfect Guards (PGs) and Heals.
Greed Shade can be revived with Beatrice during her On-Ride to VC or defensively with Negrolily plays. This lets you focus on using other cards for the rest of the turn.
You may be thinking, if he’s so flexible, wouldn’t we want more copies? Yes and no. Remember that we now have Enlargulv in our deck, which can grab G2s and higher. So if we do need combo pieces or G3 Heals, Enlargulv can take care of that for us. A con with Greed Shade is that you do have to mill 2 cards when using him. Which can make the mid-to-late game not as convenient. So there’s a balance of using Greed Shade versus Enlargulv depending on your current game state.
Furthermore, more Megacolony decks showed representation during the fall/winter part of BCS 24/25. You can add more copies of Greed Shade to help improve that matchup further. Typically, you can regrab your G3s to ensure proper rerides for next turn.


These next G2s are all played at 1 copy for specific scenarios and uses. Starting with Ghost Ship, he’s literally a 24/26/29k beater that we can revive while drawing a card each time. We can capitalize on him early on with Bandit Rum and Obadiah turns to draw 1-3 cards. He can also serve as a “2nd Skull Dragon backup” when you now only have access to 1 Skull Dragon.
Cannoneer has been mentioned a few times already because of the Negrolily disruptive play. Often we force opponents to play around it so it does not actually go off as often. But again when it does come up to pop a specific RG, we use it!
Cannoneer can still be used normally during your turn to help get rid of existing cards. If your opponent leaves a Honoly onboard, you can consider popping it then.
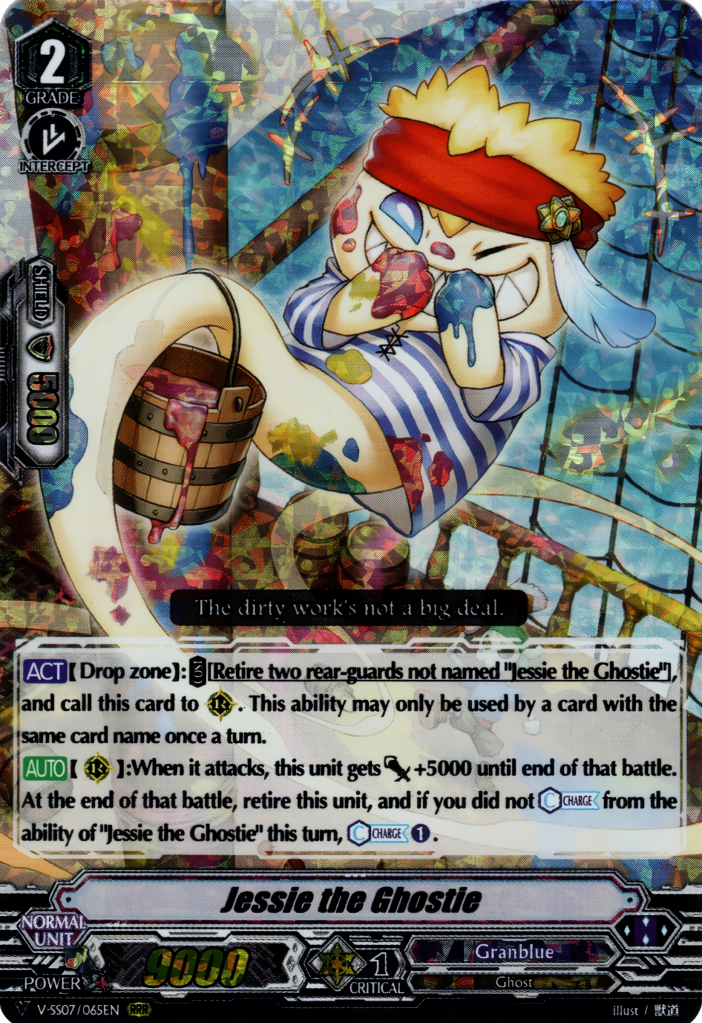
Jesse comes up where you need him to CC during your current turn. He often is the 1st attack and the rest of your attack pattern is normal as usual. We typically use his skill to revive himself so we can conserve any CB/Soul for other revivals. He can also get rid of RGs that clutter and add to the Drop zone count. This can come up on Bartholomew turns where you want to hit the 30 count.
Since Jesse is a Ghostie, if you have a Beatrice Vanguard on the Bad Bounty reride, you can extend more attacks through him:
Skull Dragon -> Jesse -> Tommy/Ghostie G0
Most of the time, he’s used to CC so that you can do your normal turns.
Enpix and Ghoul Dragon can be played at 0-1 copies depending on your current metagame. Enpix has a variety of use:
- A RG that stays on the field so that we can Negrolily (gets around most skills that choose for retire/lock/bind skills)
- This can allow us to still have access to Cannoneer/Honoly/etc. during the opponent’s battle phase
- Great against Chaos and Shiranui matchups
- Protects a front-row RG as well to prevent any locking or Dominating
Ghoul Dragon is literally for the Narukami matchup. It’s best to get him early on via Colombard’s skill so that you can apply pressure as a RG too. Then if it does get binded, you have access to it whenever you need it.
Other Grade 2 Options
Riveting Franche can be played at 0-4 copies depending on the build. Normal Nightrose builds can play 1 copy to help with a consistency boost for early game setup. And then later used as an attack extender if needed.
In Crest builds it’s recommended to play 4 copies. This helps maximize your odds of grabbing a Crest Giver before you have to ride G1.
King Serpent is a card to be considered more for the Crest builds. It can be repeatedly used in a single turn. This helps CC/SC. It lets you continue to extend more attacks. Jesse is basically a hard 1/Turn, so that’s why King Serpent could be chosen instead. Plus, Jesse has to attack to CC. This limits one of your attacks to not being a Skull Dragon or Ghost Ship.
Grade 1 Lineup

Starting with Sentinels, playing 1 Sanctitude and 3 Waterspout Djinns is recommended. Sanctitude gets around guard restrictions like Bartholomew, Chainrancor, Linka on a DP Vanguard, Mizukaze, etc. It’s also a 1 card PG when your opponent is on a stride in general.
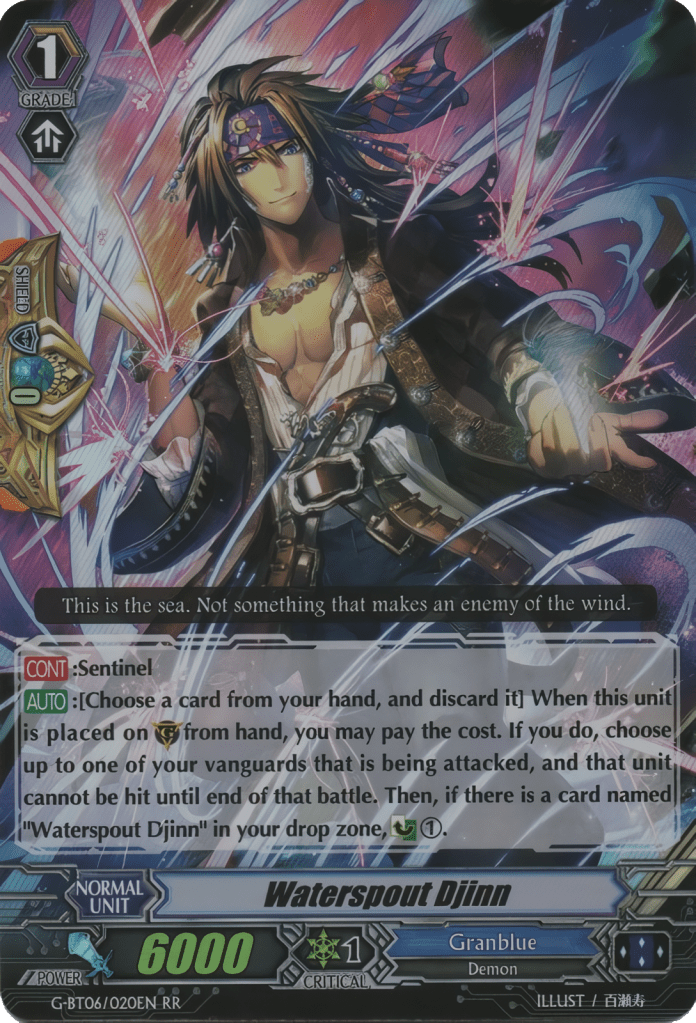
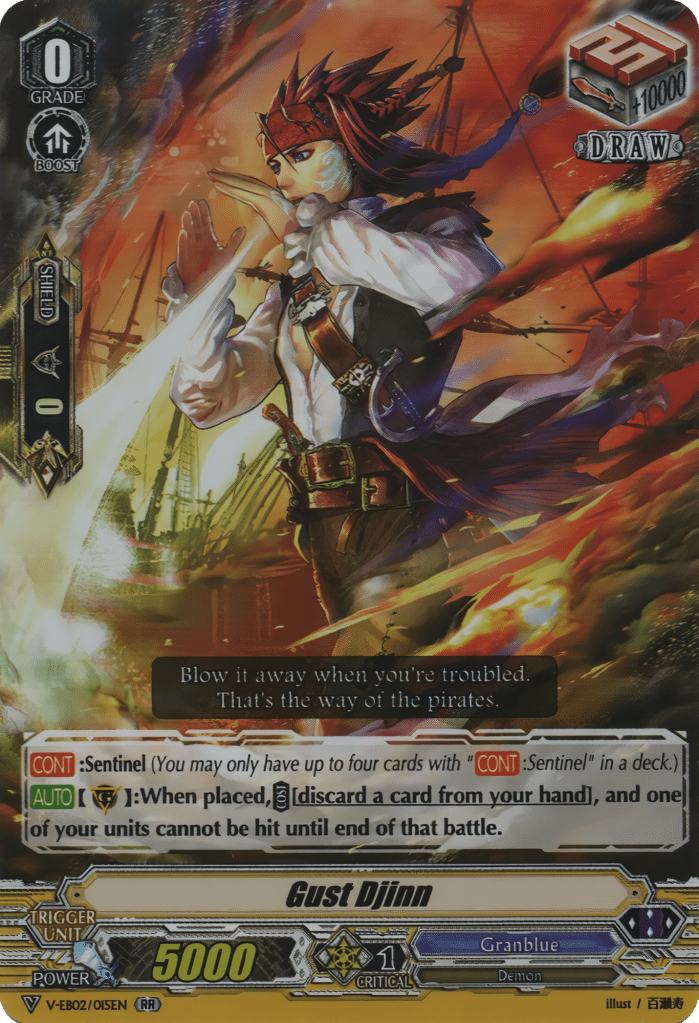
Waterspout Djinn helps with extra CC. Granblue’s main CC card is Grenache, so having extra cards to help is much appreciated. Plus there will be scenarios where Grenache isn’t available. So being capable of getting at least CC1 while PG’ing helps! You can also ride Waterspout Djinn. Then SB him the next turn or two. When you do PG, you can CC1 right away.
Furthermore, as you use any Negrolily plays, you can at least refund that CB instantly. Or matchups where you have to PG because the opponent has units that are 2 critical or more.
But, beware that both cards need to be played from hand. Negronora reviving cards to the Guardian Circle (GC) won’t work with those two.


Negrobone V is useful on the main phase revivals of Ghost Ship and Skull Dragon. It’s been used at 2-3 copies, mainly for late-game revivals for Bad Bounty and Bartholomew turns. Enlargulv can grab a Beatrice from the Drop zone and then call it to RC to revive anything. So we don’t have to rely on Negrobone V as much.
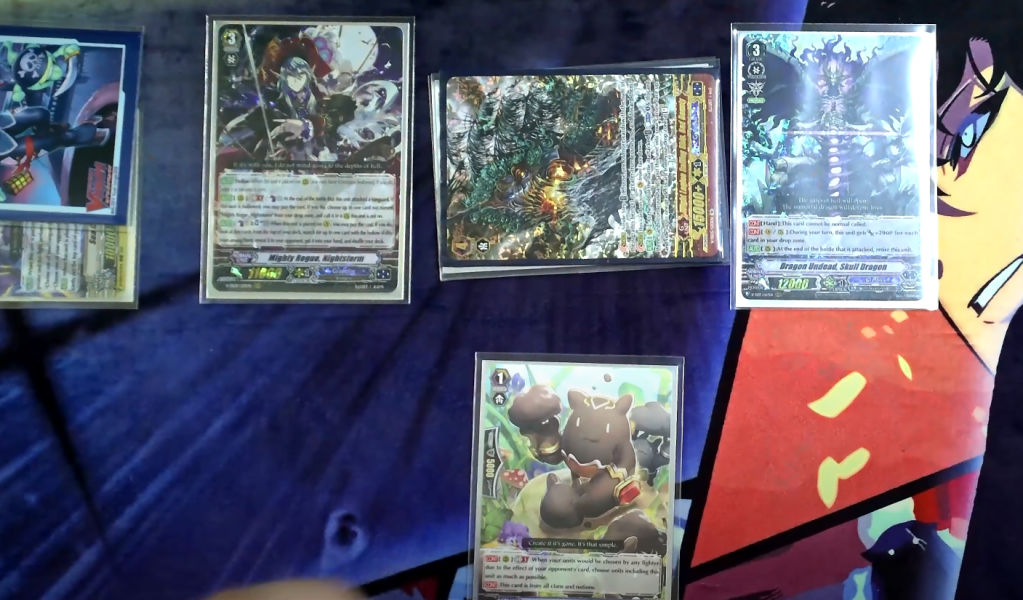
Tommy V helps with consistency in seeing your Nightrose ride targets. It discards G3s like Nightrose V and Skull Dragon. It also grabs G3 Heals if we need them to defend with. It’s an easy 13k booster that we can rely on. It comes up with boosting cards like Nightstorm or Beatrice. That can help get over a damage-checked trigger.
Tommy V is a Ghostie too! So if you have Beatrice as your Vanguard (VG), then the shield value of it increases. It can be used to extend more attacks.
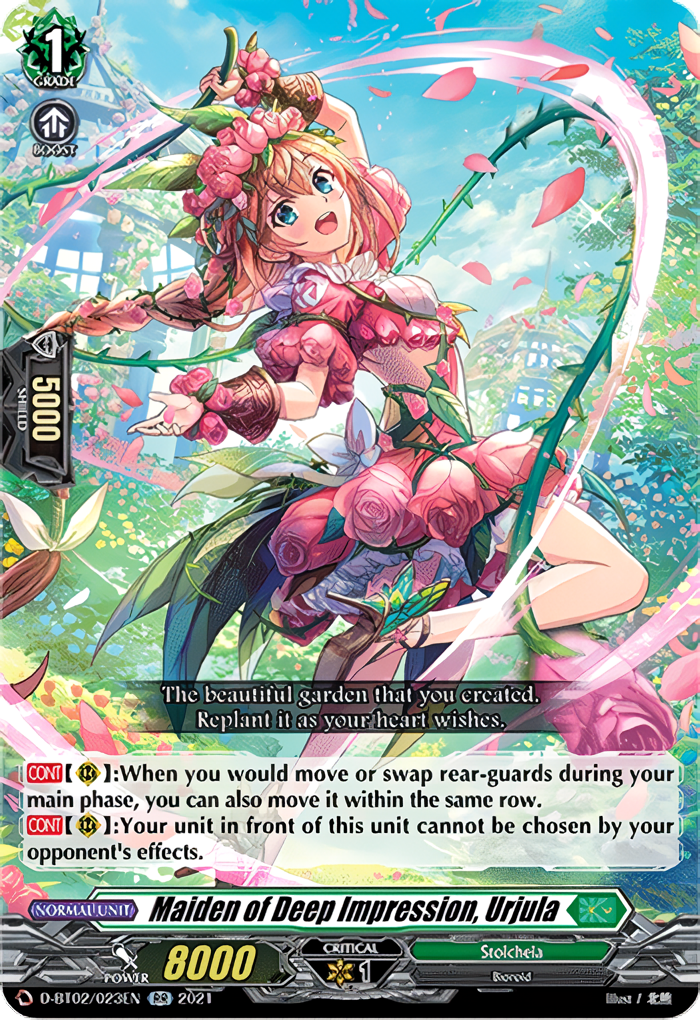

Both Urjula and Honoly are seen at 0-1 copies. Urjula helps with protecting cards like Nightstorm, Riveting Franche, and Skull Dragon. Essentially, this helps guarantee attack extending and the threat of a Skull Dragon.
Remember it’s any skill that chooses your front-row RG. This includes G Guards that reduce Crit, retire, or spin back to the deck. Another substitute choice for Urjula can be Connell. Connell is better in most situations it protects all other RGs essentially.
Honoly helps deal with decks that have a high number of attacks. Granblue is blessed to search this directly with Colombard or Obadiah. Furthermore, you can call this via Negrolily play with Beatrice. Usually, the best timing is when the 4th battle is happening. The 5th battle starts already causing the opponent to rethink the rest of their turn.
Obadiah turns can keep Honoly on board while still producing 4 attacks per turn. You can still generate advantage with Ghost Ship. Then once you’re ready to pop off with 5+ attacks on Bad Bounty/Bartholomew turns, remove it from play. Use its skill.
Depending on the matchup, Honoly or a disruptive Negrolily-Cannoneer play will aid you more than the other. So take some practice with different matchups.
Other Grade 1 Options
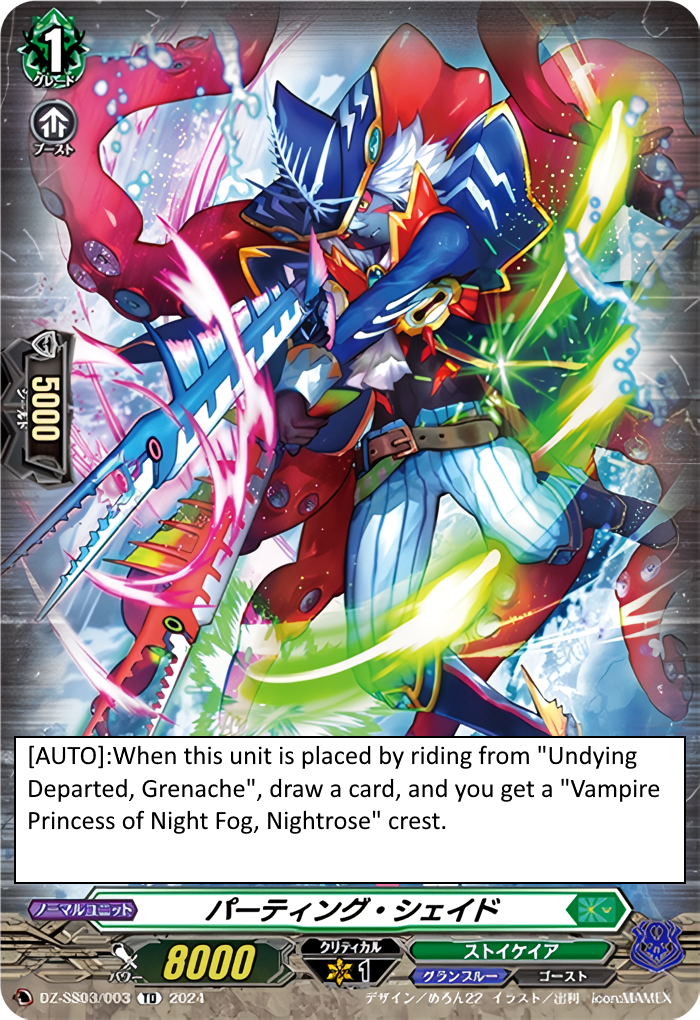

Recently, the Nightrose deckset has been revealed with Crest support. If you want to play a Crest build, it’s recommended to play 4 copies of the Crest Giver, Parting Shade. Every attack that you do will have the advantage of the power gained from the Crest. Ideally, you can take advantage of turns where you’re gaining a total of +25k to the front row. This helps guarantee to still hit over 2 damage-checked triggers.
Attack extenders like Nightstorm and Negrobone G shine more with the power-up. You can pair off with cards like Beatrice and King Serpent. You can even use Vanguard skills like Nightrose V for more synergy.
Do keep in mind that the Crest does limit you to only ride Nightrose cards as Vanguard. So no Beatrice nor Skull Dragon.


Extra Crest support to consider is Tommy D and Negrobone D. Personally, space is already tight, especially trying to fit playsets of Parting Shades and Riveting Franche. But I at least wanted to mention it.
Tommy D can directly grab any Nightrose by discarding it. So you don’t have to call it RG for its skill like Tommy G or V. Worse case it’s just extra stride fodder.
Negrobone D seems nice for advantage. This is especially true on massive field superior-calling turns like Obadiah/Galleon. Although, Granblue already has the cards it needs to build up big hand sizes.
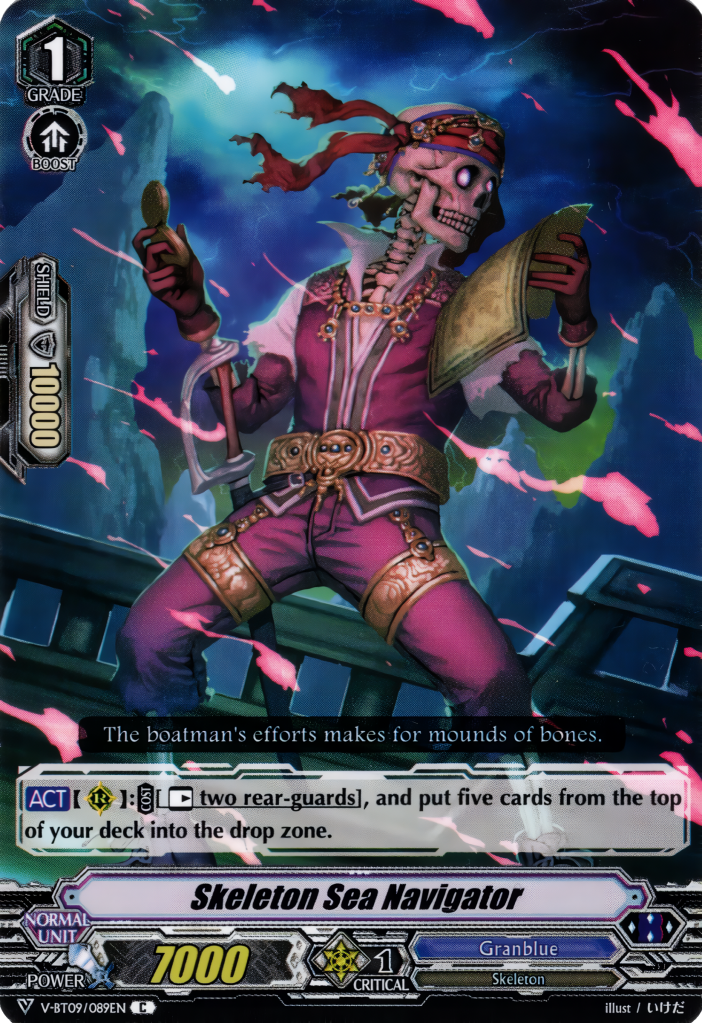

For a faster and more aggressive type of build, you can play 1-2 copies of Skeleton Sea Navigator. You can also play 1 Burrow Mushrooms. They’re both searchable by Colombard on Turn 2. The goal is to build a Drop zone size of 10-15 cards by/on your Turn 3 for Bandit Rum. Navigator can rest itself and another RG to mill 5.
Why Burrow Mushrooms? Glad you asked! You can rest both Navigator and Burrow Mushrooms to mill 5. Then use Burrow Mushrooms’ skill to go into Soul and call 2 plant tokens. You can use Navigator (that’s right it’s NOT 1/Turn!) to rest the 2 tokens and mill 5 again the same turn. For a total of 10 cards, which is enough at that point.
You can also use other G1s or Crits that go into Soul. Ideally, a Rough Seas Banshee, so you can shove into Soul to draw 1 card.
As a result, your Bandit Rum turns have more options. You can 1st stride Bad Bounty if you’re going 2nd as well. Bartholomew becomes a doable finisher on Turn 4 since it’s easy to get to 30 in the Drop zone. You can always reuse the Navigator skill to help bridge that 30 count.
Yes, you’ll deck out sooner than the typical builds. But inspiration from a meme years ago, you won’t deck out if you win first. 🙂

Grade 0 Lineup

So yes technically the starter you play matters. With current Nightrose builds, Peter is used because there’s a potential scenario where your Beatrice VG could extend attacks into it. This comes up if you don’t have a Tommy in the Drop zone. This has never come up for me personally.
For Crest builds, yes Grenache is mandatory since Parting Shade specifies it. Plus there’s the SP rarity if you have one.
In the main deck, Grenache G is our main CC card. In fact, CC2 is necessary to continue to do our turns moving forth. It’s best to call Grenache on a massive field call like Obadiah. But you may have to call it from hand or use Beatrice/Negrobone V to revive it.
You can also call it via Negrolily play so you can CC1 net. Or fetch it with Colombard and refund the 2 CB right away.


Critical triggers to consider are both Rampage Shade G and Wild Seas Banshee. Rampage has been errata’ed to be a strong trigger and a defensive draw. It’s very useful and your VG is typically Nightrose too. So we see 3-4 copies.
Wild Seas is the GB1 and generic version of going into Soul. It’s more flexible and works regardless of VG. 1-4 depending on the build.


More useful Crits are Chad and Rough Seas! Chad can be played at 3-4 copies to help with striding. Especially since you’re milling your G3s like Nightstorm, Beatrice, and Skull Dragon. Or reriding your Nightrose’s or Beatrice.
Rough Seas is player preference. There are pros/cons. Great for a main phase into Soul and draw 1 card instantly. Which helps make room for better boosters/attackers on your field. Plus Soul usage if needed during the same main phase or going into your battle phase. You can keep it as a booster for one turn. This helps hit over higher base VG’s like 10k G2 VGs. Next turn then just use her skill to draw a card.
It’s a great target for Riveting Franche’s top 5 skill. Furthermore, for Crest builds, if you’re going first, you can call Rough Seas. It helps if you miss the G Assist for the Crest Giver. Calling Rough Seas lets you draw 1 card deeper. This may help you get a possible Crest Giver for the next turn. It’s a risky gamble but could save you.
The con is that it is a weaker trigger. Which may be an issue in certain matchups. Personally, your beaters like Skull Dragons and Crest builds, won’t miss the +5k difference of power gain in most cases. 0-3 copies.
Other Grade 0 Options

For more Sentinel options, you can play 0-2 copies of these cards. These cards are used when you’re trying to make more room in the G1 lineup. This is more important in Crest builds too since they’re trying to fit in a playset of Crest Givers.
Furthermore, these are great targets to revive with Negronora’s skill! Either bigger shield or force a PG skill when you G Guard essentially.
Stride Lineup
Going first you want to go into Bandit Rum. There are scenarios where you go into it if you’re going second. That mainly comes up if you need the 2 Protect markers. What’s really nice about Bandit Rum is that it attack extends for free. You can take advantage of Ghost Ship 2-3 times this turn to draw 2-3 cards while applying pressure. 2 copies.
Obadiah is usually going second and ideally with a Beatrice/Nightrose V VG. You can get 1 Protect marker and then set up your drop zone. There’s great synergy with Enlargulv and Forbidoll to build a better field.
Both cards could come up late game if it makes sense. With Obadiah, you don’t have to mill any cards from the deck. You can just revive a full board. Each RG will gain +5k too. 2 copies are recommended.


Usually, Turn 4 and after, we have great options in Bad Bounty and Bartholomew! Bad Bounty gives us 2 VG attacks. The G3 we reride will dictate our attack patterns and any extra skills we can continue with. Nightrose V is our go-to reride target since it helps extend more attacks with its skill.
There are scenarios where the other G3s are options:
- Nightrose G for an extra attack by milling 3 cards (assuming a Skull Dragon/Ghost Ship self retires) (no CB or Soul available)
- Beatrice will revive 1 RG with a SB (can extend more attacks into Jesse -> Tommy/G0 Ghosties)
- Skull Dragon against Chaos and Megacolony matchups
It’s recommended to play 2-3 copies. A 3rd one comes up more in matchups like Chaos and Megacolony if it becomes grindy.
Bartholomew ideally is a finisher where we can use the 3 or more from hand to GC restriction. This makes it difficult for the opponent to guard for the turn. You can pair up with Skull Dragons and attack extenders like Nightstorm/Riveting Franche. Remember, the guard restriction is for each attack. 1-2 copies are recommended.
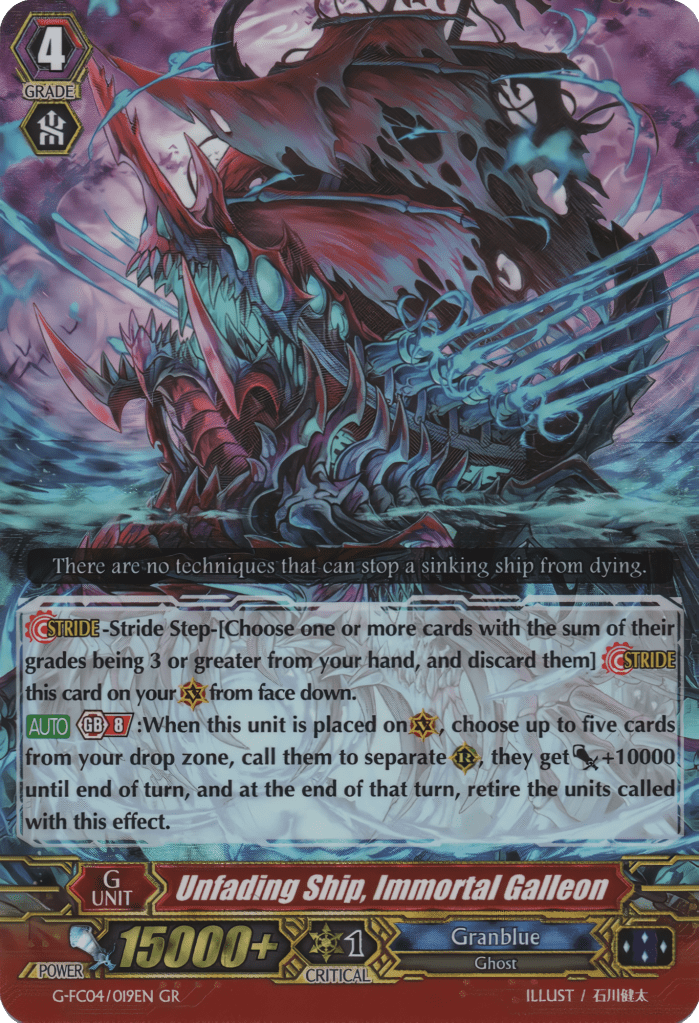

Galleon is a GB8 stride that in the late game can help close games too. If the game becomes grindy, you can use him to call a full field for free! If you had to G Guarded a lot, you can use him to call a full field for free! You can take advantage of CC units like Jesse/King Serpent and attack extenders as well.
Harmonics is needed for the extra ticket shield and the self-damage can help from time to time. You can also unlock your locked cards in the Link Joker matchup too. Both cards are at 1 copy.
Other Stride Options

There are also the retrains of Obadiah and Mist Phantasm Nightrose! The new Obadiah could be used as another option for CB denial situations. 0-1 copies.
Nightrose can help in scenarios where a Bad Bounty or a Bartholomew turn isn’t ideal. Perhaps you’re missing pieces like Nightrose V or not at the 30 count in the Drop zone yet. If we have another G3 Nightrose card, we can Stride into this one.
This can promote attacks while giving power. This will scale up with the Crest build. It’s like Nightrose V. We already call a Beatrice and a Skull Dragon. Beatrice can call the 2nd Skull Dragon. The extra Crit can create VG-pressure against other decks to force a PG or a G Guard. Then your follow-up attacks can have an easier time hitting.


Megiddo is as strong as the RGs that it calls. Years ago it was very strong to superior call 4 Skull Dragons and 1 Nightstorm. But, Skull Dragons have been reduced so Megiddo doesn’t shine as much anymore.
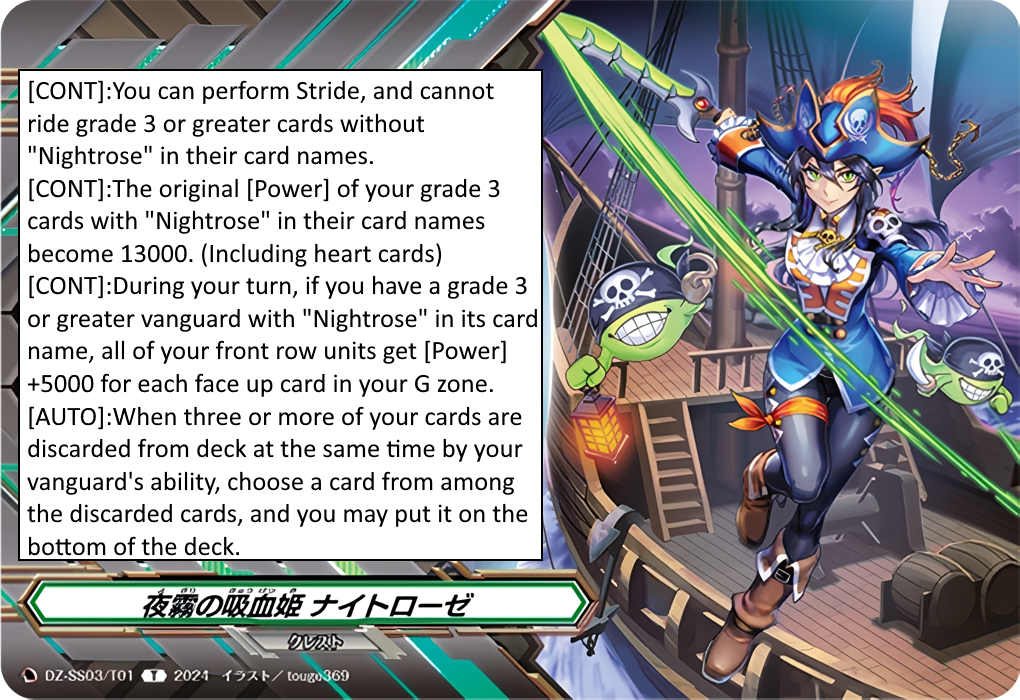
You may be asking why are Neon Gyze and Zoa options? With Nightrose getting its own deckset in the Standard format, she has been errata’d as a Stoicheia VG. When overDress was starting, the nations of Magallanica and Zoo merged into Stoicheia (except Bermuda Triangle).

Thus technically any Stoicheia VG could Ultimate Stride into Megiddo or Zoa. However, in Premium, you still had to choose a clan to represent. So if you are represented as Granblue, you cannot add Zoa to your G Zone. It’s technically a Zoo nation unit. However, with Neon Gyze’s special ruling, as long as you had it in your main deck. You can add any Zeroth Dragons to your G Zone. This is regardless of your clan.
G Guard Lineup
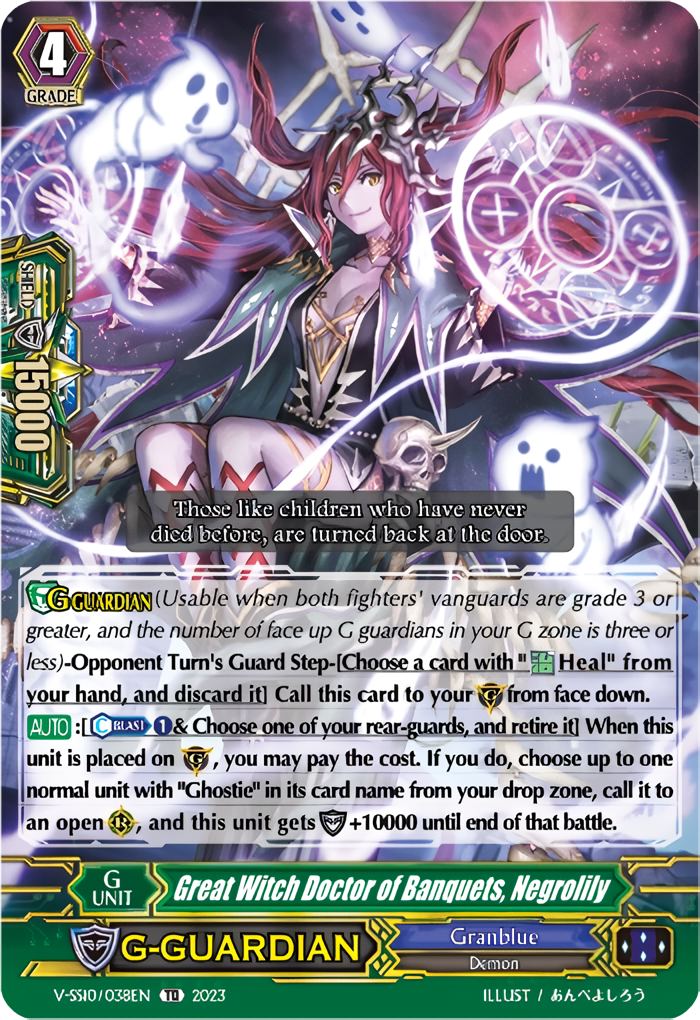
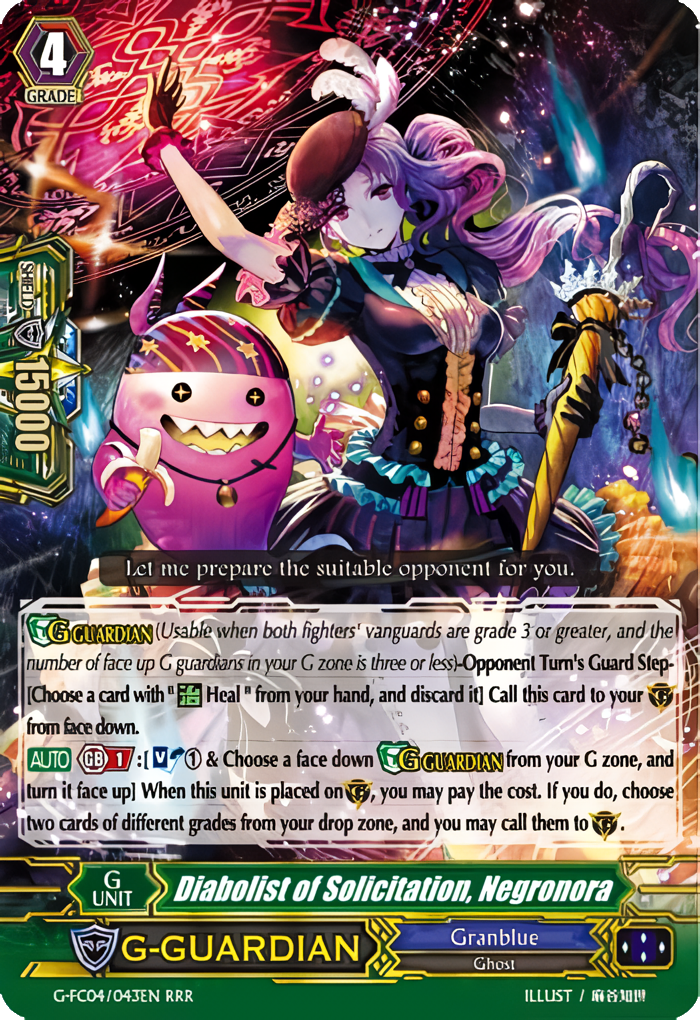

Granblue is blessed to have 3 phenomenal G Guards. Negrolily is for disruptive plays. Negronora is very big shield and a possible PG from the Drop zone to GC. Oriana can reduce -1/-2/-3 Crit on the attacking unit for its battle (includes VG attacks).
Each one uses different resources. Depending on what you have and the current game state, you use the one that fits your situation the best! Generally, it’s best to play 2 copies of each.
Other G Guard Options


These G Guards may be used at 0-1 copies and it’s mainly for their niche scenarios. Negromode can be similar to Negronora. It comes up in case you don’t have faceup cards in the G Zone just yet.
Deep Corpse can help mill more cards into the Drop zone. However, we already can mill a good amount of combo pieces so it’s not really needed. It could hurt us more than help because of deck-out issues.
Basic Go-To Plays

Now that you have a general template of the deck build overall. Let’s cover some basic go-to plays!
Turn 2
Riding Colombard as VG gives you some options to do.
9 times out of 10, you’ll fetch and call Ghost Ship! It’s a great way to generate advantage. You can do 2 attacks. It removes itself from RC and can be reused for the rest of the game.

You do have other options. Greed Shade can help fix your hand and try to seek your Nightrose G from Drop zone. Beatrice can help build an early board while going first since your opponent will be an 8k G1 VG. Honoly is there when going 2nd against a high multi-attack deck. Great against Accel decks like Harri, Gurguit, Thavas, Murakumo, etc.
Turn 3
Bandit Rum Turn

Going 1st, ideally you want to go into Bandit Rum. You can have 4-6 attacks depending on both resources and combo pieces you have available. A simple play:
- Ghost Ship (24/26k) (self retire and draw)
- VG (26/28k) (stack triggers on X unit)
- Revive Ghost Ship (will gain +2k)
- X Unit/Ghost Ship
- Ghost Ship/X Unit
This is a minimum of 4 attacks that will produce:
- 2 Protect Markers
- 3 cards from Triple Drive
- 2 cards from Ghost Ship draws
You can further extend with Nightstorm/Beatrice skills too. Just be mindful of the current game state and long-term resources.
Obadiah Turn

Going 2nd, you can maximize an Obadiah turn by riding a Beatrice. You can use her immediate revival skill to get the piece you need for that turn. You can also gain hand advantage with a Rough Seas Banshee. You’ll also gain 1 Protect Marker since she has the Gift Marker.
Depending on what you need still and matchup-wise, you typically want to have access to:
- Grenache
- Forbidoll
- Enlargulv
- Enpix/Honoly
- Negrobone/Cannoneer
Then revive Grenache and Enlargulv. Remember on 1st stride Obadiah you can only revive 2 RGs. Use Enlargulv to grab Forbidoll. Use it to grab 2 of 3 possible cards (Nightstorm, 2nd Beatrice, Skull Dragon).
Then you can have 4-5 attacks:
- Skull Dragon/Ghost Ship
- Nightstorm boosted
- CB1 to revive Skull Dragon/Ghost Ship
- VG (27k) (stack triggers onto Skull Dragon/Ghost Ship)
- Skull Dragon/Ghost Ship
You can also adjust your pattern of attacks if you need to stack triggers on Nightstorm instead. You can get to 5 attacks by reviving a Beatrice via Nightstorm, and then reviving a beater.
Turn 4+
Bad Bounty Turn

During the main phase, ideally, you can revive 2 beaters like Skull Dragon/Ghost Ship.
- Bad Bounty
- CB1 to reride Nightrose V
- Skull Dragon #1
- Skull Dragon #2
- Nightrose V
- CB1 revive Skull Dragon and Beatrice
- Then SB1 to revive the 2nd Skull Dragon
- Skull Dragon #1
- Skull Dragon #2

You can further extend attacks with Nightstrom G/Riveting Franche too.
Bartholomew Turn

During the main phase, ideally, you can revive 2 beaters like Skull Dragon/Ghost Ship.
- Skull Dragon #1
- Skull Dragon #2
- Bartholomew
- CB1 revive Skull Dragon, Beatrice, and a booster
- Then SB1 to revive the 2nd Skull Dragon
- Skull Dragon #1
- Skull Dragon #2 boosted

Remember, each attack will force the opponent to guard with 3 or more cards from hand to GC. This will happen if your Drop zone is 30+.
You can further extend with Nightstorm G/Riveting Franche. Having boosters can help hit over a damage-checked trigger.
Turn 5+
Galleon GB8 Turn

This can come up in making a strong field. Depending if you have CB available, this is a free full-field superior call. This can allow for cards like Jesse/King Serpent to give you a CB to extend an attack.
If you have multiple CB available, you can extend more attacks. You can take advantage of the +10k that was also on boosters. You can boosts the newly revived units mid-battle to still put on pressure. It plays out very close to Obadiah.
Other Key Plays
Increasing Your Defensive Hand Quality
Use Enlargulv or Greed Shade to grab G3 Heals or PGs for better shield quality. This can be even more important in certain matchups where you need to use the Negrolily disruptive plays.
Other matchups can have annoying guard restrictions, so G Guarding more easily can also be very helpful.
Negrolily Plays
Go-To Cannoneer/Honoly Plays

You can use Negrolily to revive a Cannoneer or Honoly during your opponent’s battle phase. This play is available to all Granblue variants, so you can have any VG.
- Negrolily retire any RG you have
- Revive a Beatrice
- SB1 to revive a Cannoneer or Honoly
Keep in mind that the Cannoneer play requires 2 CB. You can also fetch these cards from deck with reviving Colombard, but you’ll need an extra CB.
It takes some practice to learn when to use them. For Cannoneer, it’s best to retire a RG that can extend more attacks, has high power, and/or has more Critical. Ideally, while you’re G Guarding another attack, you can remove the other threat.
For Honoly, if you can time it on the 4th battle the next battles will already take in Honoly’s skill. Take the time to assess the game state and any matchup nuances.
Double Cannoneer (Pop, Pop, Pot of Greed)

With having Nightrose G as your VG, you can use her GB2 skill to do a double Cannoneer pop.
The key is that you place Cannoneer over Beatrice. Then follow the sequence.
- Use Cannoneer’s CB1 skill to retire an opponent’s RG
- Nightrose GB2 skill to revive Beatrice and place it over Cannoneer
- Beatrice SB1 to revive the same Cannoneer (can call it anywhere)
- Cannoneer CB1 again to retire another opponent’s RG
Do keep in mind this will use a 3rd CB, a 2nd SB, and milling 3 cards from the deck. However, a well-timed double Cannoneer pop can be valuable.
Crest Build Plays
Obadiah 8 Attacks With Only 2 CB
Ideally, go first with Bandit Rum and G Guarded. You can easily have a Crest power gain of 20k for this turn. Alternatively, you can have a power gain of 25k for this turn. You can use Obadiah’s skill to get any pieces and revive a full board that is ideal. King Serpent will instantly refund Obadiah’s CB cost too.

Key units: King Serpent, Nightstorm, Beatrice, Negrobone G, any Beater
- King Serpent (28k/33k)
- Nightstorm (31k/36k)
- CB1 Revive Beatrice
- Beatrice SB1 to revive King Serpent CC1/SC1
- King Serpent (28k/33k)
- Beatrice boosted by Negrobone (39k/44k)
- CB1 to revive Nightstorm
- Nightstorm (31k/36k)
- CB1 to revive Beatrice
- Beatrice SB1 to revive a Beater
- Beatrice (32k/37k)
- VG (48k/53k)
- Beater (very big)
Bad Bounty 10 Attacks With Only 2 CB
Similarly, if you go first with Bandit Rum and G Guarded, you can start with a Crest power gain of 15k/20k for this turn. Then Bad Bounty will go face up in the G Zone. Nightrose V has the continuous self-retire skill power-up of +5k. So moving forward the power gain per front RG will be 25k/30k.
- Bad Bounty (43k/48k)
- CB1 to reride Nightrose V
- This gives the new adjusted power gain moving forward
- Every RG will self-retire after they attacked/boosted
- CB1 to reride Nightrose V
- X Unit
- Nightstorm (36k/41k)
- CB1 revive Beatrice
- Beatrice SB1 to revive King Serpent CC1/SC1
- King Serpent (33k/38k)
- Beatrice (37k/42k)
- Nightrose V (47k/52k)
- CB1 Revive Beatrice and King Serpent CC1/SC1
- Beatrice SB1 to revive Nightstorm on the other front row RC
- Beatrice (37k/42k)
- Nightstorm (36k/41k)
- CB1 to revive Beatrice
- Beatrice SB1 to revive a Beater
- Beatrice (37k/42k)
- Beater (very big)
Phantasm Nightrose 12 Attacks With Only 2 CB
Similarly, if you go first with Bandit Rum and then G Guarded, you can start with a Crest power gain of 15k/20k for this turn.

- X Unit
- Nightstorm (26k/31k)
- CB1 revive Beatrice
- Beatrice SB1 to revive King Serpent CC1/SC1
- King Serpent (23k/28k)
- Beatrice (27k/32k)
- Phantasm Nightrose (43k/48k)
- CB1 and Retire King Serpent and Beatrice
- Revive Nightstorm and King Serpent CC1/SC1 (both get +10k)
- CB1 and Retire King Serpent and Beatrice
- King Serpent (33k/38k)
- Nightstorm (36k/41k)
- CB1 to revive Beatrice
- Beatrice SB1 to revive King Serpent CC1/SC1
- Beatrice (27k/32k)
- King Serpent boosted with Negrobone (30k/35k)
- CB1 to revive Nightstorm (place onto Beatrice, forces it to Retire Beatrice)
- Nightstorm (26k/31k)
- CB1 to revive Beatrice
- Beatrice SB1 to revive a beater
- Beatrice (27k/32k)
- Beater (very big)


Sample Deck Lists
Most Typical
The first one is seen more often and has a well-balanced ratio of cards. The deck list is from Solemn’s World’s in January 2024. It’s a very consistent deck.

Deck Log: https://decklog-en.bushiroad.com/view/6UQK
Deck Code: 6UQK
Some Variance
Some variance can include cards like Ghoul Dragon, Rough Seas Banshee, Riveting Franche, tweaked ratios, etc.

Deck Log: https://decklog-en.bushiroad.com/view/7Z20Q
Deck Code: 7Z20Q
Navigator Build
The Navigator build includes 2-3 Navigators, 0-1 Burrow Mushrooms, 0-3 Rough Seas Banshee, and 0-3 Riveting Franche. The deck can have a high Drop zone count very quickly. You can even take advantage of a possible 2nd Bartholomew in niche scenarios.

Deck Log: https://decklog-en.bushiroad.com/view/2J4QL
Deck Code: 2J4QL
Crest Build
The Crest build maximizes on 4 Riveting Franche, 4 Crest Giver, and some of the D support. The deck can take advantage of both Tommy D and Phantasm Nightrose D. G Era and older cards like Negrobone G can also be used. King Serpent can gain more from the Crest power-up.

Deck Log: https://decklog-en.bushiroad.com/view/55QNU
Deck Code: 55QNU
Metagame Matchup Tips
General Mindset For All Matchups
For all matchups, do your best to have this as your general mindset.
- It’s best to stay at low damage early on. Ideally 1-2, but 2-3 isn’t bad.
- Do your best to conserve your hand and call RGs from the Drop zone.
- This will aid in keeping a big hand size and having some breathing room on what to guard with.
- If you plan to do any Negrolily disruptive plays, make sure you plan suitably on the CB you need.
- Usually, you can take 1-2 damage and then do your play. Just make sure you don’t end up in a position where you have no face-up damage going into your turn.
Obviously, the game state can be different from time to time, so just adapt as you go. Now let’s get into tips for specific matchups.
Neo Nectar
More Token Based Decks

On their 1st stride Katrina turn, their token columns are at least 40k/50k. They can easily do 5 attacks total (4 of them being Token columns). They can extend 1-2 more attacks if they use Horiculture Elf.


They generally swing Katrina on the 3rd/4th attack and rebuild their field. It can be rebuilt with Tokens or include Horiculture Elf to extend another Token attack.
That being said it’s even more important to stay at low damage early on. Once they stride, their Token attacks scale really high immediately.
Negrolily with Cannoneer is important when you need to get rid of a Token attacker or a Horiculture. A well-timed disruptive play will make it easier to guard the entire turn.
You can also take a damage or two before the Katrina swing. Once they rebuild their field, you can G Guard into Negrolily then.
Depending if the OT is still in the deck, you can both G Guard and PG with Waterspout Djinn. This can help CC1 during that interaction and help with your resources. Furthermore, you can perform a double Cannoneer pop play here. Literally, their turn is done if both of their front-row RGs are retired and you PG the VG.
Then continue on with Bad Bounty/Bartholomew turns with beaters.
They sometimes play Ines and ride her as VG. So she can easily get to 28k base which makes your smaller attacks not hit.
Musketeers

Reverse Cecilia lets the deck have multiple VG attacks by reriding during the battle phase. The initial attacks are very similar to the more Token-based variants. Reverse Cecilia must have a locked card in the other front-row RC. This is essential to reride as a new VG.
Reverse Cecilia needs to be called from the deck for her skill to activate later on. They usually call it on the Katrina swing. A couple of options you do depending on what they call.
- If they call another RG that’s not protected nor Reverse Cecilia. Simply pop one of those with Cannoneer. That’s it.
- If they call Favila to protect both itself and Reverse Cecilia, then you can assess if popping another RG matters. Reverse Cecilia still has to lock 2 RGs that are currently in the Stand position. If they don’t meet that, then they cannot even activate Reverse Cecilia since it’s part of her cost.
Another option is calling Honoly. Depending on the Musketeer player, it can also end their turn or limit their turn.
- They rely on cards like Usurp to call itself and have more RG attacks
- This can help prevent a 3rd VG attack since Reverse Cecilia needs to see a RG Cecilia swing
If they have cards like Alain or Susanna, they can massively CC during the battle phase. This can make the 3 VG attack still happen. Or focus on pushing more RG attacks. So be observant.
Revengers (Raging Form)
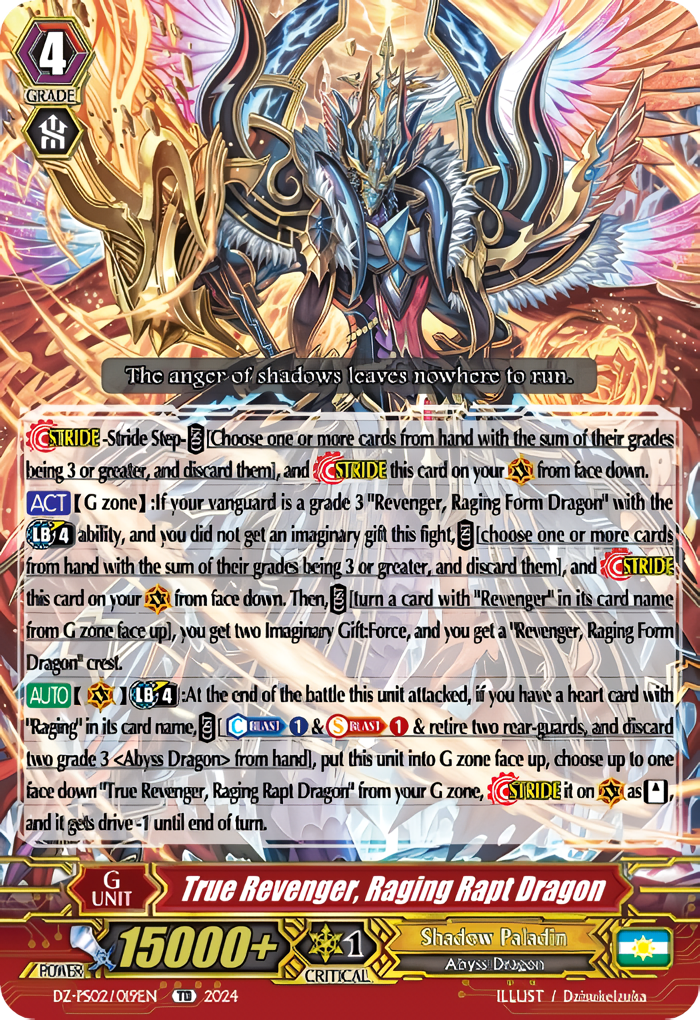

The Revenger player ideally wants to use Raging Rapt’s skill to set up Force markers and have 3-4 VG attacks. They can do this on their Turn 3 if they have the necessary pieces and CB.
If you’re going first, it’s normal gameplay. Make an effort to have a G Guard play and PGs/Protects to easily deal with their follow-up Turn 3.
If you’re going second, keep high defensive value cards. If your hand isn’t great, you can resort to damage denial. Just simply ride up, attack RGs if any, and pass. On your Turn 2, you can ride Colombard and search for either Greed Shade or Rough Seas Banshee. Greed Shade can fix your hand. You can discard the 5k ticket if you still have it and get something better. Rough Seas is simply draw 1 without needing to attack. It acts like your drive check but keeps the Revenger player at 0 damage.

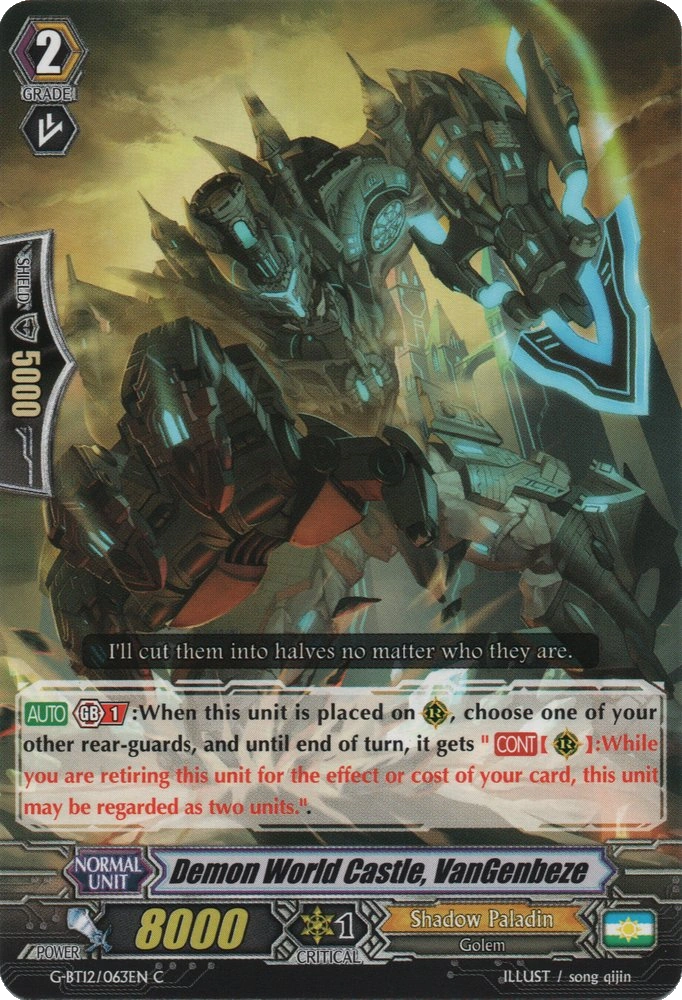
This locks out their Slay Hex on-ride skill to reride into the OG Raging Form. If that’s all they have then it puts them in an awkward spot. If they have the OG Raging Form in hand, they get 3 VG attacks with Demon World Castle. They could also use a G3 Heal to give themselves damage. But they have to have those cards along with the required pieces.
Later in the mid-to-late game, if they Stride into Chainrancor, you can pop key RGs and G1s. This will turn off their GB3 guard restriction skill.
Shiranui


Domination is one of the strengths of Nubatama. There are a couple of ways to lessen dominated attacks or even fizzle them.
Enpix helps in dealing with domination skills from Oboro, Zanki, and other RG-based domination strides. The same applies to Bracing Angel Ladder if you do play it. However, we usually play Forbidoll. So, that may not come up for us.
Rinne is one of their key strides in applying extreme pressure. There are 2 ways to make its skill weak.
- Having Orders, Protect Markers, and/or Ticket shields in hand will make the 2 cards called from hand instantly fizzle. So you just lose those 2 cards and no Rinne domination attacks occur. Explained more in the Domination FAQ.
- If you’re forced to call 2 RGs, and you have another existing RG on the field already, you can G Guard with Negrolily. You retire the non-dominated RG and revive Beatrice to an open RC. Then Beatrice can call another RG over the 2nd dominated unit. It’s still your RC, so that’s why it’s possible. That 2nd dominated RG is retired due to overloaded RC. Negrolily should have enough shield to guard against the 1st dominated attack too.
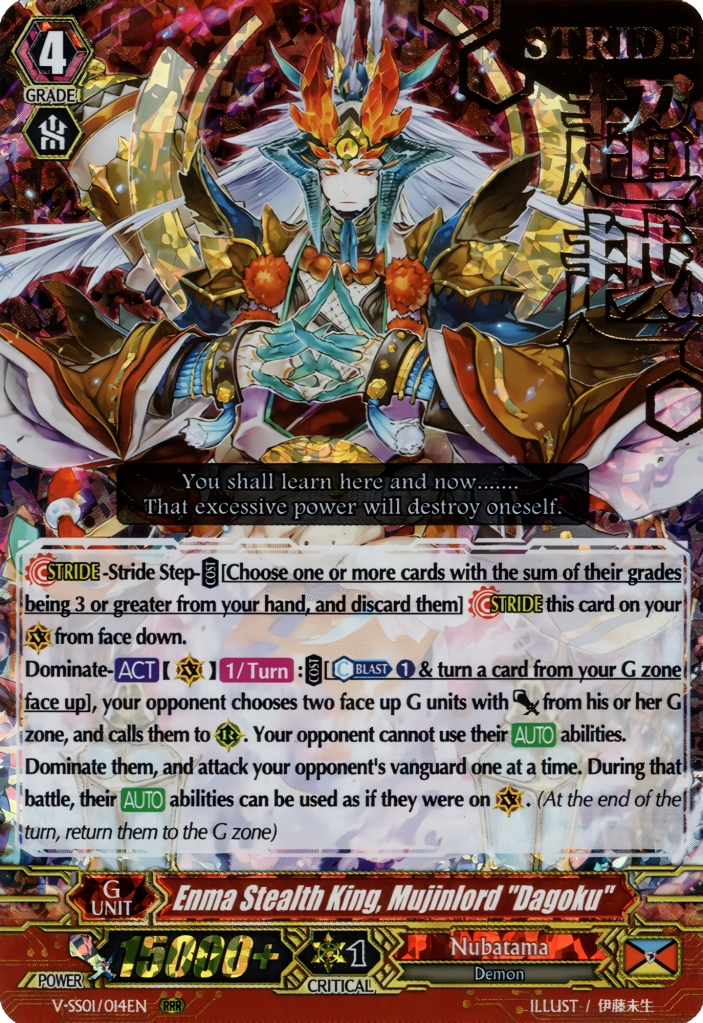

You still have to deal with their restanders, Dagoku, and a possible Mizukaze. So still keep at it with your key plays.
Nightrose (the mirror match)

This matchup is often a grindy mirror match. Essentially, it comes down to some big factors.
- The player that pops off well on their G3 turn puts themselves in a better position. Usually, if they’re going 1st and go into Bandit Rum.
- The player that has their pieces sooner, makes it harder for the other to do their turns.
- The player that keeps their resources well managed and a big hand size, usually outlasts.
- If a player gets Cannoneer’ed or Honoly’ed on a more committed turn, they are usually put into a bad position.
Sometimes you’ll have scenarios where both players are going into back-to-back Obadiah turns. During these turns, there will be 4 attacks and Honoly on board or in effect. With also an Urjula protecting Nightstorm or beaters.
Limiting CB is key. It can make it difficult for the other to use a Cannoneer to retire an onboard Honoly. They still need enough to do the rest of their turn effectively. Also, a Negrolily play can still revive the Honoly if it was retired from RC anyway.
It’s a battle of attrition and a Bartholomew can also end games. So always check both your and your opponent’s Drop zone count. You can have RGs or even Enpix to help you deal with Bartholomew turns. This way you have access to Negrolily plays still.
The best way to learn the matchup is to face it. Practice multiple games to understand from your own experiences.
Chaos


Keep your field empty as much as possible. You can rely on the Hollow mechanic and self-retires like Ghost Ship and Skull Dragon. You have to be aware. They still have cards that can put locked cards onto RC from the deck. They can also do this from the Drop zone.
You can use Enpix if you need to have a Greed Shade/Enlargulv resolve in one column. This will make that column untouchable. Greed Shade/Enlargulv can help grab PGs/Heals/pieces. Furthermore, Enpix provides you a RG to be able to retire with Negrolily. So you still can do Negrolily plays in this matchup.
You can capitalize on Bad Bounty into Nightrose V plays while you still can. Once you don’t have any front-row RCs to call RGs onto, you can reride into Skull Dragon. This will give you a bigger 2nd VG attack. Keep in mind, there’s a limitation with the Crest build since only Nightrose G3s can be ridden.
Messiah Deletor
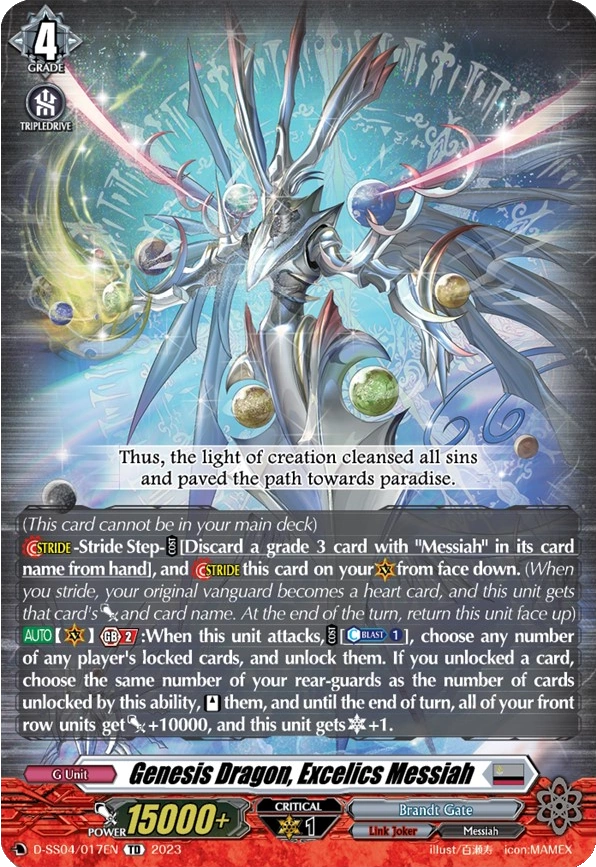
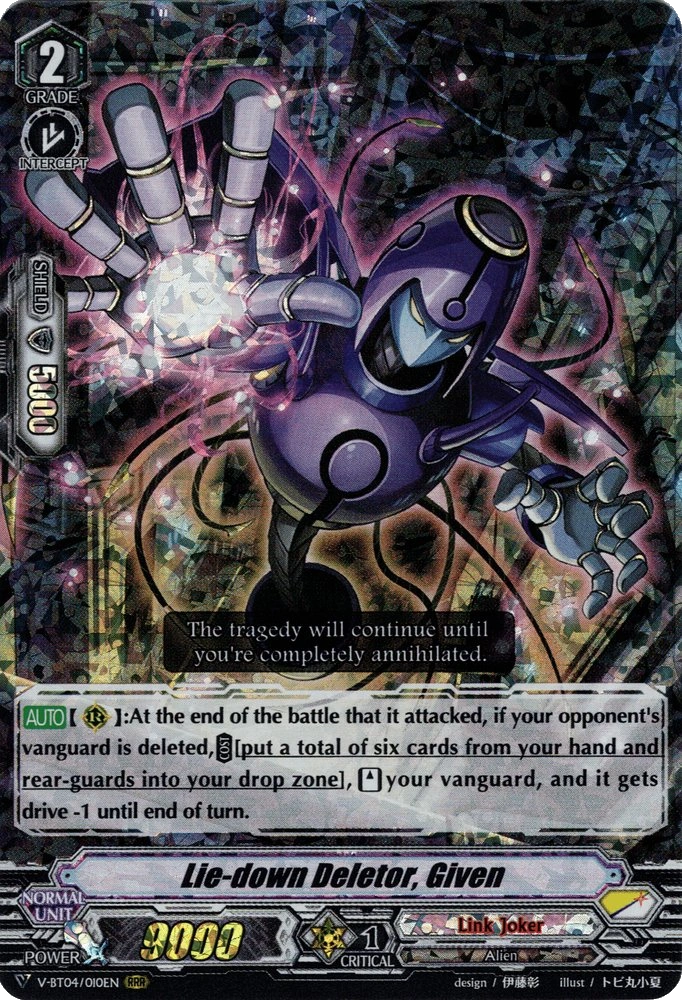
The Messiah Deletor deck takes advantage of Given being able to restand their VG. They will go into Force 2 as well. One on the VC and the other on RC. The ideal turn for them is to ride a Deleter G3 that deletes your VG. Then Stride into Excelics.
In combination with self-locking cards and ones that CC, ideally Sacrifice Messiah D and others, they can repeatedly restand both their Excelics stride and Given RG. Excelics will further increase their front row by +10k and gain Crit each time.
You can try to make it difficult for them to do that prior or you can ensure to have both a Heal and Enpix on RC. Link Joker can lock your RGs, so Enpix is your key piece to stay safely on RC. This will allow you to have Negrolily plays. You can execute a well-timed Cannoneer or Honoly play.
If they also have another Sacrifice Messiah (G version), they can push through Honoly. Assess their field and pick which Negrolily play is best.
Megacolony

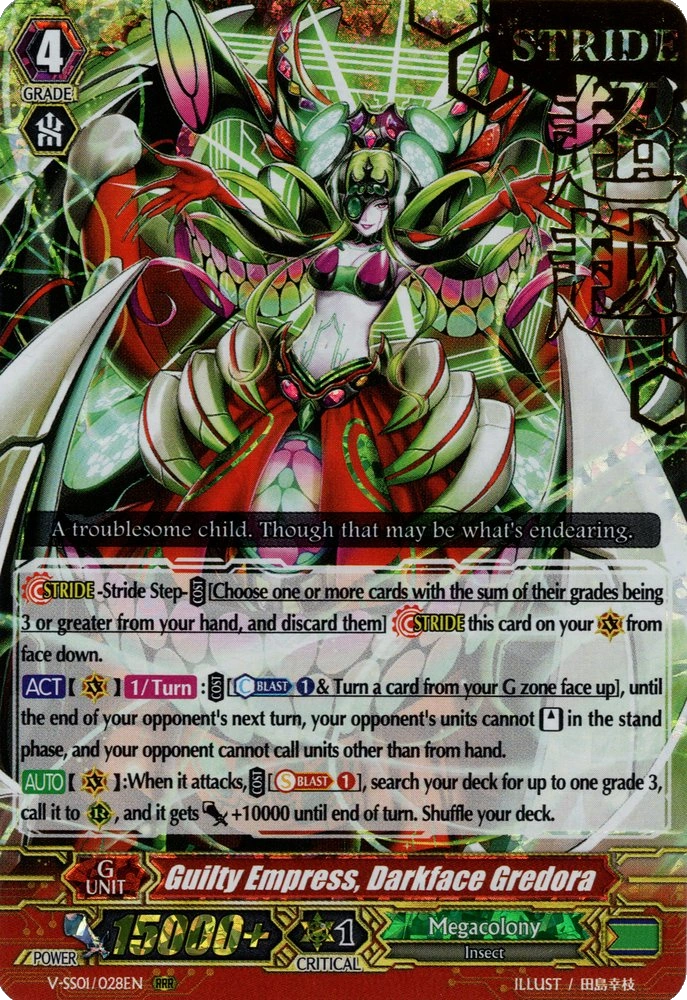
Megacolony is Granblue’s hardest matchup. The G4 Gredora prevents us from calling RGs from the Drop Zone. It also denies us G Guardians, since we can’t also call those to GC.
There’s a low chance we can still win though. Typically, early on do as much damage and prepping yourself with a hand of both shield quality and G3s. The G3s are needed to reride each turn since your field will be always stunned.
Then you can use Bad Bounty to have 2 VG attacks. You can have the reride be Skull Dragon to have a bigger swing on the 2nd VG attack. You can make sure to use Protect Gift G3s to generate Protect I markers. This will help keep you in the game.
You can call RGs like Greed Shade or Enlargulv to keep “sculpting” your hand each turn. While having a RG that can attack still. Be wary of the Darkface’s GB2 skill though.
This matchup is hard to win, so don’t get discouraged if you feel it’s unwinnable. However, in a regional, it’s still worth fighting for the win. Sometimes winning a bad matchup can mean the difference in reaching into the Top Cut.
Accel Decks
Honoly is your best friend in these matchups. As well as Cannoneer since it forces Accel players to think about their attack patterns. Accel decks usually have their powerful turns due to a high number of attacks but a specific sequence of them.
Also, do your best to finish the games sooner rather than later. Their Accel circles will increase and it’ll be harder to guard late-game everything thrown at you.
Narukami

This one is unique since Binding is annoying for Granblue. A card like Ghoul Dragon shines here. Get him asap and you still apply attacks early on. If it’s binded, you can use it in later turns when needed.

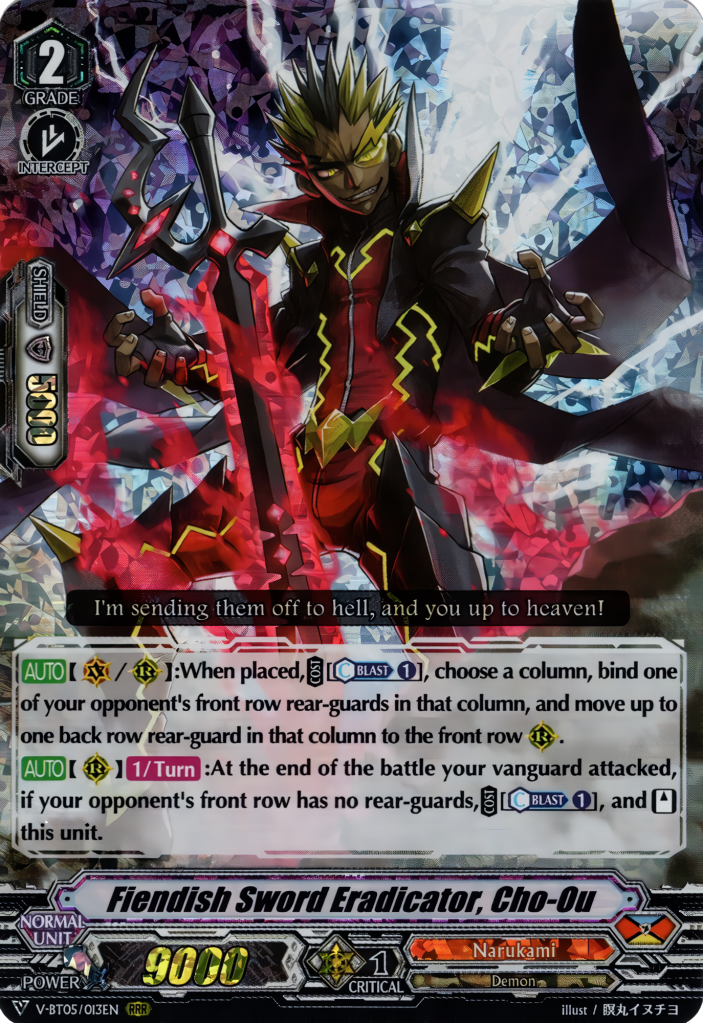
You can also use Enpix to have a RG to retire for Negrolily plays. You can pop cards like restanders such as Cho-ou and Esper.
Do your best to finish the game sooner rather than later. They will continue to go wider with Accel circles. You only have a turn or two of Honoly hard limiting their attacks. They will also potentially scale in power.
Gurguit

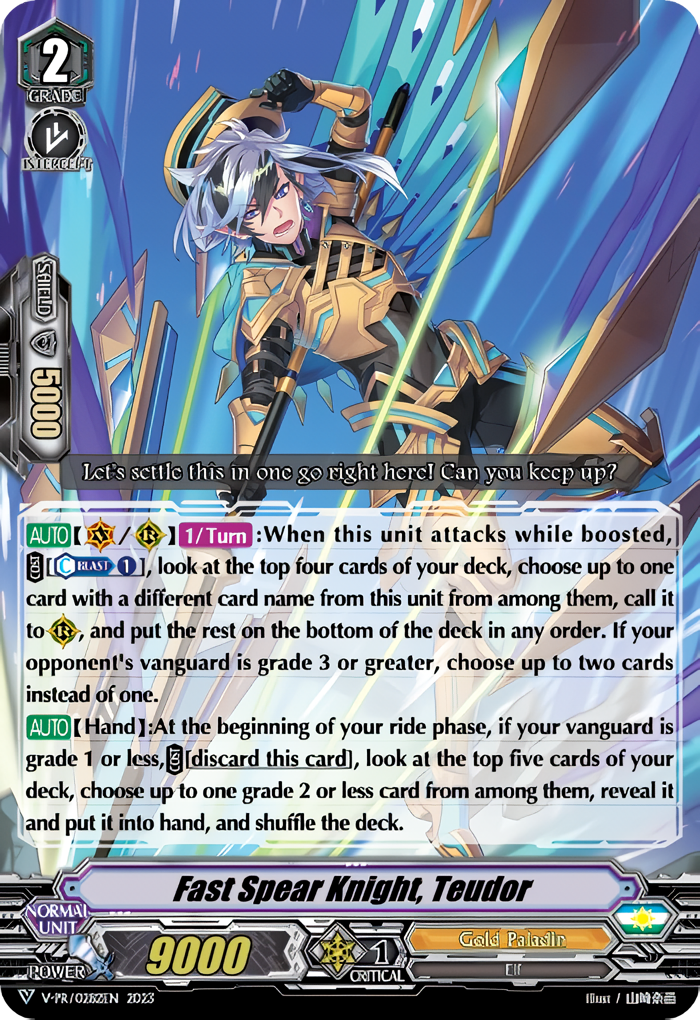
Gurguit pops off strong on Turn 3 with a combination of the Campbell stride and Percival as a RG. The deck will immediately generate 2-3 Accel circles and has ways to build a field. Plus attack extends with cards like Campbell and Teudor.
Honoly is vital. You can generally keep it on board. You can fall back-to-back on 4 attacks Obadiah turns if you need to steadily push damage and keep hand size.
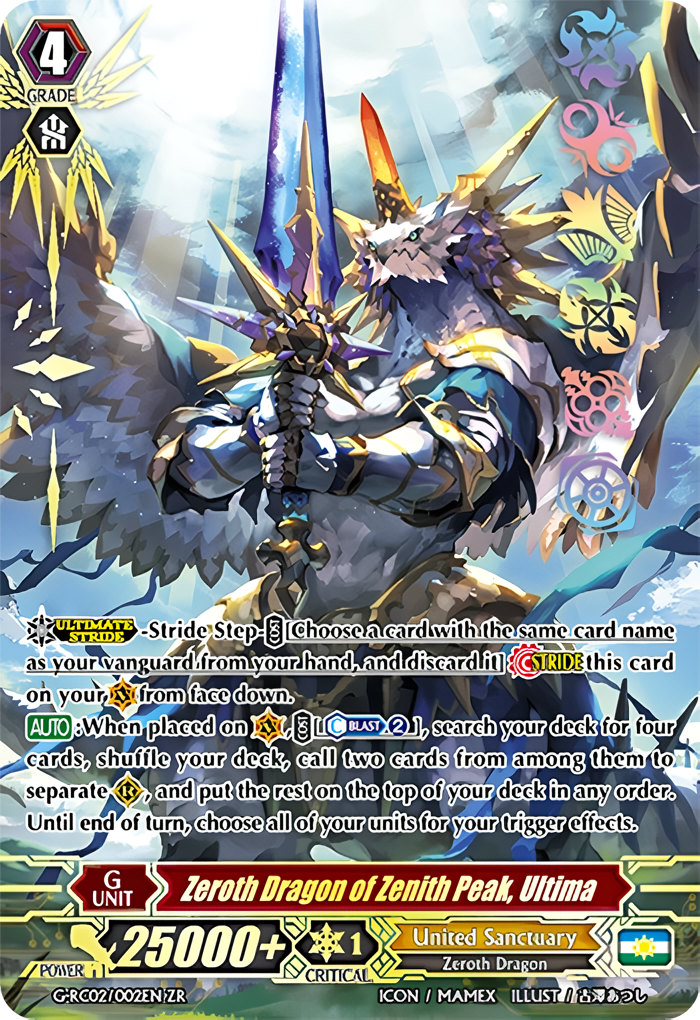

Keep in mind that you still need to deal with powerful strides. These include a restanding VG and possibly Ultima if they don’t play the OT. Ultima turns will make sure they have each attack be 3 Critical and an additional +20k minimum. If you’re at 3 damage already, then each attack is lethal. They can also use a Maleagant to CC2 to push another attack.
You can prevent an Idvarious from restanding if you pop a Rested RG they needed. Cards like Aglovale V will also remove their RGs if they use its power-up skill. Which means less RGs for them to have at Rest for Idvarious.
Gurguits defensive skill is annoying too. The extra shield can stop your lower-powered attacks easily. Plus if they’re lucky, they can top deck a PG and use it. So be mindful of your final push turn.
Aqua Force
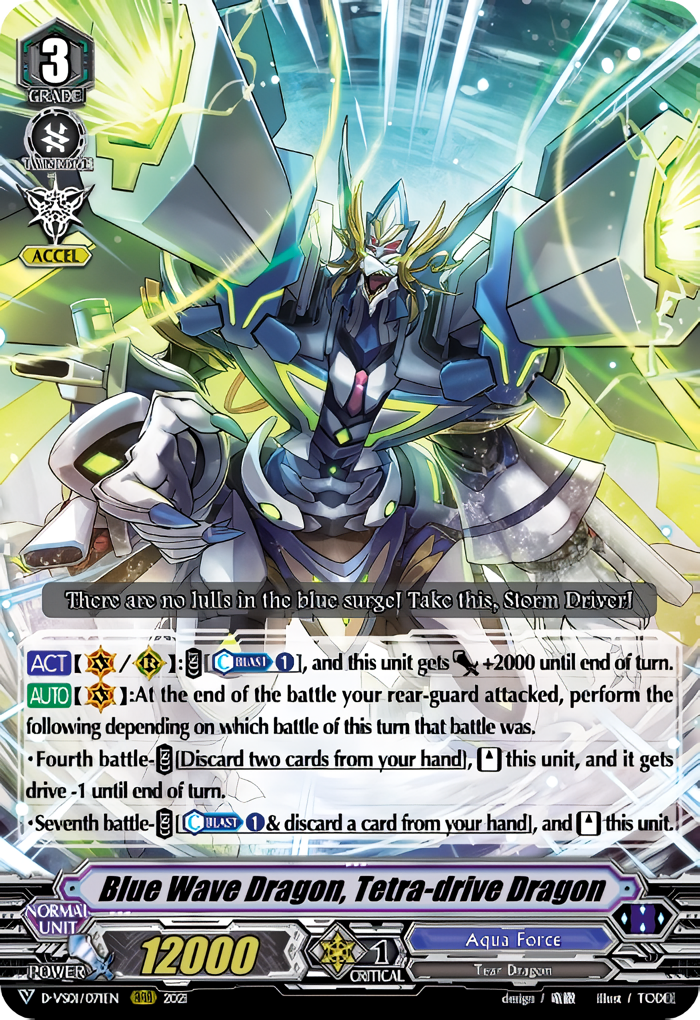
Aqua Force is in a weird state where it has Thavas and Blue Wave G3s. Generally, the stride turns are where they pop off. A well-timed Cannoneer on restanders hurts them. Most builds don’t have the best early game except a more Tetra-drive based deck.

As it pains me to say this about Aqua Force, just be mindful and do Granblue stuff. That’s it.
Harri


Harri is a high multi-attack deck and has a few variants. The Stage Harri and Harri G (with or without Crest). Honoly is needed to hard-limit their high multi-attacks. Usually, it’s their turn 4, but they can still do a good amount on their turn 3.

These cards are their usual go-to strides early and mid-game. They have 2 VG attacks with multiple RG attacks with these strides. Stage Harri will use Pigeon Pop to call Starry Pop, so a well-timed Cannoneer can help. Ideally, they want to generate Accel circles onto the Stage for both higher power-gain and hand advantage.


Be mindful that they also have their own disruptive plays. Harri G can use Maja to bring out Tricky Assistant/Gruesome Scythe Dragon directly from Soul to pop your RG/column.
Both Stage Harri and Harri G can use Lovely Companion -> Redstar Dualhorn/Peryton -> Tricky Assistant/Gruesome Scythe Dragon.

Depending on what they have in Soul, you can use Urjula to help you protect some RGs. However, be mindful of Gruesome Scythe Dragon since it chooses the column, so Urjula doesn’t work against it.
Other Matchups
You should be fine playing normal Granblue style. This is as long as you have the general mindset mentioned early on and know how to adapt. I highly recommend to keep playing against a variety of other clans/decks. This will increase your experience of what to do in similar matchups. You got this. 🙂
Additional Resources
Other Helpful Blog Articles
Domination FAQ: https://rogueofthesevenseas.com/2023/08/17/domination-faq-cheat-sheet/
Zorga Rulings: https://rogueofthesevenseas.com/2023/01/15/zorga-rulings-and-interactions-cheat-sheet/
Granblue YouTube Videos
Nightrose In-Depth Combo Guide
More Negrolily Combos
An Insightful Guide Video Form
Crest Support Deck Video Form
Credit and Support
Thanks To Amigos
Big thanks to all my amigos who have helped with playtesting. I appreciate the constructive feedback and theory crafting over the years. Thanks also to my opponents whenever I played or faced Granblue.
Also, to my fellow bloggers from the Force of the Ocean and Axis Vanguard days. Being capable of discussing and writing articles with other bloggers has helped me continue to write blog articles.
I recommend checking out Solemn Vanguard’s channel too for more recent Granblue content: https://www.youtube.com/@SolemnVanguard
Support The Blog/YouTube Channel
Deck Boxes, Playmats, Sleeves, Binders:
Dueling Guard (5% off Discount) Link: https://bit.ly/4c60uxJ (or use code “CommanderJaime“)
Singles, Boosters, and Clan Bundles:
50 Cards Shop (use promo code “Jaime” for 5% discount): https://www.50cards.shop/shop
Trading Card Mint (use promo code “jaime” for 7% discount): http://tradingcardmint.com/
Card Trader Affiliated Link: https://bit.ly/44l1g5B
TCGplayer Affiliated Link: https://tcgplayer.pxf.io/Jaime
I recommend checking out Solemn Vanguard’s channel too for more recent Granblue content: https://www.youtube.com/@SolemnVanguard
Commander Jaime’s Social Media/Links/Etc:
Update Log
- 11/28/24 – Updated Greed Shade section. Added both Megacolony and Messiah Deletor matchups.
